
How to Create an Agency Project Board in WordPress That Runs Your Whole Client Workflow


Your agency wins a new client. The brief is approved.
And then the project “kicks off” in a WhatsApp group, tracked across three spreadsheets, with status updates buried in email chains nobody can find.
It shouldn’t work this way. Not when you already run your entire website on WordPress.
An agency project board, built inside the same dashboard you use every day, takes under 30 minutes to set up with FluentBoards. No separate SaaS subscription, no per-user fees, no context switching for your team.
Here’s exactly how to build one.
Why Running Agency Projects Inside WordPress Changes Everything
Most WordPress agencies run client projects across at least three separate tools:
- A project management app
- A messaging platform
- A shared document for status tracking
Every tool is a separate login, a separate subscription, and a separate place to look for answers.
The cost compounds fast. Per-user SaaS pricing for tools like Trello runs $5–10 per user per month. For a 10-person agency team, that’s $600–1,200 per year just for a project board. Scale to 20 people and you’re paying $1,200–2,400 for the same board that should cost nothing extra.
WPManageNinja, the team behind FluentBoards, ran into this exact problem. As their team grew past 120 people, Trello’s per-user pricing became unsustainable. They were also tired of leaving WordPress every time someone needed to check a project.
So they built FluentBoards, moved their own projects onto it in June 2023, and reported a 200% increase in productivity. Not from the features alone: from eliminating the context switching.
The result runs entirely inside your WordPress admin. No new platform to learn. No tab switching mid-meeting. If you want to explore the full project management solution for agencies before going further, that overview has the broader picture. Otherwise, let’s build your board.
How to Create an Agency Project Board in WordPress (Step by Step)
So let’s build it. Here’s the full setup, from installing the plugin to handing your client a live view of their project.
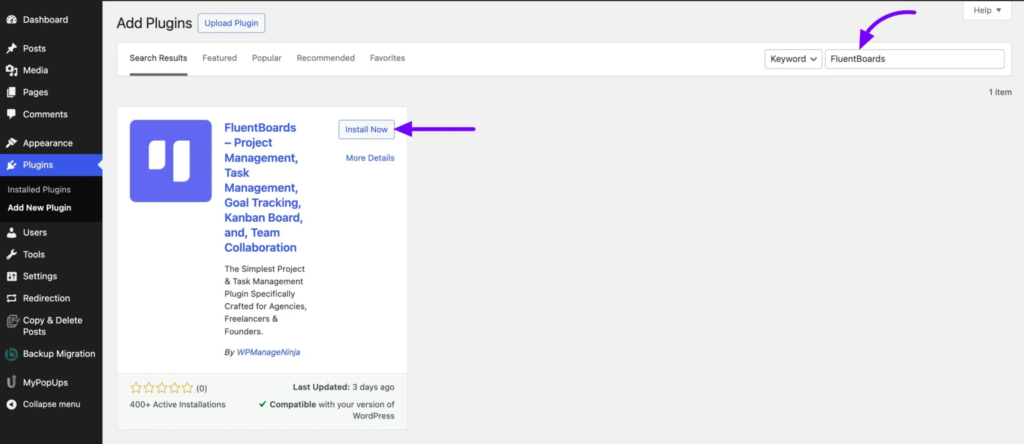
Step 1: Install FluentBoards on your WordPress site
FluentBoards installs like any standard WordPress plugin. Go to your admin dashboard, open Plugins, click Add New, search “FluentBoards,” then install and activate.
If you’re on Pro, download your zip file from the FluentBoards account area and upload it via Plugins > Add New > Upload Plugin.
The free version is everything you need to start. It gives you unlimited projects, unlimited tasks, Kanban view, List view, and basic team collaboration. No cap on boards, no cap on team members.
Before you touch a single setting, understand the Free vs Pro split for agency use:
- Steps 6 and 7 (Pro): the Calendar, Gantt, and Table views, plus the Frontend Portal for client access
- Steps 1 through 5 (Free): the full project board setup
If you’re evaluating whether Pro is right for your agency, the FluentBoards Free vs Pro breakdown has the full feature comparison.
Level up your WordPress project management game with this Trello equivalent solution – where limitless possibilities come at an unbeatable price!
Pro Tip: One thing worth doing before you configure anything: activate Pro first. Board templates (a Pro feature) let you clone a fully staged, pre-filled project board for every new client in minutes. Setting your template up now saves the most time later.
Step 2: Create your first agency board
Open FluentBoards from your WordPress sidebar and click New Board. If you already have boards in your workspace, use the add-board button at the top of the view.
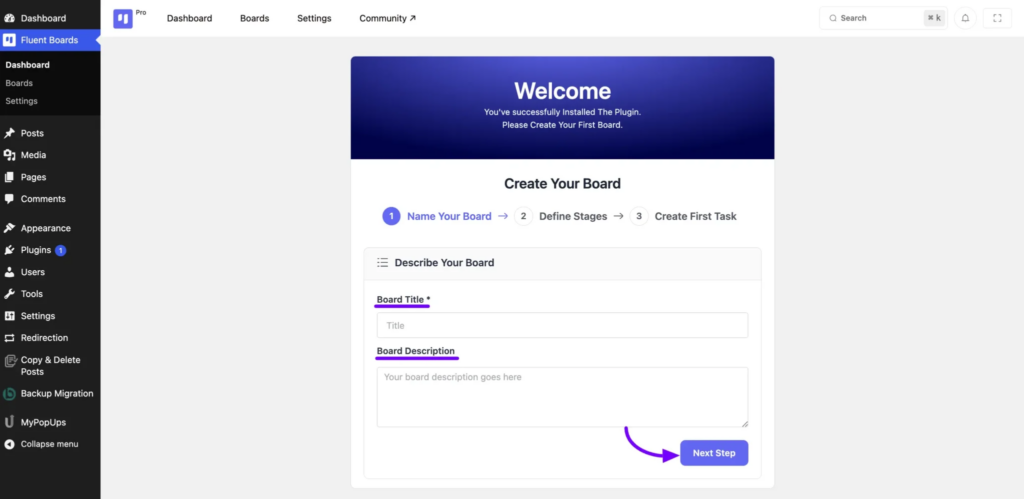
Once the board is created, set it up properly before adding a single task:
- Name it specifically: “Smith & Co. Website Redesign” beats “Client Project” every time. When you have eight boards open in a Monday standup, the name is the only thing telling everyone which window they’re looking at.
- Add a board description: A sentence or two on scope, the client contact, and the delivery timeline is enough. Anyone landing on the board for the first time should understand the project in about ten seconds.
- Set a background color or image: When you’re switching between client boards back to back, that visual difference is often the fastest way to know which board you’re on.
Pro Tip: Create one board per client project, not a single mega-board for everything. It keeps each project clean to scan, and it makes sharing an individual board with a specific client straightforward later through the Frontend Portal.
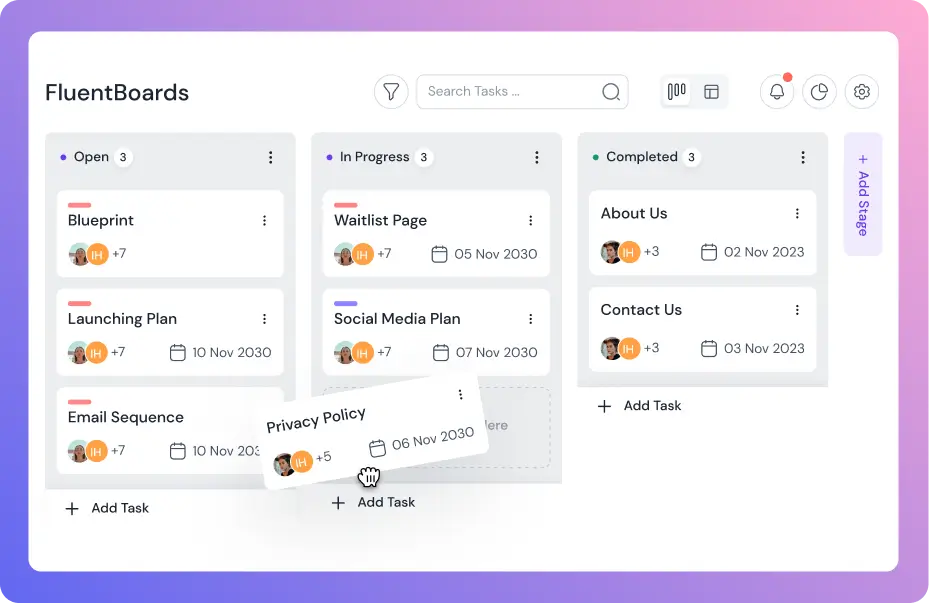
Step 3: Set Up Workflow Stages That Match Your Agency
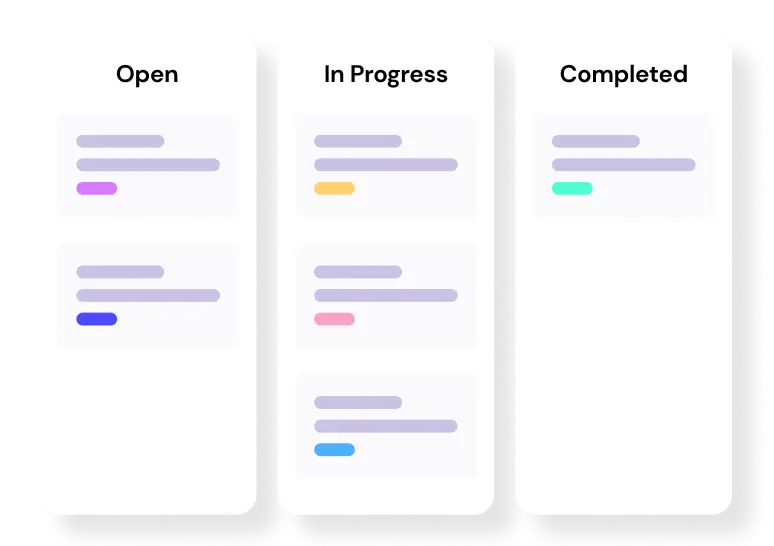
Stages are the columns in your Kanban view. Each task lives in exactly one stage and moves through them as work progresses.
FluentBoards gives you default stages (Open, In Progress, Completed) that work fine for personal task tracking but rarely fit how an agency actually operates. Click any stage header to rename it. Use the add-stage button at the edge of the board to create a new column, and drag columns to reorder them.
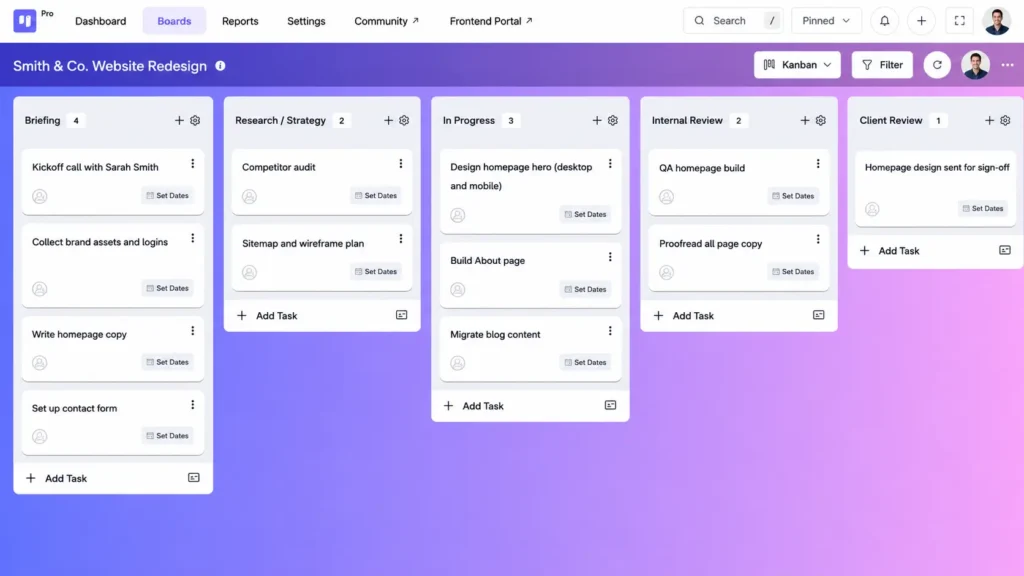
A typical agency delivery workflow looks like this:
- Briefing
- Research / Strategy
- In Progress
- Internal Review
- Client Review
- Approved
- Live
That’s seven stages reflecting a real agency handoff path from intake to delivery. Your workflow might differ: a dev agency might need a QA stage between Internal Review and Client Review. A content agency might split In Progress into Writing and Editing. Adjust until the stages match the path your work actually takes.
Pro Tip: Keep stages to six or seven maximum. More than that and the board becomes a horizontal scroll nobody scans during a standup. If your process needs more granularity, use subtasks inside tasks rather than adding stages to the board.
Step 4: Add your team and set access levels
Open your board, click the board menu, and go to Board Members.
In the Add Members field, search any user on your WordPress site by name or email, then click Add Member. Adding a client? Tick Grant access with view-only permissions so they land as a Viewer straight away.
Each member gets a role on this board, set from the dropdown next to their name:
- Manager: runs the board, edits stages, manages tasks, controls settings and members
- Member: does the work, creates and edits tasks, comments, logs time, moves cards
- Viewer: read-only access, sees everything but changes nothing, ideal for clients
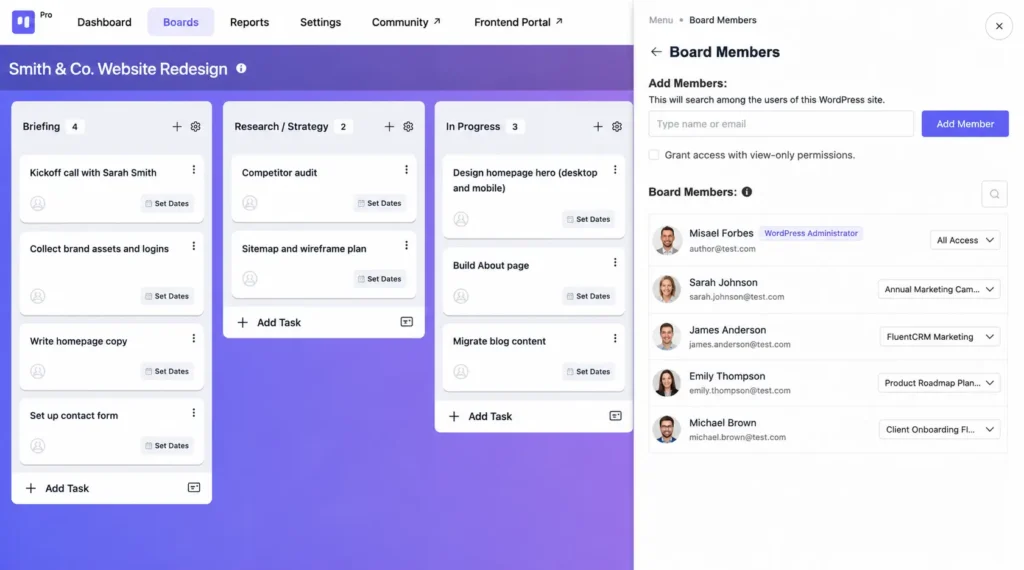
For most agencies, your project managers are Managers, your team are Members, and clients are Viewers. Clients get full visibility without being able to move a card, delete a task, or rename a stage.
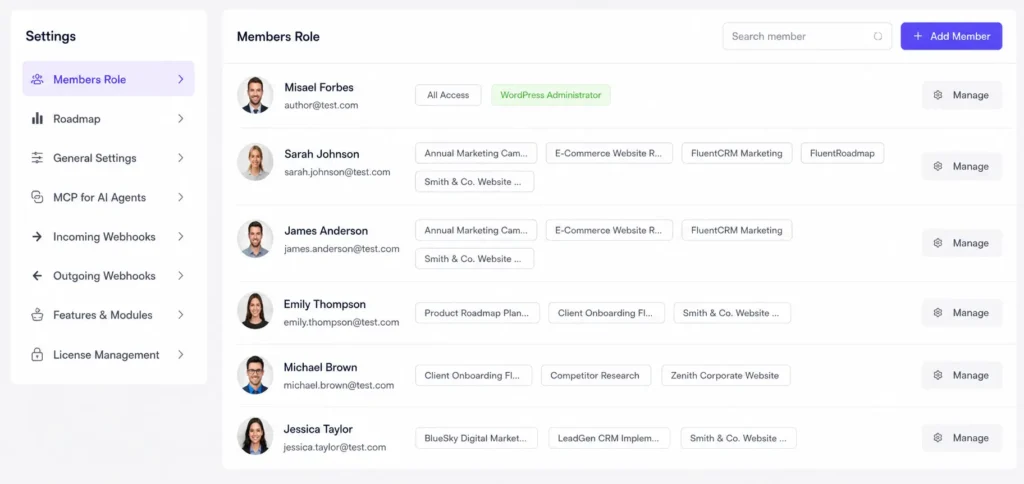
Managing several client boards at once?
You can set everyone’s roles across all your boards from one place under Settings > Members Role, instead of board by board.
Pro Tip (Pro only): Use Stage Default Assignee to automatically route tasks to the right team member the moment a task enters a stage. When a task moves into Internal Review, it auto-assigns to your QA lead. When it moves to In Progress, it auto-assigns to the developer. Zero manual handoffs between stages.
Step 5: Create tasks and load the details that matter
Click Add Task inside any stage column. The task name matters more than it seems: it’s how your team knows exactly what to do without a meeting to clarify. “Design homepage” is vague. “Design homepage hero, desktop and mobile, per brand guidelines v3” is actionable from the moment it’s created.
Inside each task, fill in:
- Assignees: one or more team members responsible. FluentBoards supports infinite assignees per task, so you can put both your designer and developer on the homepage build.
- Due date: set with date and time precision for hard deadlines, like the client review date you promised Sarah Smith.
- Priority: low, medium, or high. Use high sparingly so it means something when it appears.
- Description: the full brief, client requirements, links to assets, reference screenshots, everything the assignee needs.
- Subtasks: break complex deliverables into smaller, checkable steps. Your “Launch staging site” task might have subtasks covering DNS, redirects, testing, and final sign-off.
- Attachments: design briefs, source files, feedback screenshots, everything attached to the work it relates to.
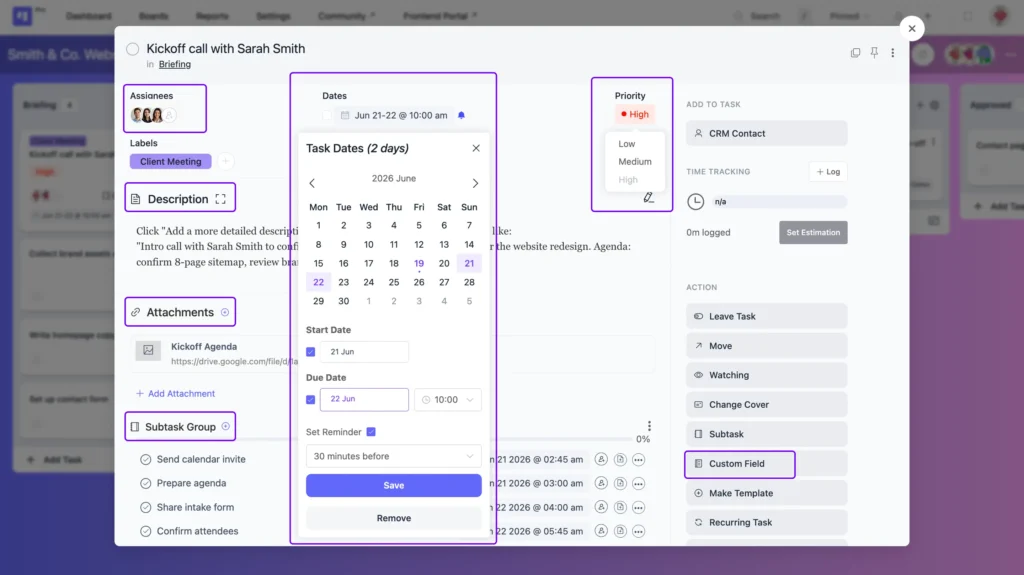
Custom fields (Pro) let you add anything your workflow needs: a client name dropdown, a project budget field, a contract reference number, or an approval status selector.
Pro Tip: Build one master template task for your most common work, with your agency’s standard checklist pre-filled as subtasks. Use FluentBoards’ task clone feature to duplicate it every time. It copies the description, subtasks, attachments, priority, and custom fields, so a cloned task is ready to assign in seconds.
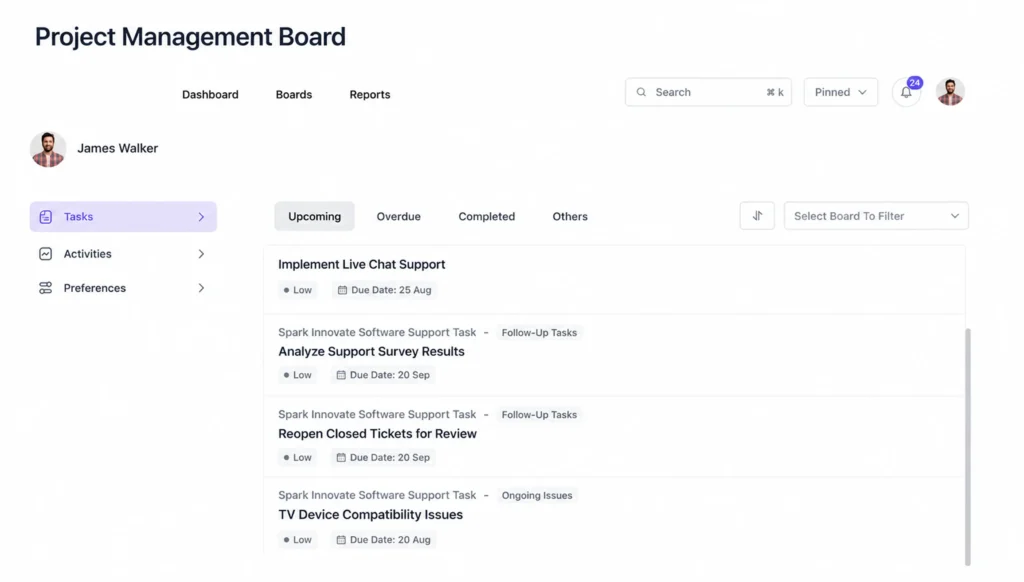
Step 6: Choose the view that fits Your role
How you visualise a project shapes how easily you can act on it. FluentBoards gives you five views of the same data, so you always have the clearest angle on the work
- Kanban view (Free): task cards moving across stages. Best for seeing what’s in progress, what’s stuck, and what just moved. The natural home view for most teams.
- List view (Free): a scrollable task list. Fast for morning check-ins when you want a clean read of every open task without the card layout.
- Calendar view (Pro): deadlines mapped across a monthly calendar. Useful when you’re managing deliverables for multiple clients simultaneously and need to see where deadlines cluster.
- Gantt Chart view (Pro): shows how tasks stretch across time, where they overlap, and how they depend on each other. The right view for project managers handling multi-phase client engagements with interdependent deliverables.
- Table view (Pro): spreadsheet-style rows with all task fields visible. Good for billing reviews, exporting a status summary, or sharing a deliverable list in a client meeting.
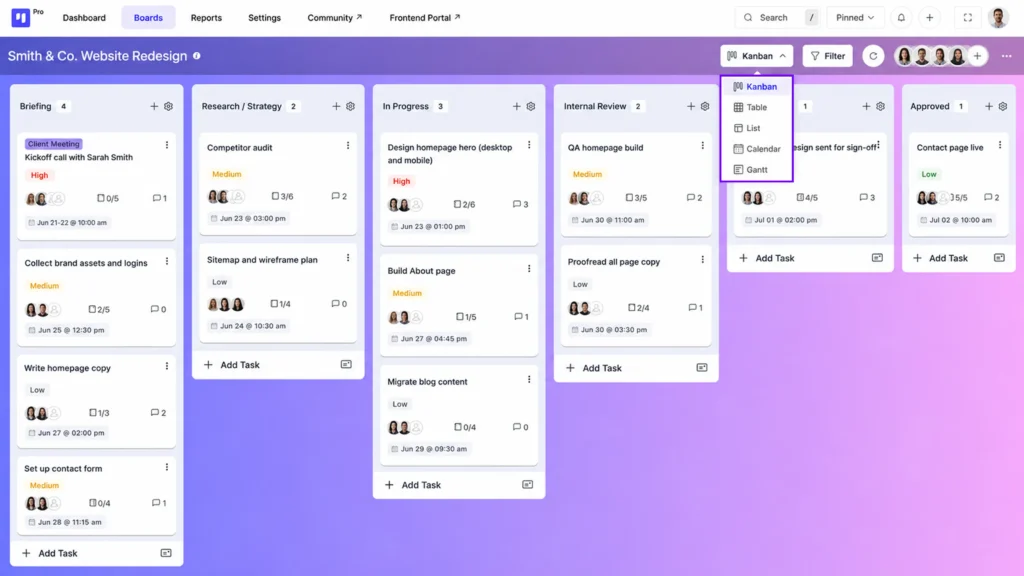
Switching views changes nothing for anyone else on the board. Your project manager can live in Gantt. Your designer can stay in Kanban. A freelance contractor can use List. Everyone sees the same underlying data in the format that suits how they work.
Pro Tip: Use Table view (Pro) before a client invoice cycle. Filter by assignee and due date, export the visible rows, and you have a ready-made deliverable log without building a separate report.
Step 7: Give clients a live window into their project
This is where the FluentBoards agency setup becomes a genuine differentiator.
FluentBoards Pro includes a Frontend Portal: a live project view your client logs into through a page on your own website. They see only their project, never your dashboard or other clients’ boards. No screen share, no weekly status email rehashing progress they could have checked themselves.
You set it up in the board settings, and you control exactly what clients see: which stages are visible, whether task descriptions show, and whether they can comment directly on tasks.
That last part changes how feedback flows. Questions that used to arrive as scattered emails and Slack messages start landing as task comments, attached to the specific work they’re about. Your team sees each question in context, so nobody loses fifteen minutes working out what the client meant.
Want to give stakeholders the bigger picture too?
Pair the Frontend Portal with FluentRoadmap, a public roadmap add-on included free with FluentBoards Pro.
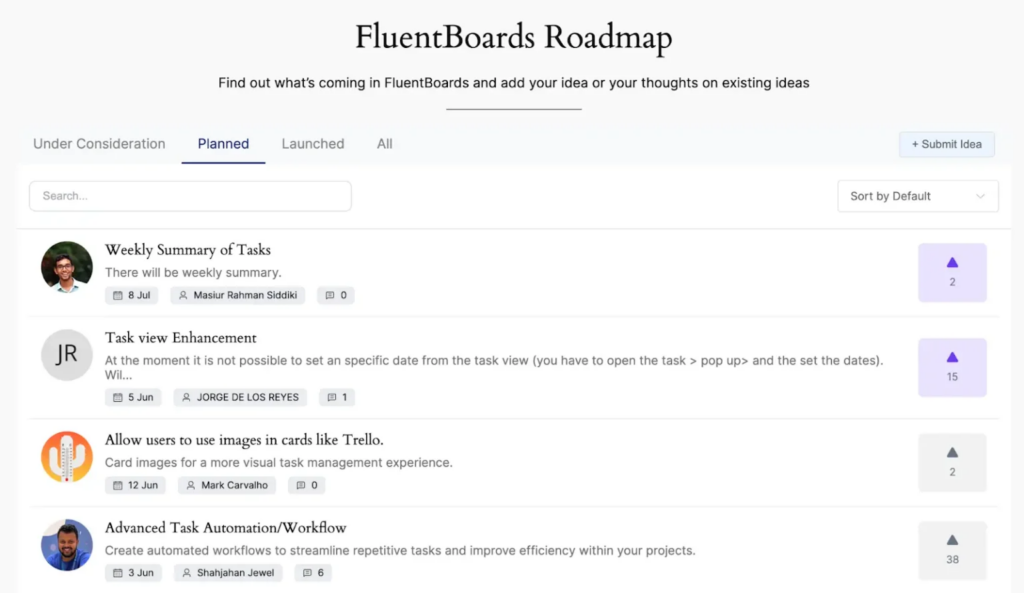
It lets you share a high-level view of what’s coming without exposing every task. Useful for agencies running software builds or ongoing retainers, where clients want to see direction, not just day-to-day motion.
Frequently Asked Questions
Still have questions about setting up your agency board? Here are the ones that come up most.
Start With One Board, Build From There
Setting up your first FluentBoards agency board takes under 30 minutes. The harder part isn’t the setup: it’s the habit shift. Teams that stick with a shared project board stop hunting for updates in message threads and start finding them in thirty seconds on the board.
Start with your most active client project. Get the stages right for how that project actually runs. Add your team, create the first batch of tasks, and move a few cards through the workflow. Once it clicks, duplicate that board as a template for the next client (Pro), or replicate it manually in a few minutes. Either way, the second board takes a fraction of the time the first one did.
Your team is already inside WordPress every day. Your project board should be too. Check out FluentBoards pricing to pick the right plan for your agency, and start your first board today.
That’s all for today. Let’s redefine project management!
Let’s redefine project management with FluentBoards!

Follow:
Get Tips, Tricks, & Updates
We won’t send you spam.


Leave a Reply