


Website Launch Checklist: 45 Checks Before and After a WordPress Site Goes Live


Three days after launch, the client calls. The new site looks great, but nobody has booked an appointment through it since Friday.
You test the contact form, and it works.
Then you check where the submissions are going: the staging email address, which nobody reads.
That is exactly the kind of issue a website launch checklist is meant to catch.
A website launch checklist is a list of checks your team completes before, during, and after a site goes live to make sure everything that worked on staging still works on the real domain.
This part of our agency project management guide gives you 45 WordPress-specific checks, each with a clear owner, plus the client sign-off step most checklists leave out.
Before Launch: Content and Design
Content and design checks catch the mistakes clients notice first: typos, missing images, and placeholder text. Run them on staging, at least a few days before launch, so fixes don’t pile up on launch day.
| Check | Owner |
| 1. Proofread every page, including headers, footers, buttons, and form labels, for typos and leftover placeholder text | Project lead |
| 2. Compress images and add descriptive alt text to every one | Developer |
| 3. Add the favicon and site icon, so the browser tab doesn’t show a default icon | Designer |
| 4. Publish the privacy policy, cookie notice, and terms the client needs, written or approved by the client | Client, chased by project lead |
| 5. Design a custom 404 page with a search box and links to the main pages | Developer |
| 6. Set social share images, so links shared on social media show a proper preview | Developer |
Legal pages need a little extra care!
What a website legally needs depends on where the client operates and what kind of data they collect, so the wording should come from the client or their legal adviser. Your job is to make sure the required pages are there, approved, and properly linked before launch.
Before Launch: WordPress Setup
WordPress setup checks are where most launch disasters hide, because they look fine on staging and only fail on the live domain. Each one takes a few minutes, and skipping any of them can cost days.
| Check | Owner |
| 7. Note the “Discourage search engines from indexing this site” setting under Settings, then Reading. It’s usually ticked on staging and must be unticked on launch day | Developer |
| 8. Set permalinks to the structure your redirect map assumes, usually post name | Developer |
| 9. Audit plugins: remove unused ones, update the rest, and make sure every premium license is in the client’s name | Developer |
| 10. Remove test and temporary admin accounts, and give the client their own administrator login | Project lead |
| 11. Configure caching and test the site logged out, where caching actually applies | Developer |
| 12. Set up security: a firewall or security plugin, login protection and strong passwords on every admin account | Developer |
| 13. Schedule automatic backups stored off the server | Developer |
| 14. Set the site title, tagline, timezone and admin email address to the client’s details, not the agency’s | Developer |
Check 9 can cause more trouble later than almost anything else on this list. If a premium plugin license stays under the agency’s account, the client could lose access to updates when the relationship ends. That often goes unnoticed until something stops working.
The safest approach is to move each license to the client’s account. If that is not possible, clearly document who owns the license, who pays for renewals, and what happens when your support ends.
Pro Tip: Put check 7 on your launch day list as well as here. The search engine setting is the single most common WordPress launch mistake, and it’s invisible until the client asks why the site isn’t showing up on Google weeks later.
Before Launch: Forms and Email
Forms and email fail silently, which makes them the most dangerous part of a launch. Every form can look perfect and still send its messages nowhere.
| Check | Owner |
| 15. Submit every form end to end and confirm each message reaches the client’s real inbox, not a staging or agency address | QA |
| 16. Configure an SMTP plugin so WordPress sends email through a proper mail service instead of the web server | Developer |
| 17. Add SPF and DKIM records for the sending domain, so emails don’t land in spam | Developer, with the client’s domain access |
| 18. Test transactional emails, like password resets, booking confirmations, and store order emails | QA |
| 19. Proofread every confirmation message and autoresponder | Project lead |
By default, WordPress sends email from the web server itself, and many mail providers treat those messages as suspicious. An SMTP plugin like FluentSMTP connects WordPress to a real email service and keeps a log of every email sent, so you can see a failed form notification before the client’s customers do.
Before Launch: SEO and Redirects
SEO and redirect checks protect the search traffic the old site already has. If old URLs break, the new site can lose rankings the client spent years building.
| Check | Owner |
| 20. Build a redirect map that sends every indexed old URL to its closest new page with a 301 redirect | Developer or SEO lead |
| 21. Generate an XML sitemap for the new site | Developer |
| 22. Verify the site in Google Search Console, ready to submit the sitemap on launch day | SEO lead |
| 23. Install analytics, set up conversion events like form submissions, and exclude your own team’s visits | SEO lead |
| 24. Write a unique title tag and meta description for every page | Project lead or SEO lead |
| 25. Check that no page is set to noindex by mistake and that canonical tags point to the live domain | SEO lead |
The redirect map is the check most teams rush. Start with the old site’s sitemap, then add the pages that get search traffic from the old site’s Search Console Performance report, so the URLs that matter most are never missed.
Pro Tip: Put the old URL, the new URL and a status column in one spreadsheet, and test every row after launch. If the old site had no traffic worth keeping, say so in writing, so the client knows the choice was made on purpose.
Before Launch: Testing
Testing checks the site the way visitors will actually use it: on phones, in different browsers, and over real connections. Run them after content is final, because late content changes break layouts.
| Check | Owner |
| 26. Test on real phones and tablets, not only in a resized desktop browser | QA |
| 27. Test in current versions of Chrome, Safari, Firefox and Edge | QA |
| 28. Check page speed on the homepage and the pages that matter most, like booking or checkout | Developer |
| 29. Check accessibility basics: color contrast, alt text, keyboard navigation, and labeled form fields | QA |
| 30. Scan the staging site for broken links and missing images | QA |
Pro Tip: The person who tests shouldn’t be the person who built the pages. Developers test the paths they built, while a fresh pair of eyes tests the paths visitors actually take.
Get Client Sign-Off
Client sign-off is the written confirmation, before anything goes live, that the client has reviewed the finished site and agrees it’s ready. Almost every launch checklist skips it, and it’s the step that protects you most when something comes up later.
| Check | Owner |
| 31. Get written sign-off on the finished staging site from the client’s named approver | Project lead |
| 32. Agree the launch date and time in writing, ideally early in the week | Project lead |
The best sign-off process checks the final site against the criteria you agreed on at the start, such as the launch requirements in your statement of work. Sign-off is the final step in the review stage of your web design project management workflow, so it should never come as a surprise to the client.
Pro Tip: Avoid Friday afternoon launches! If something breaks, you want the whole team available the next morning, not on Monday.
Launch Day
Launch day moves the approved site from staging to the live domain and confirms everything still works there. Run these checks in order, with one person calling them out and ticking them off.
| Check | Owner |
| 33. Take a final backup of the old live site and the staging site | Developer |
| 34. Move the site from staging to live, using your host’s tools or a migration plugin | Developer |
| 35. Update DNS if the domain is moving, and allow time for the change to reach everyone | Developer |
| 36. Confirm SSL is active, the HTTP version redirects to HTTPS, and no page shows mixed content warnings | Developer |
| 37. Clear every cache: the caching plugin, the host’s server cache, and any CDN | Developer |
| 38. Untick “Discourage search engines from indexing this site” and submit the sitemap in Search Console | Developer |
| 39. Run a smoke test logged out: key pages, every form, checkout or booking, and a handful of old URLs to confirm the redirects | QA |
If the domain is moving to a new host, lower the DNS record’s TTL (time to live) a day or two before launch.
A shorter TTL means the change reaches visitors faster, so fewer people land on the old server while the switch happens. Keep the old hosting account active for at least a week after launch, in case you need to roll back or copy something across.
Pro Tip: Send the client one short message when the smoke test passes, like “The site is live and all checks passed at 11:20. We’ll monitor it closely this week.” It replaces ten anxious emails with one calm one.
After Launch: The First 7 Days
The first seven days after launch are when problems that didn’t show up in testing appear! So watch the site closely before you call the project done. Most of these checks take minutes each day.
| Check | Owner |
| 40. Turn on uptime monitoring with alerts to your team | Developer |
| 41. Confirm with the client that real form submissions and orders are arriving | Project lead |
| 42. Check the 404 log daily and add redirects for any old URLs you missed | Developer |
| 43. Check Search Console for indexing errors and confirm the sitemap was processed | SEO lead |
| 44. Restore a backup of the live site to staging to prove backups work | Developer |
| 45. Hand over logins, training and documentation, and confirm where support begins and ends | Project lead |
The handoff deserves its own process, which our guide to client offboarding covers in full. Send the client a short launch report at the end of the week as part of your regular client reporting.
Pro Tip: Use the moment to offer a website maintenance plan, because the client has just seen how much care a site needs.
Run the Checklist as a Board
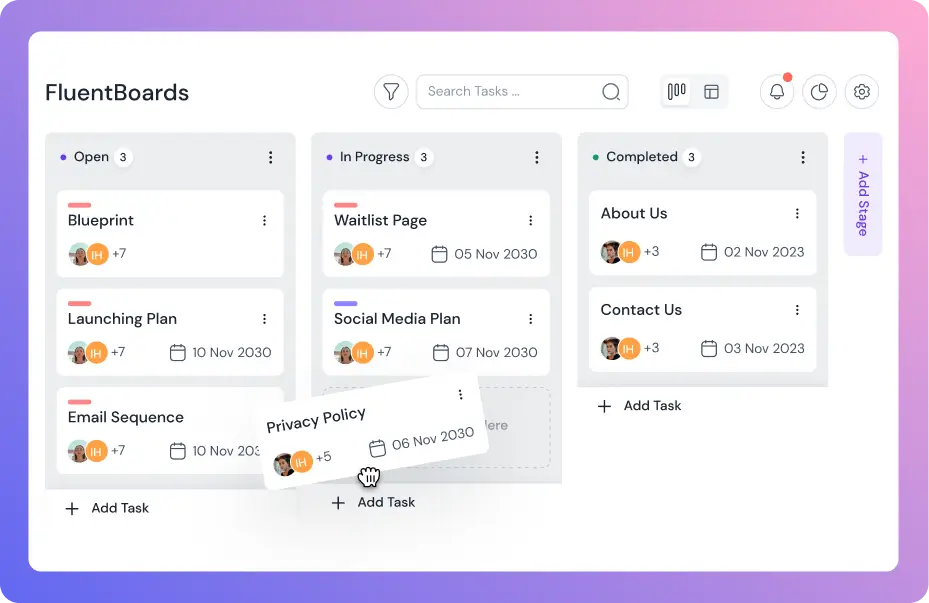
A launch checklist only works if every item has an owner, a deadline, and a place where anyone can see what’s done. Running it on your project board does all three, and it gives you a record of who checked what.
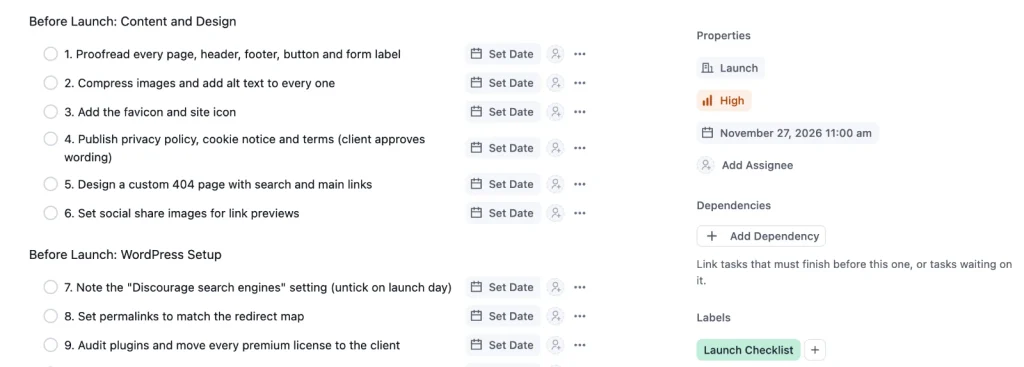
Put the launch on the board as its own task or stage, with one task per check. Assign each one to the owner in the tables above, and give launch-day items a due date with a time, like “Smoke test: 11:00.”
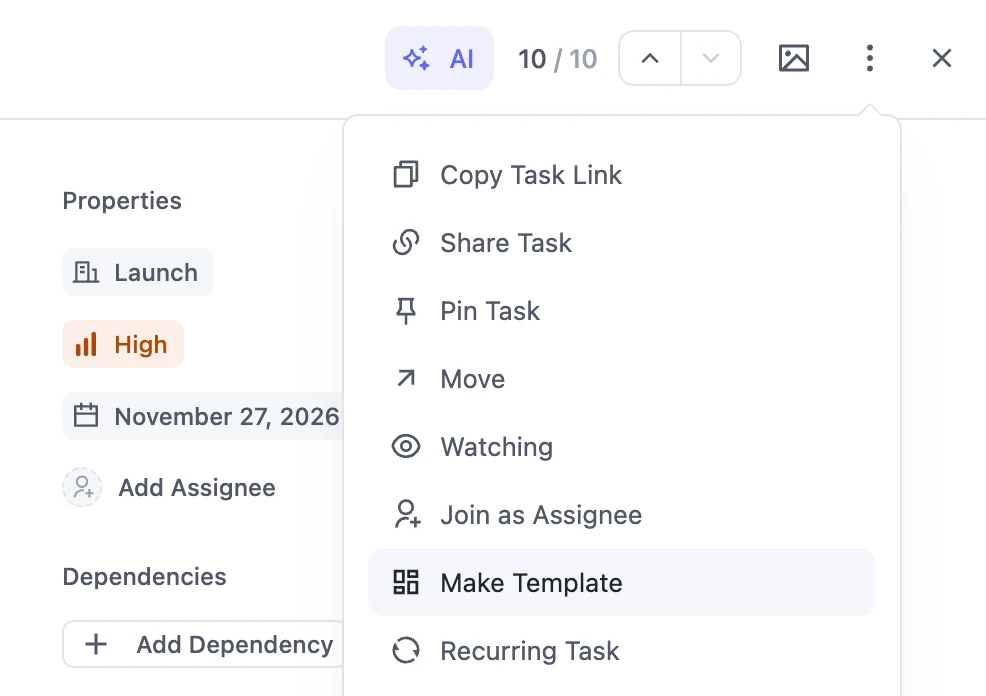
Make the checklist reusable. Save the launch task as a task template, with subtask groups for Before Launch, Launch Day, and After Launch, and add it to every project in seconds.
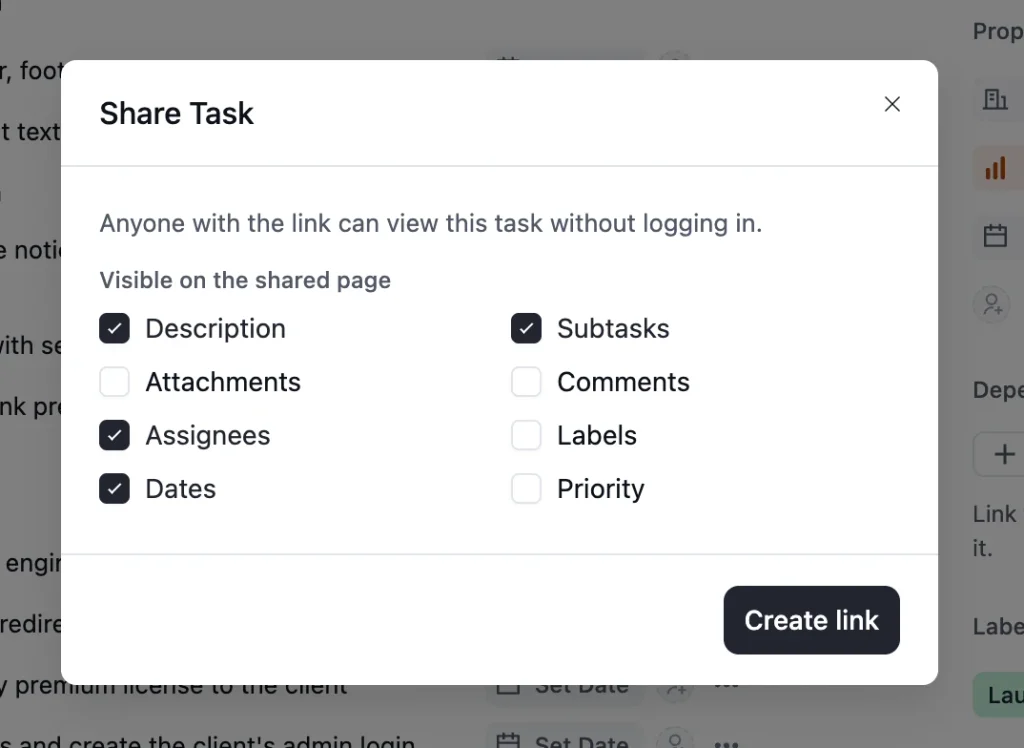
To show the client progress without a login, share the sign-off task with a read-only task-share link.
Frequently Asked Questions
These are the questions developers and project leads ask most in the days before a launch.
What should you check before launching a website?
The most-missed checks before a WordPress launch are: untick the “Discourage search engines” setting, test every form to the client’s real inbox, set up SMTP email, map 301 redirects from old URLs, set up backups, remove test admin accounts, confirm SSL with no mixed content, and get written client sign-off.
How do you launch a WordPress site from staging?
Back up both the old live site and staging, move staging to the live domain with your host’s tools or a migration plugin, update DNS if needed, confirm SSL, clear every cache, untick “Discourage search engines,” and run a smoke test of key pages, forms, and redirects while logged out.
What should you do after a website goes live?
For the first seven days, monitor uptime, confirm real form submissions arrive, check the 404 log and add missing redirects, review Search Console for indexing errors, and test a backup restore. Then hand over logins and training, and agree on how support works from here.
Copy the Checklist Into Your Next Launch
The next site you launch will face many of the same risks as every other WordPress launch: a blocked search setting, a form sending to the wrong inbox, or an old URL nobody remembered to redirect.
The difference is whether those risks are caught on a checklist before launch day or discovered in a client call three days later.
Add these 45 checks to your next project before the build is finished. Assign an owner to each one, schedule the launch date with the client, and make sure sign-off happens before the site goes live.
Then save the checklist as a template, so every launch after that starts with the right checks already in place.
That’s all for today. Let’s redefine project management.
Let’s redefine project management with FluentBoards!

Follow:


Get Tips, Tricks, & Updates
We won’t send you spam.




Add your first comment to this post