

How to Use List View in FluentBoards (And Get More Out of It Than You Expect)


If you think in lists, not cards, List View is the better place to start.
It’s the simplest view in FluentBoards, and every task sits on one row with its name, status, assignee, due date, and priority. Most of that you can change without opening anything, so a stand-up review turns into a scroll and a few clicks instead of twenty open tabs.
Switch to it and start working straight from the row.
List View in FluentBoards is free
New to List View as a project management concept? Here’s how it works as a method. This post focuses on the FluentBoards side:
- Where to find it
- What it does differently from Kanban
- How to get more out of the features that are easy to overlook
Switching to List View: Two Seconds, One Click
Open any board and look at the top of the board near the title. You’ll see a view switcher dropdown showing whichever view you’re currently in, with Kanban as the default. Click it and select List View.
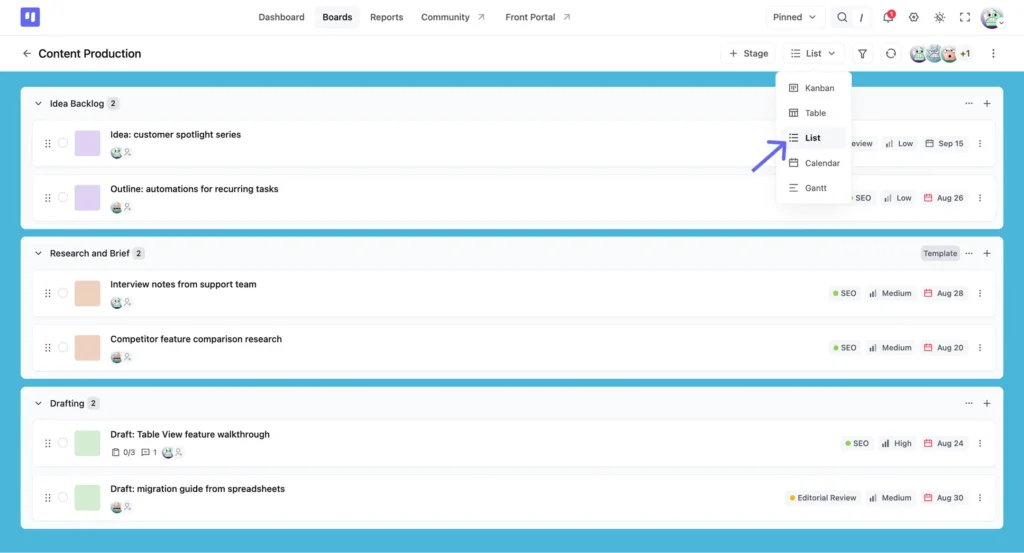
Your tasks don’t change, your stages don’t change, and nothing about your project data moves. Only the display format changes.
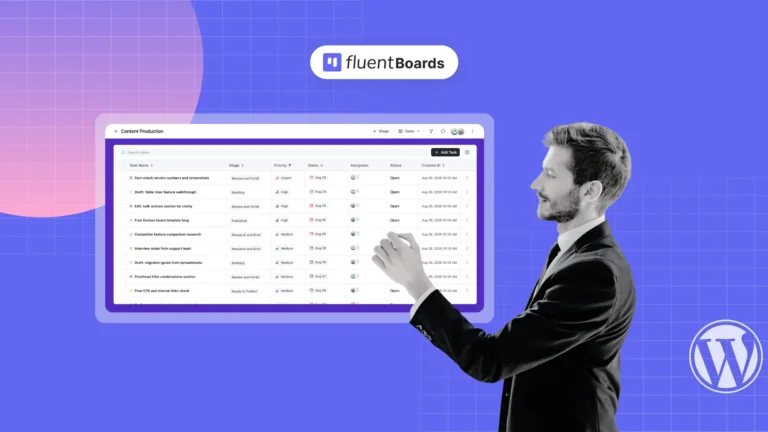
List View shows every task in the board as a vertical list, organised by stage. Each task sits on its own row with the name, status, assignee, due date, and priority all visible in a single line, so you get the whole board in one scroll.
Prefer visual columns and drag-and-drop cards? The Kanban board setup guide covers that view in full. This one is for list thinkers.
How Tasks Group by Stage (This Behaves Differently Than Kanban)
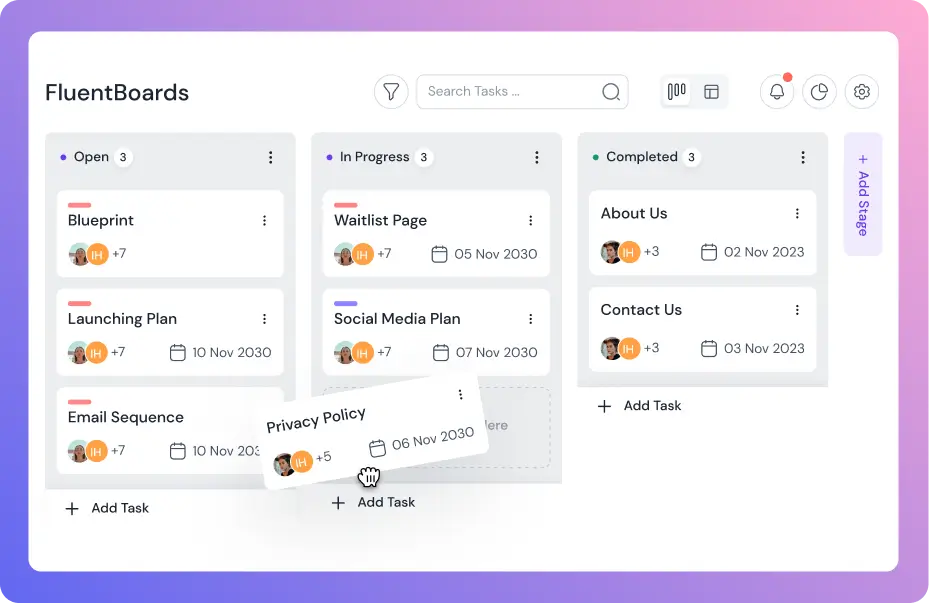
In Kanban, stages are side-by-side columns and your eye moves sideways to follow a task through its workflow. In List View, stages stack vertically. Each one becomes a collapsible section header with its tasks listed as rows underneath.
That changes how you read the board. Instead of scanning left to right, you scroll down through stages in sequence, seeing the full task list for one stage before moving to the next. For projects where stage order matters, that’s usually the easier read.
Click any stage header to collapse or expand it. If you’re focused on what’s in Review and don’t want the noise of everything else, collapse the rest. The data is still there, just out of the way.
Tasks still move between stages here. Grab the handle on the left of any row and drag it into another stage, the same way you would move a card in Kanban. You lose the columns, not the drag.
Controls that act on the whole stage
Each stage header has its own “⋮” menu, holding controls that work on the section rather than one task:
- Sort By reorders tasks inside that stage, so you can put the nearest deadline at the top of Review while leaving Backlog alone
- Reorder Stages moves the whole section up or down when your workflow changes shape
- Change Background sets the stage colour, which is what makes one section findable on a long scroll
- Move All Tasks shifts everything into another stage at once, useful when a sprint closes and the leftovers roll forward
- Archive All Tasks clears a finished stage without deleting the record
- Make template saves the stage so you can rebuild it on the next project instead of typing it out again
- Copy Stage, Set Status Closed, and Set Default handle the rest
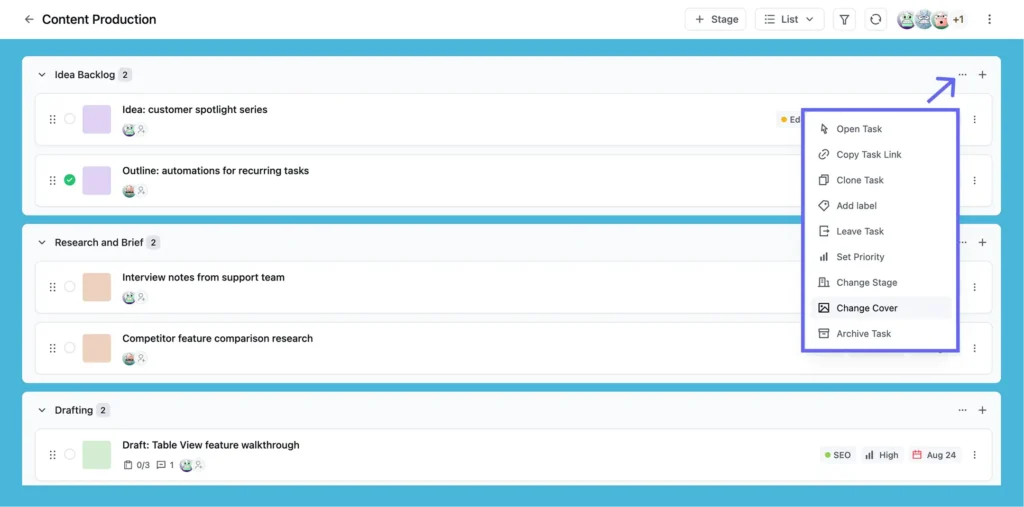
Set your focus: Board background, stage colours, and card covers all carry into List View, so colour whichever layer you need to spot fastest: the whole project, one stage, or a single task. Dark mode is there too, in the top bar.
What You Can Actually Do From a Task Row
List View looks like a read-only summary, but several fields in each row are live. You can update a task without ever opening it.
On the left of the row sits a status circle. Click it to toggle the task between open and closed, a one-click status update with no task panel involved.
Small win: Closing a task sets off a quick confetti burst across the row, a small celebration for each one you clear.
Then comes the card cover swatch, the task name, and the assignees underneath it. The “+” beside the avatars stays visible, so you can put someone on a task without opening it.
The right side of the row
Three more fields respond to a click:
- Priority: Click the badge to open the picker, choose a new level, and click away
- Due date: Click the date to open a picker inline and set or adjust the deadline
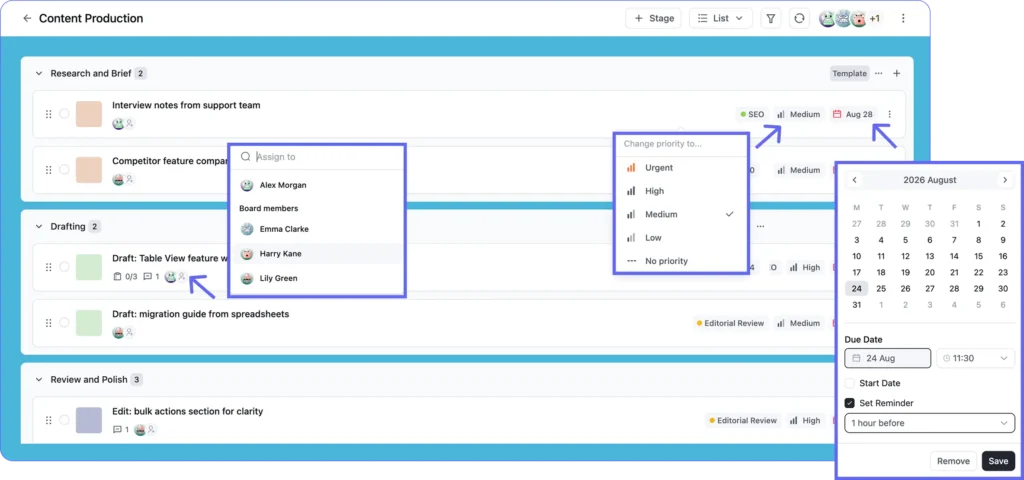
Set your reminder: Tick Set Reminder and choose how far ahead you want the nudge. The assignee gets notified automatically, so nobody has to chase anybody.
Clicking the task title does something different: it opens the full task detail panel. The title is a navigation target rather than an inline field, so renaming, descriptions, comments, and custom fields all live inside the panel. The row handles quick status and assignment updates, and the panel handles the substantive editing.
More in the row menu
The “⋮” at the far right of each row holds nine more actions: Open Task, Copy Task Link, Clone Task, Add label, Leave Task, Set Priority, Change Stage, Change Cover, and Archive Task.
Two are worth knowing straight away. Copy Task Link grabs a direct URL, so you can drop it into Slack and your teammate lands on the right task. Clone Task duplicates a task with its fields intact, handy for work that repeats without sitting on a schedule.
That split makes List View work well as a running project management to-do list when you’re working through a stage task by task, toggling statuses as you go.
Configuring Which Fields Show Per Row (List View Preference)
You control what shows on every row. Open your profile overview from the top right, click Layouts, then the List View tab.
By default each row shows:
- Label
- Priority
- Assignee
- Subtask count
- Attachment count
- Dates
- Comment
- Notification
Toggle off anything you don’t use. If your team doesn’t put labels on this board, or you want to focus on due date and assignee only, the row cleans up straight away. There’s an Enable All switch at the top too, if you want the lot on or off in one click.
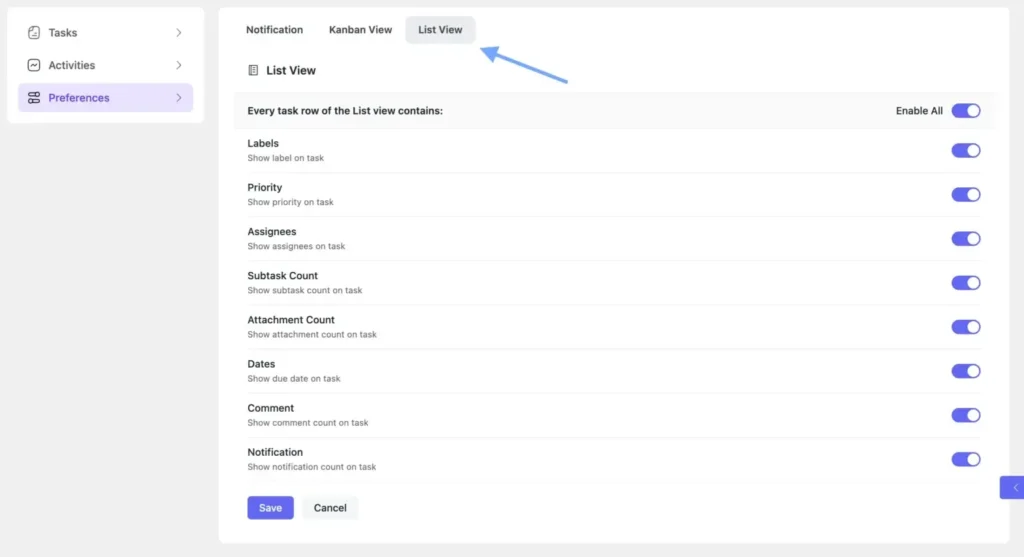
Worth knowing: The setting is per board and per user, so adjusting it on your end doesn’t change what anyone else sees.
Adding Tasks and Stages Without Leaving the List
Every stage header has a “+” on the right. Click it and a task creation window opens with that stage already selected, so you can set the title, priority, assignee, labels, dates, and a card background before saving.
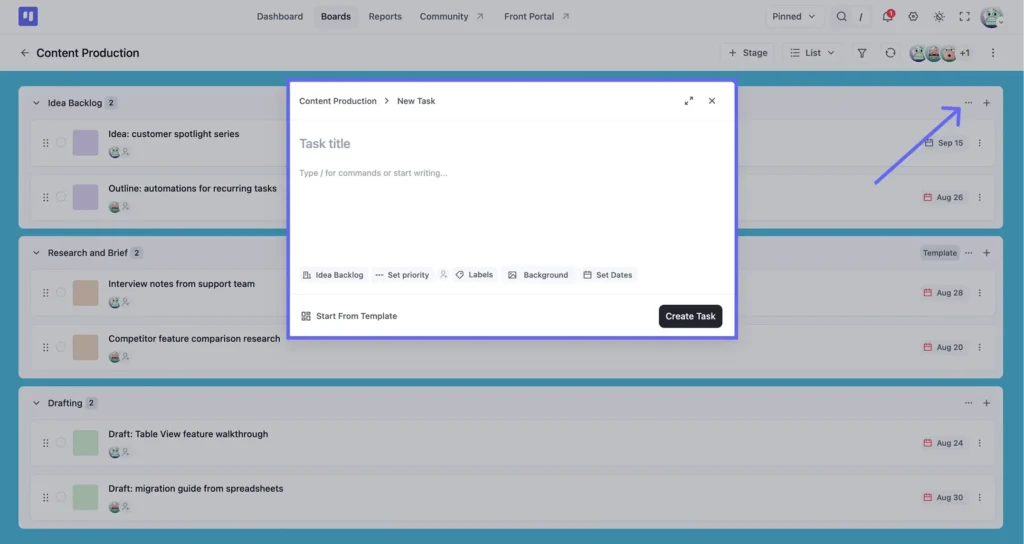
Need a whole new stage?
The “+ Stage” button at the top of the board opens Create New Stage, where you give it a title, pick a type, and add it to the board. The list redraws with the new section in place.
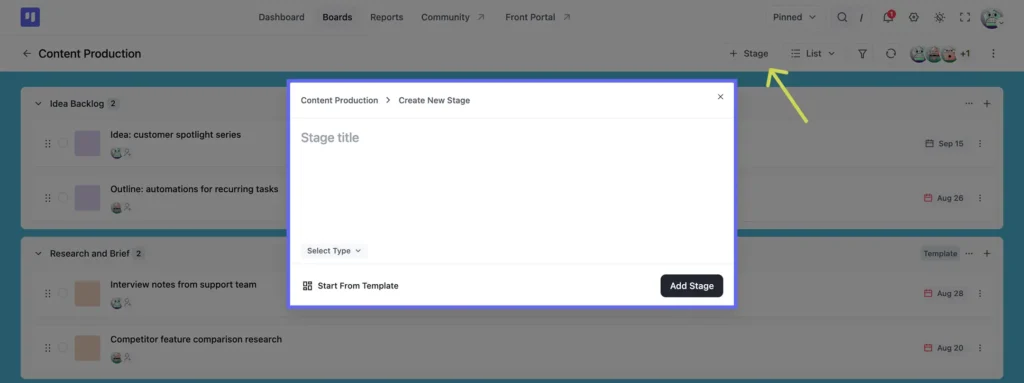
Start from a template: Start From Template sits at the bottom of both. If the task or the stage follows a shape you’ve built before, pull it in rather than filling the fields out again.
Filtering and Sorting: Build the Exact View You Need
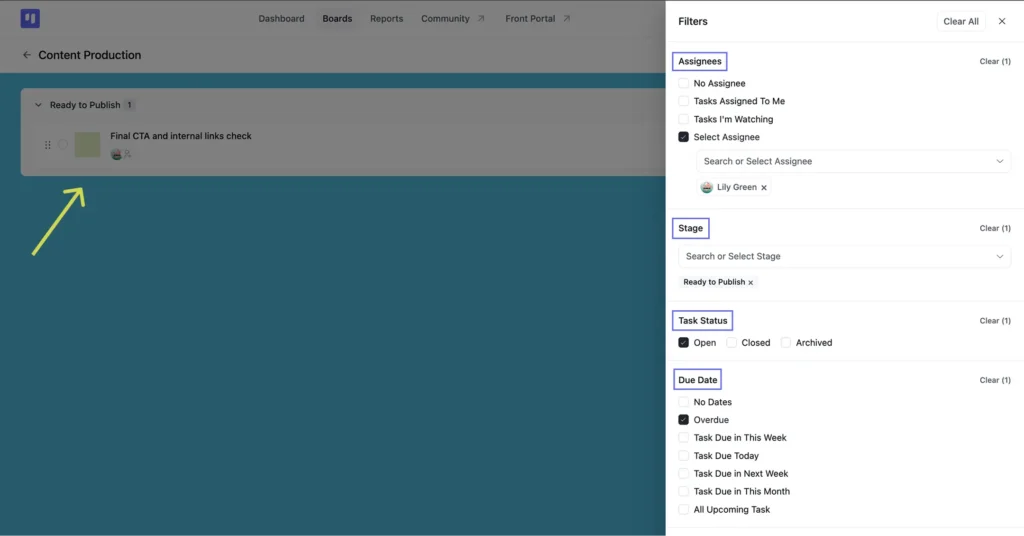
The filter icon sits in the board header. Open it and you can narrow the list by:
- Assignees, including No Assignee, Tasks Assigned To Me, and Tasks I’m Watching
- Stage
- Task Status: Open, Closed, or Archived
- Due Date, with presets from Overdue through to All Upcoming Task
- Priority
- CRM Contacts
- Labels
- Custom Fields, if your board has any
Three combinations worth knowing:
Filter by assignee: Select one or more team members and every other task drops out. Add Task Status on Open alongside it and you’ve got what that person actually still has to do, with everything they’ve already closed out of the way. It’s the fastest way to see someone’s live workload across all stages without asking them to walk you through it.
Sort by due date: Open a stage’s ⋮ menu, choose Sort By, and pick Due Date. That stage reorders from nearest deadline to furthest, and flipping the direction shows the longest-horizon work first, useful when planning what can wait another week.
Sort within a stage: Open a stage’s ⋮ menu and choose Sort By. You get Date Created newest first, Date Created oldest first, or Task Name alphabetically. Because it runs per stage, you can order Review while Backlog stays exactly as it was.
Sort by priority: Same menu, different option. Critical tasks rise to the top of that stage, which is the view to open first thing in the morning.
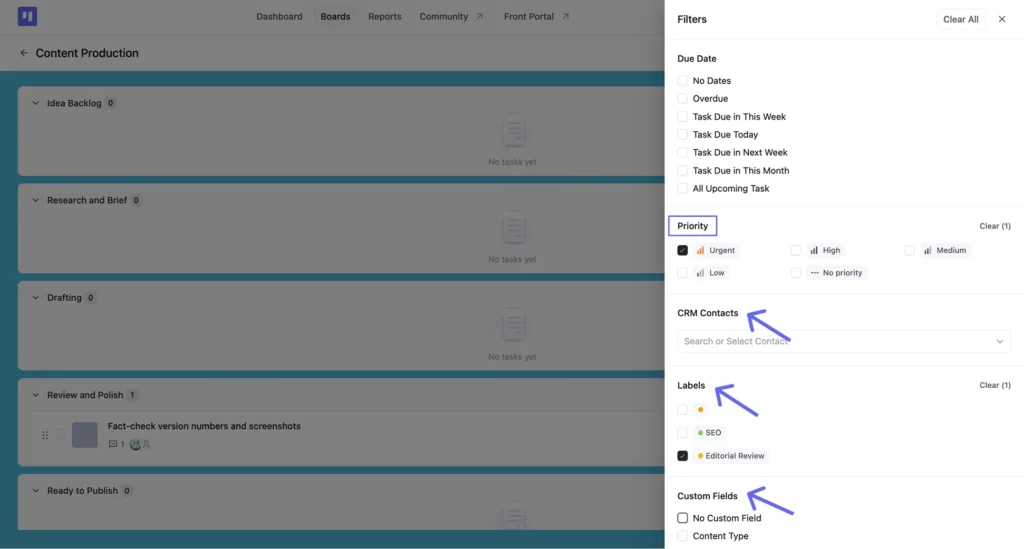
Scroll the panel and it keeps going. If you’ve connected CRM contacts, you can filter to one client and see only their work. Same with labels, and with any custom fields your board uses.
Sorting works separately
Open a stage’s “⋮” menu and choose Sort By, and a Sort Options panel opens with four choices: Date Created, Priority, Task Name, Due Date, plus an Ascending/Descending toggle underneath. Pick one of each and hit Apply. Because it runs per stage, you can sort Review while Backlog stays exactly as it was.
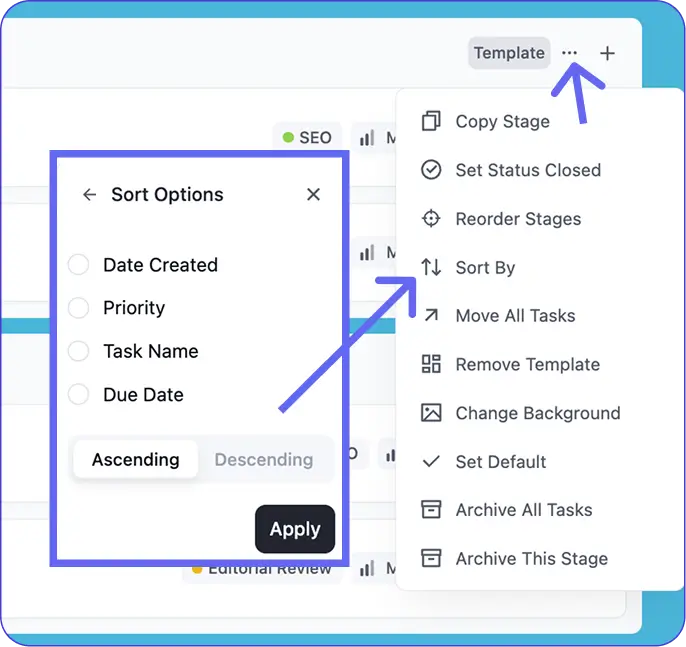
Tip: Sorting stacks on top of whatever you’ve filtered to. Narrow the list first, then sort a stage by due date, and the order holds inside the filtered set.
List View in My Tasks: The Personal Version
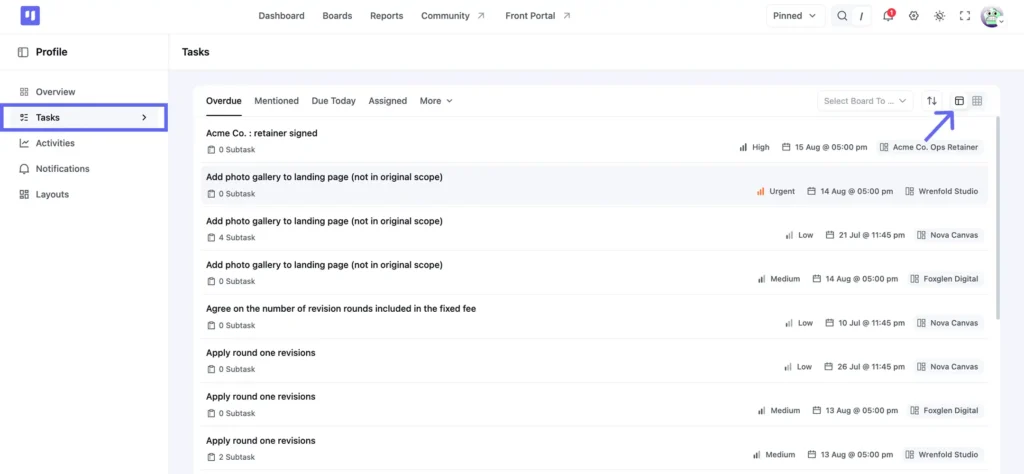
Board-level List View shows all tasks in one specific project, organised by stage. There’s a separate List View worth knowing about: the My Tasks dashboard. Click your avatar in the top right and choose My tasks, or open your profile and pick Tasks from the left sidebar.
In My Tasks, work from every board across the account lands in one place. The tabs across the top are Overdue, Mentioned, Due Today, and Assigned, with More holding the rest. Each task shows its subtask count, priority, due date, and the board it came from, so you can see where something belongs without opening it. The display is still a list, but organised by priority and deadline rather than by project stage.
The distinction matters. Board-level List View manages work inside a specific board. My Tasks triages your own workload across all of them. Plenty of teams open My Tasks to decide what to work on, then move to the board to do it.
Free vs. Pro: Where List View Fits
List View is included on the Free plan. No Pro license required:
| Capability | Free | Pro |
| List View (board level) | Included | Included |
| List View in My Tasks | Included | Included |
| Row-level status, priority, due date, assignee edits | Included | Included |
| List View Preference (field configuration) | Included | Included |
| Filter by assignee | Included | Included |
| Sort by due date, priority, name, or date created | Included | Included |
| Kanban View | Included | Included |
| Subtasks | No | Included |
| Table View | No | Included |
| Calendar View | No | Included |
| Gantt Chart View | No | Included |
See what else Pro unlocks: free vs Pro comparison
Frequently Asked Questions About List View
A few things teams ask most often when they first switch to List View.
Is List View free in FluentBoards?
Yes. List View and Kanban View both come with the Free plan, with no time limit and no feature gate on what you’ve read here. Table, Calendar, and Gantt Chart View require Pro.
Can I edit a task without opening it?
Yes, partly. Status, priority, due date, and assignees are all editable straight from the row. Renaming a task, editing its description, and working with comments or custom fields happen in the task detail panel.
What’s the difference between List View and My Tasks?
Board-level List View shows one project’s tasks grouped by stage. My Tasks pulls your work from every board into one place, organised by priority and deadline instead.
What to Try Next
If you’re new to FluentBoards, get your board structure right before leaning on List View heavily. The stage groupings only mean something if the stages themselves do. FluentBoards templates give you sensible stages from day one rather than a blank board.
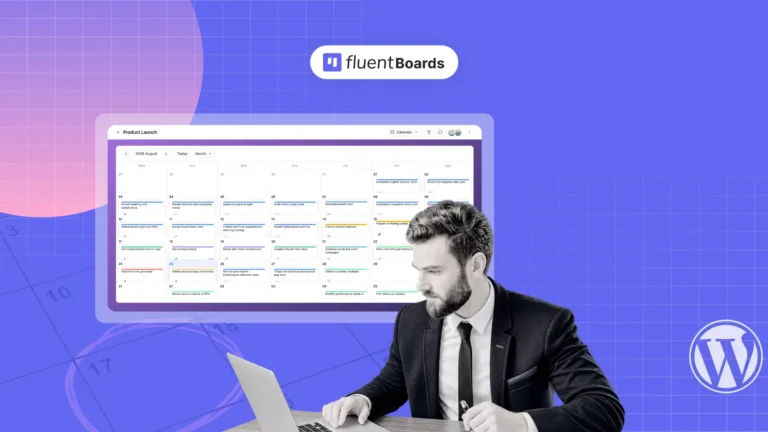
When you’re ready for more angles on the same project data, the Pro views add them without touching the tasks themselves. Table View treats your tasks like a spreadsheet with sortable columns and CSV export. Calendar View plots them across a month by due date. Switching between any of them is the same one-click toggle.
Start with List View. Get comfortable with the filters, the sorts, and the row-level edits, and the Pro views are one click away whenever you want them.
Thanks for reading. Open List View on your busiest board and see how much you can clear without opening a single task.
Let’s redefine project management with FluentBoards!

Follow:


Get Tips, Tricks, & Updates
We won’t send you spam.


Leave a Reply