

How to Set Up Built-In AI in FluentBoards: OpenAI, Claude, Gemini, or WordPress AI


Connect to an MCP server. Configure an external AI agent. Set up tools. Figure out permissions. Then finally ask AI to do something with your projects.
Useful? Absolutely.
Necessary just to get some AI assistance inside FluentBoards? Not at all.
However, the good news is FluentBoards comes with its own built-in AI layer that works directly inside your boards and tasks.
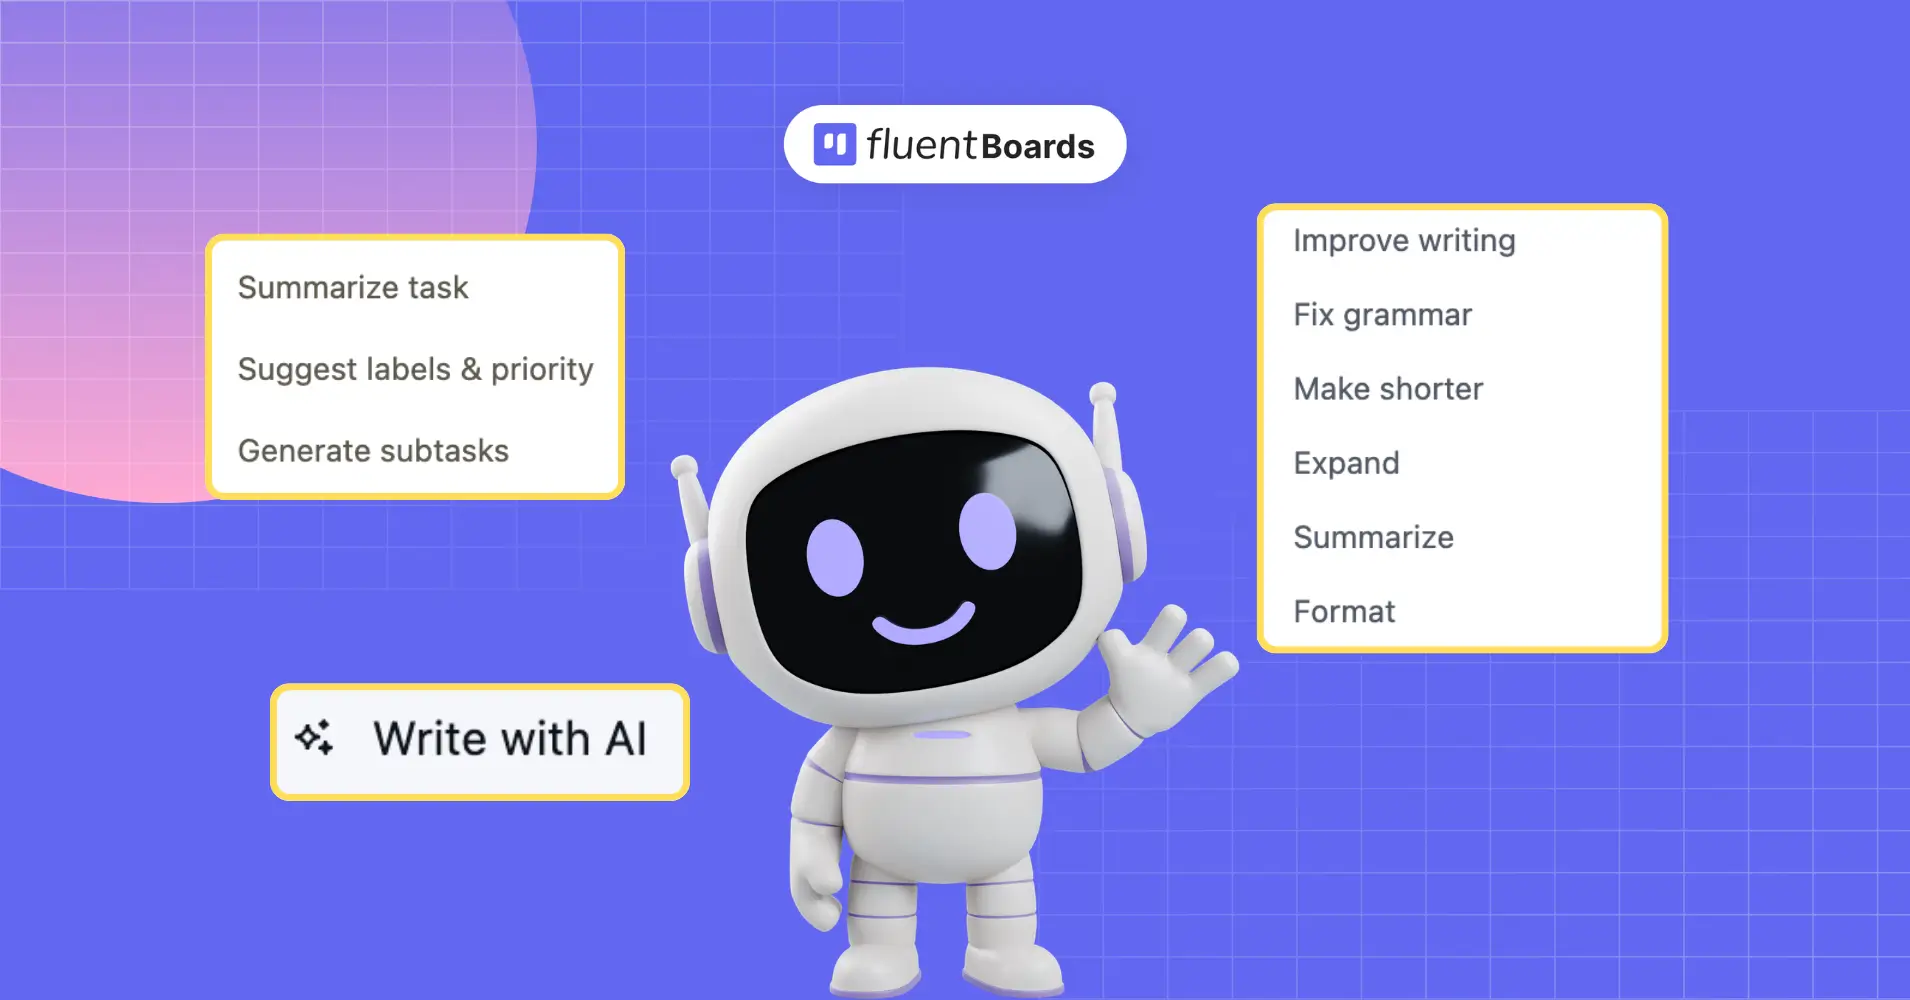
Once connected, you can use AI to write and improve descriptions, summarize tasks, suggest labels and priorities, and even generate subtasks.
And the setup happens entirely from FluentBoards.
No MCP server, no external AI agent, no code.
All you need is an AI provider, a few minutes, and admin access to your WordPress site.
- Setup time: Around 5 minutes
- Requires: FluentBoards 2.0.0+
- Access: Site admin
Let’s connect it.
Built-in AI vs. MCP: What’s the Difference?
Before jumping into the setup, there’s one thing worth clearing up. FluentBoards now has two different ways to work with AI: MCP tools and built-in AI.
And while both bring AI into your project management workflow, they solve very different problems.
With MCP, FluentBoards becomes accessible to an external AI agent such as Claude, ChatGPT, or another MCP-compatible application.
For example, you could ask your AI assistant to create a task, find something from a board, update project information, or perform another FluentBoards action without opening WordPress.
In other words, MCP lets AI work with FluentBoards from the outside.
Built-in AI works the other way around. The AI lives directly inside the FluentBoards interface and helps while you’re already managing your work. You can use it to:
- Write or improve task descriptions
- Summarize long tasks
- Suggest relevant labels and priorities
- Generate subtasks
- Clean up or restructure existing content
So, MCP is for connecting FluentBoards with external AI agents. Built-in AI is for getting AI assistance directly within your everyday project workflow.
And this guide is all about the second one.
To connect MCP with FluentBoards, follow this blog
How to Connect OpenAI, Claude, or Gemini to FluentBoards in Just Five Minutes
The built-in AI setup is available directly from FluentBoards settings.
And yes, it’s available in FluentBoards Free too. You don’t need a Pro license just to connect an AI provider or start using most of the AI features.
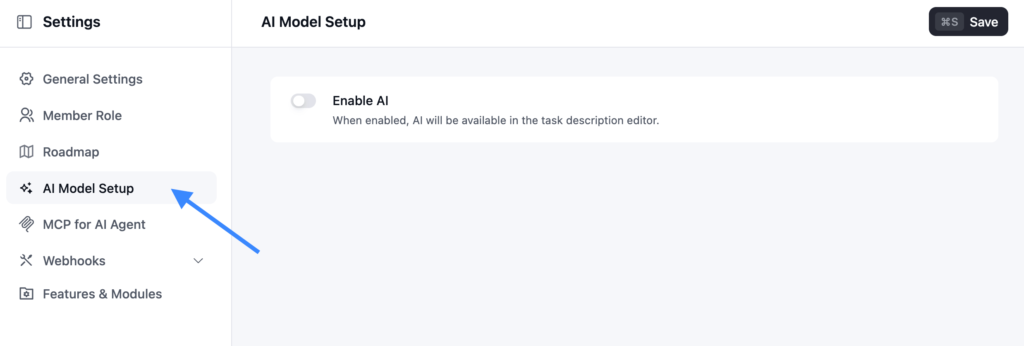
From your WordPress dashboard, go to: FluentBoards → Settings → AI Model Setup
The AI Model Setup panel contains everything you need to connect, configure, and test your preferred AI provider.
Only site admins can manage these settings.
Now let’s set it up.
Step 1: Enable AI
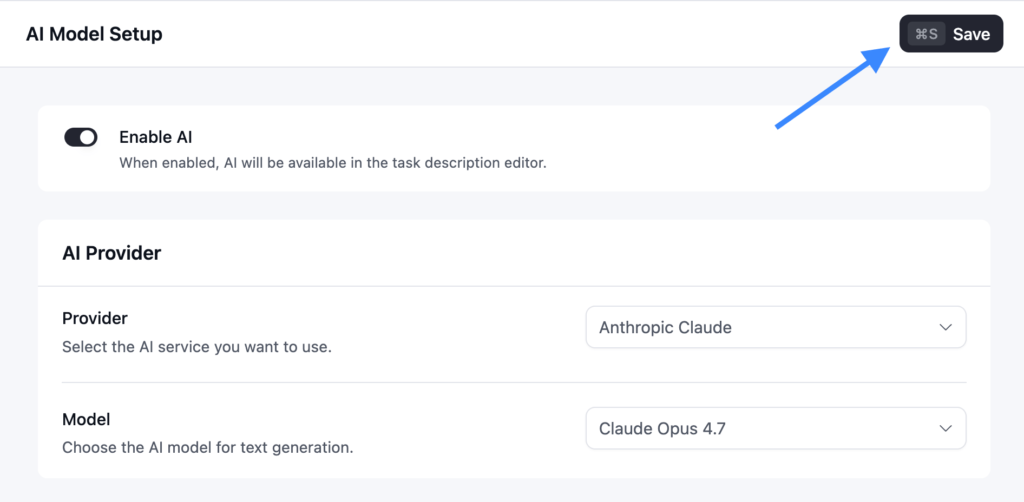
Start by turning on the Enable AI toggle at the top of the AI Model Setup panel.
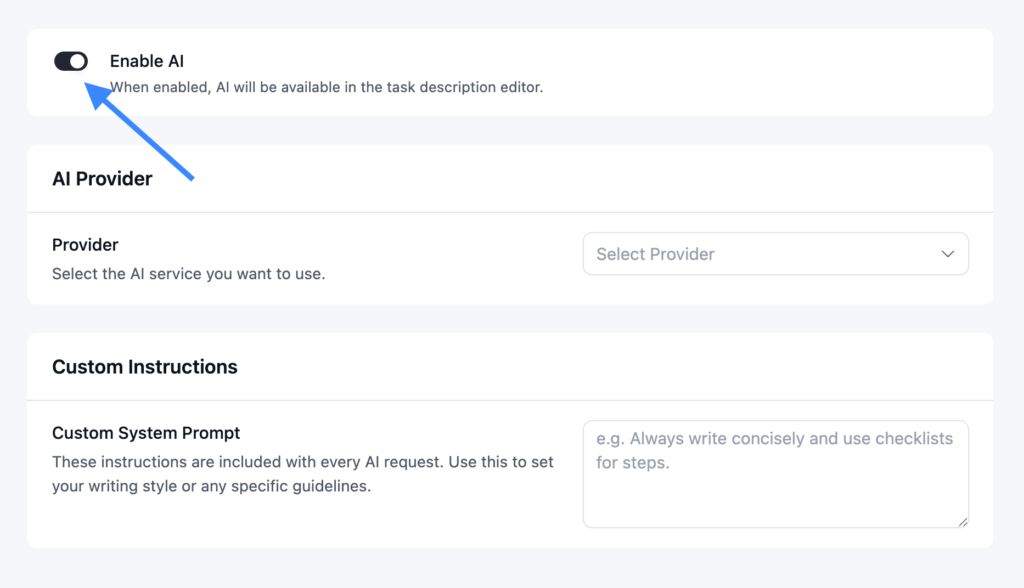
This is the master switch for built-in AI. Until AI is enabled and configured, the AI options inside FluentBoards stay hidden. So your team won’t see an Ask AI button that leads nowhere.
Step 2: Choose Your AI Provider
FluentBoards currently gives you four provider options:
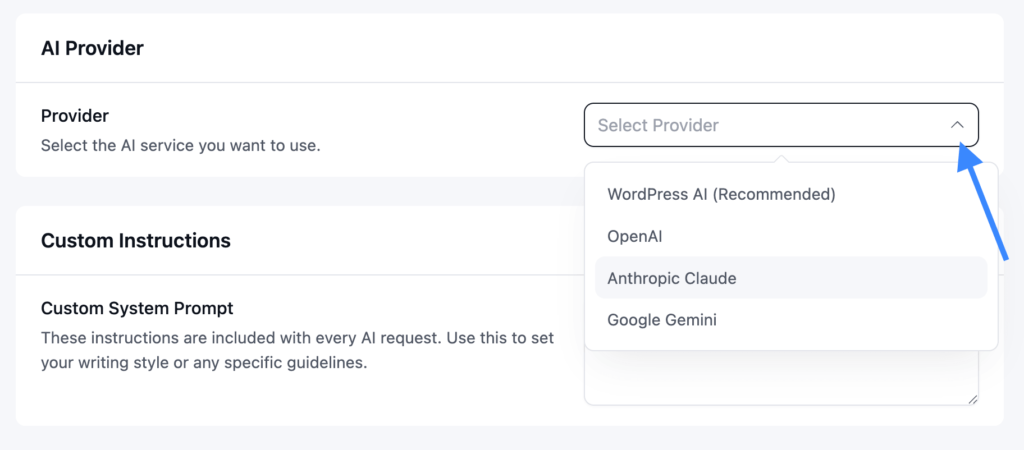
- WordPress AI
- OpenAI
- Anthropic Claude
- Google Gemini
So if you’re already using one of these services, you can connect the provider you prefer rather than being locked into a specific AI model.
WordPress AI option is the recommended route if you want to use WordPress’s own AI connector instead of manually managing an API key inside FluentBoards. Select WordPress AI and FluentBoards will direct you to: Settings → Connectors. From there, you can complete the AI connection through WordPress. For OpenAI, Claude, or Gemini, the process is slightly different.
Step 3: Add Your API Key
Once you select OpenAI, Anthropic Claude, or Google Gemini, FluentBoards will ask for the API key associated with your provider account.
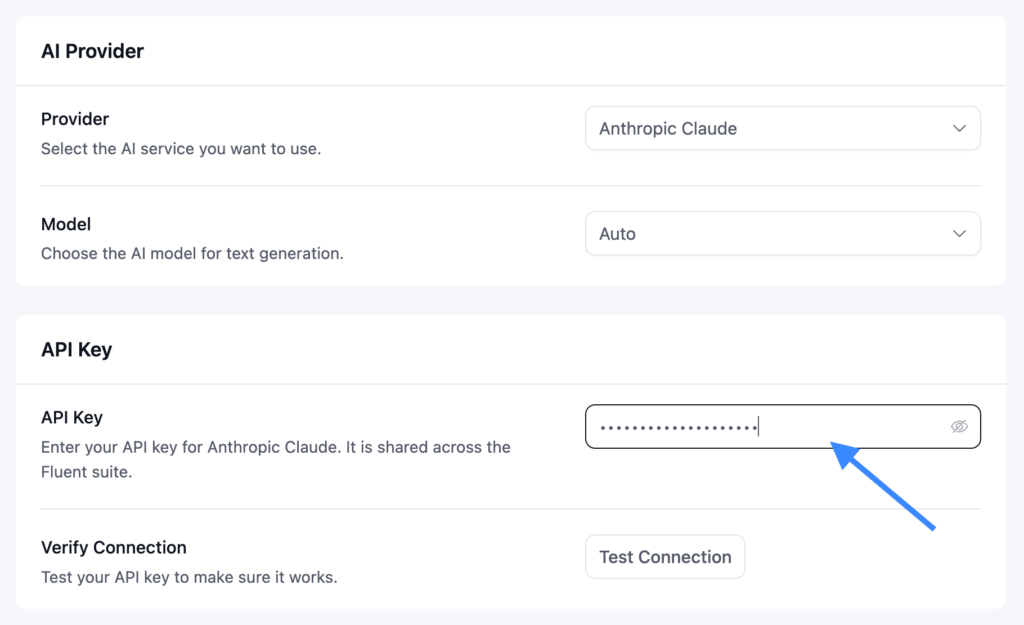
Paste the key into the API key field and save your settings.
Using WordPress AI? You can skip this step because the connection is handled through WordPress instead.
Step 4: Choose an AI Model
Next, select the model FluentBoards should use. Each provider includes a short list of supported models along with an Auto option.
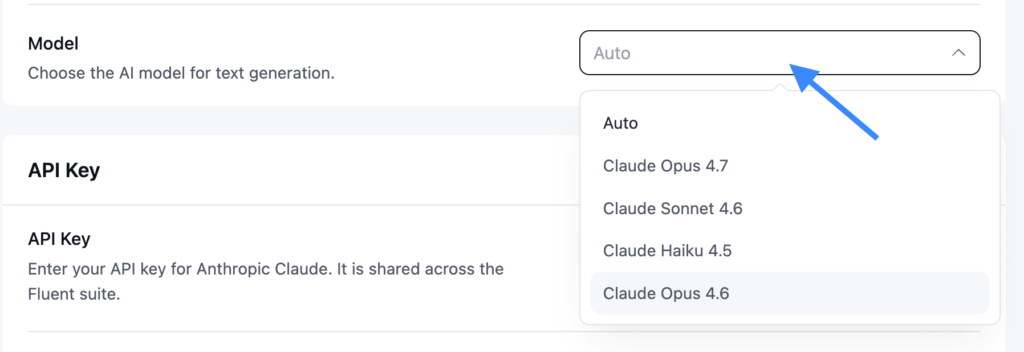
Auto is probably the easiest choice for most users. Instead of keeping track of provider model names and changing your configuration whenever those models evolve, FluentBoards can resolve an appropriate default for you. Of course, you can select a specific model when you want more control over which model handles your requests.
Step 5: Add a Custom System Prompt, If Needed
This step is optional, but it’s particularly useful for teams. The AI Model Setup panel lets you add a custom system prompt that FluentBoards includes with AI requests.
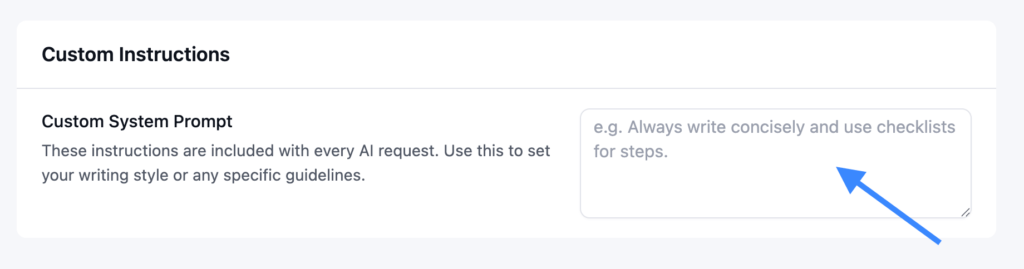
Think of it as giving AI some standing instructions about how you want it to communicate.
You could specify:
- Your preferred writing tone
- Internal terminology
- Formatting conventions
- Words or phrases to avoid
- How detailed responses should be
For example, a marketing team could ask AI to keep descriptions conversational and concise, while a development team might prefer more technical and structured responses.
The system prompt applies across FluentBoards AI features, so you don’t have to explain the same preferences every time someone uses the writing assistant.
Step 6: Save the Settings
This is the most important step. Make sure you click the Save button before leaving the page.
Step 7: Test the Connection
Finally, test your setup. FluentBoards includes a connection test so you can verify that the selected provider, API key, and model are working correctly before your team starts using them.
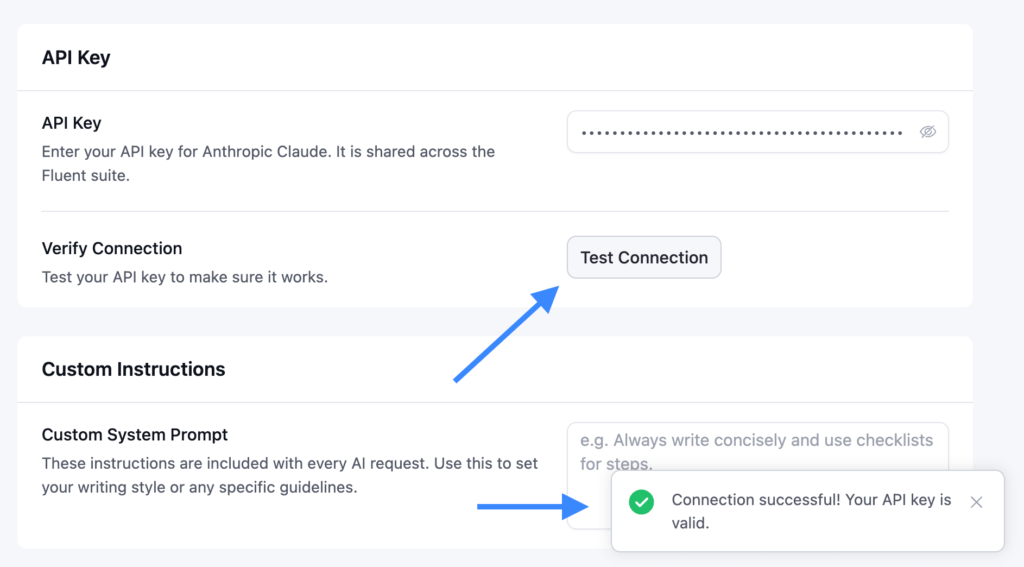
One click sends a test request to the provider. If the connection succeeds, you’re ready to go.
Now the fun part begins.
What Can You Do With FluentBoards AI?
Connecting the provider once activates AI across FluentBoards. There isn’t a separate setup process for every individual AI feature.
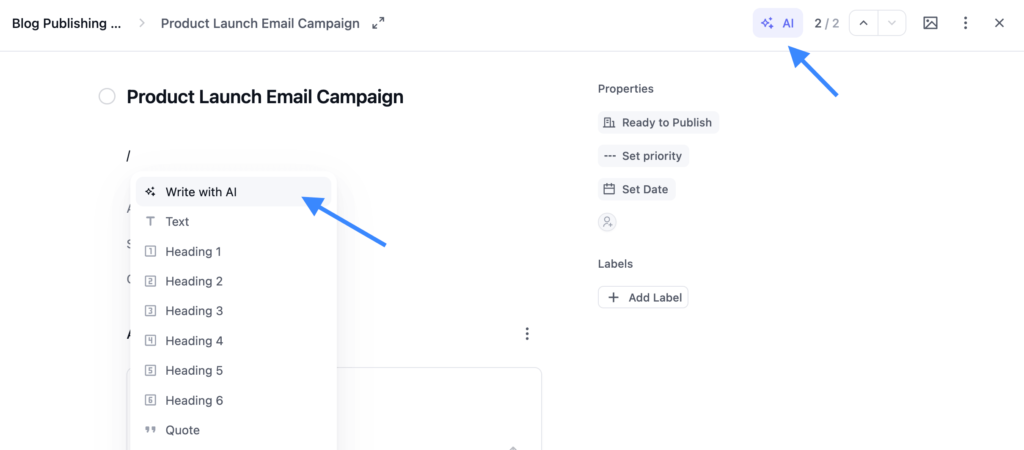
Once everything is connected, you’ll primarily find AI in two places: the description editor and the task detail view.
Write Better Task and Board Descriptions With AI
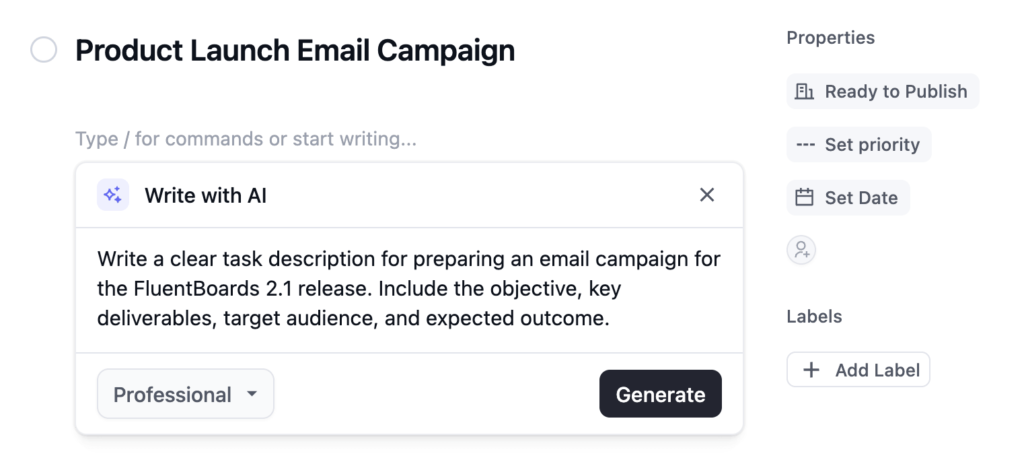
Writing a task description sounds easy. Until you’re staring at a blank editor trying to explain what needs to happen, why it matters, and what the person assigned to it actually needs to know. Built-in AI helps directly from the description editor.
Prompt: Write a clear task description for preparing an email campaign for the FluentBoards 2.1 release. Include the objective, key deliverables, target audience, and expected outcome.
Result:
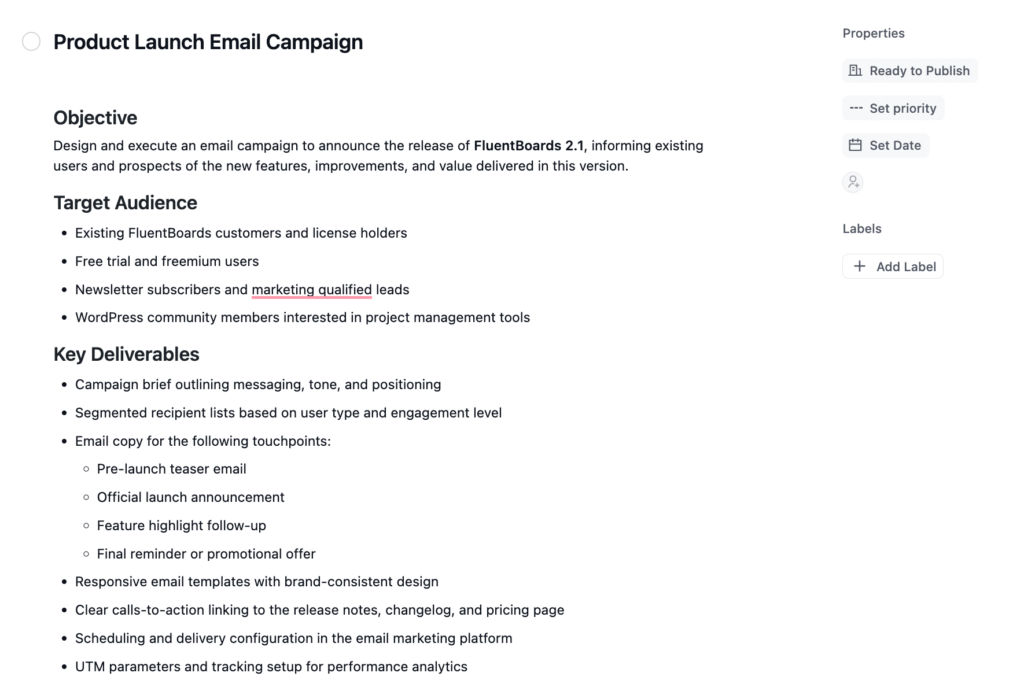
You can start with a simple prompt and let AI draft the content, or use it to transform something you’ve already written.
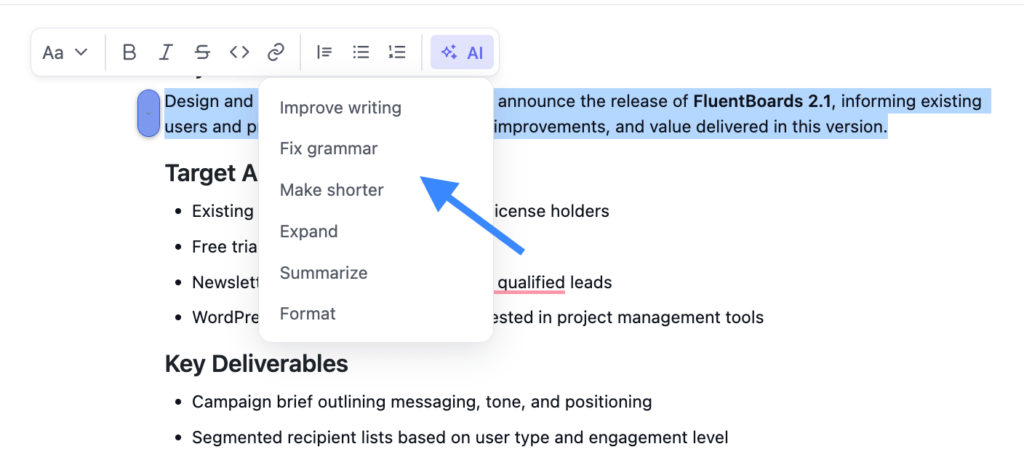
Available actions include:
- Improve writing: Polish existing text without changing the core meaning
- Fix grammar: Clean up grammatical mistakes and awkward wording
- Make shorter: Condense a long description into something easier to scan
- Expand: Turn a short idea or rough note into a more complete description
- Summarize: Reduce longer content to the important points
- Format: Organize messy content into something much easier to read
You can write however you normally do, even with rough notes, then use AI to clean things up before passing the task to someone else.
Use Ask AI to Understand and Organize Tasks
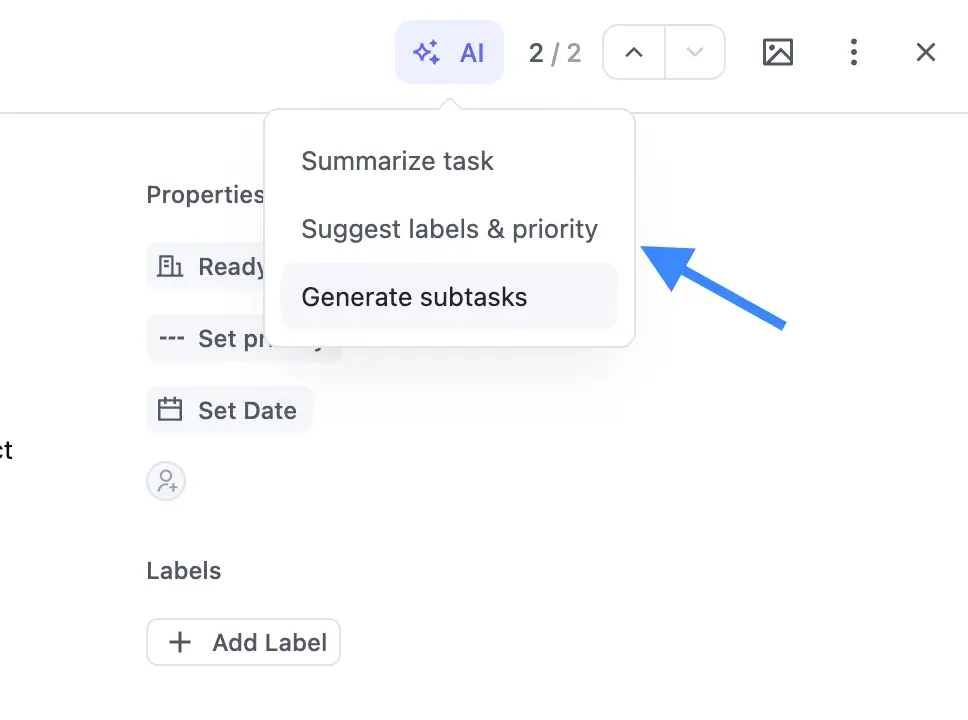
AI also appears directly inside the task detail view through the Ask AI menu. This is where FluentBoards moves beyond writing assistance and starts helping with actual task management.
You can use Ask AI to:
- Summarize a Task
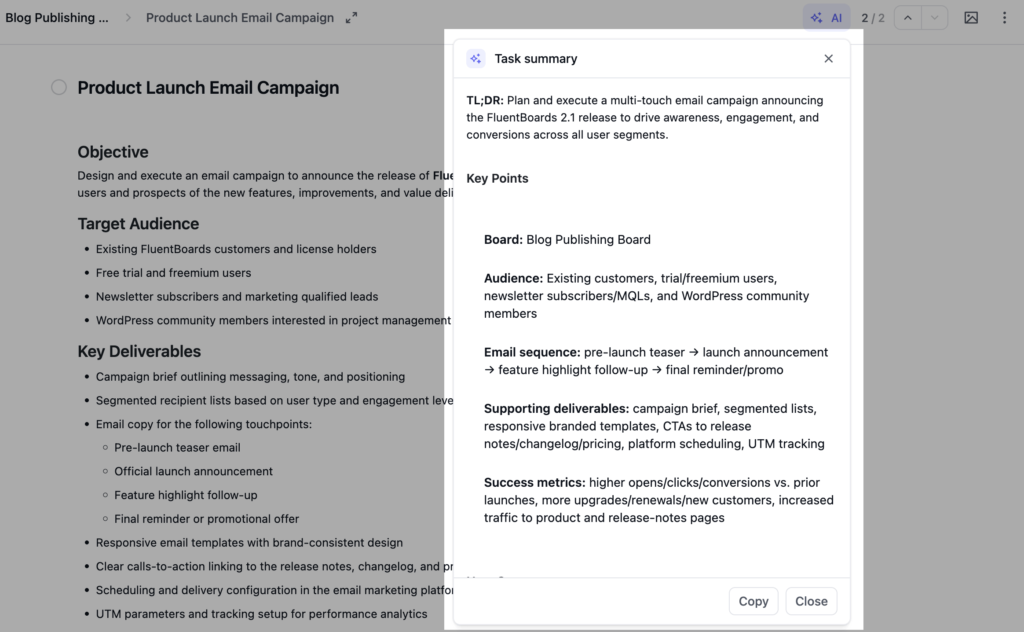
This can be particularly useful when you’re jumping into a task someone else created or returning to something after a while.
- Suggest Labels and Priority
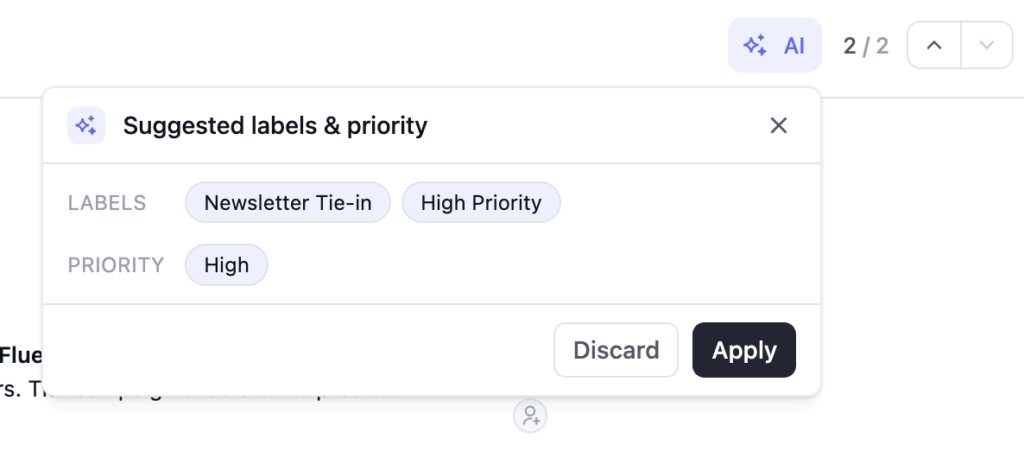
For teams managing a large number of tasks, that can remove quite a bit of repetitive triage work.
- Generate Subtasks
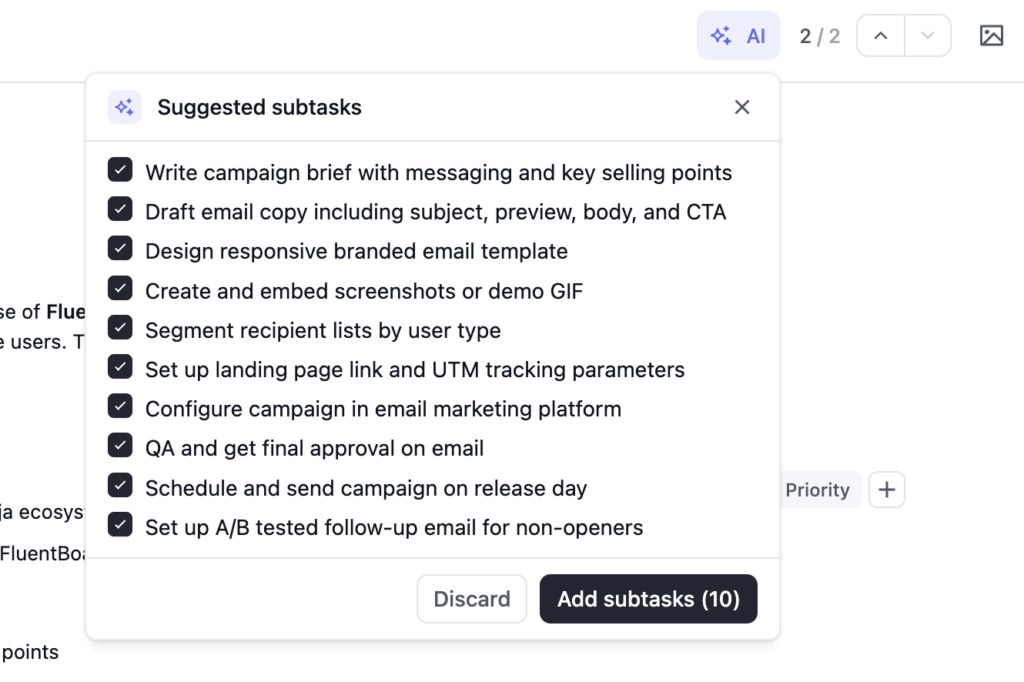
Instead of manually turning a broad requirement into several smaller action items, FluentBoards can suggest a breakdown and help you get the task ready for execution faster.
Generate Subtasks is available in FluentBoards Pro. Since subtasks themselves are a Pro feature, AI-generated subtasks follow the same requirement.
Who Can Configure and Use FluentBoards AI?
The permissions are fairly straightforward. Your admin handles the connection, and everyone else can focus on using it where they work.
Site Admins: Admins control the AI configuration. They can:
- Enable or disable AI
- Choose the provider
- Add or change the API key
- Select the model
- Configure the system prompt
- Test the provider connection
Keeping this at the admin level prevents individual board members from changing the provider configuration or the credentials being used across the site.
Board Members: Once AI has been configured, board members can use the available AI tools on boards they already have permission to access. They don’t need their own API key or a separate AI permission.
FluentBoards AI: Free vs. Pro
Most of the built-in AI experience is available in FluentBoards Free. Here’s how it breaks down:
| Capability | Free | Pro |
| Connect WordPress AI, OpenAI, Claude, or Gemini | Included | Included |
| AI Writing Assistant for task and board descriptions | Included | Included |
| Summarize tasks | Included | Included |
| Suggest labels and priority | Included | Included |
| Generate subtasks | No | Included |
The only Pro-specific AI action here is Generate Subtasks. That’s because subtasks themselves are part of FluentBoards Pro.
One Thing to Know About AI API Costs
There’s one important thing to keep in mind before rolling AI out to your whole team.
FluentBoards doesn’t provide the underlying AI model itself.
When you connect OpenAI, Claude, Gemini, or another supported provider, requests are being made through the account you’ve connected. That means every time someone uses the writing assistant or runs an Ask AI action, the request may count toward usage on that provider account.
That’s also one of the reasons provider configuration stays restricted to administrators. It gives you one central place to control which AI service the team is using.
For teams that would rather avoid manually managing an API key inside FluentBoards, WordPress AI offers another route by handling the AI connection through WordPress’s connector system.
AI Assistance Right Where the Work Happens
There are plenty of ways to connect project management software with AI. And when you want an AI agent to actively operate FluentBoards, MCP opens up some seriously interesting possibilities.
But sometimes you don’t need an agent. You just want help turning an idea into a clear task description. You want a long task summarized before a meeting. You want some sensible labels and a priority without spending time deciding.
Or you want to break one intimidating task into a list of things your team can actually start working on.
That’s what built-in AI in FluentBoards is for.
Set up your preferred AI provider once from FluentBoards → Settings → AI Model Setup, and AI becomes part of the workflow your team is already using.
Thank You!
Let’s redefine project management with FluentBoards!

Follow:


Get Tips, Tricks, & Updates
We won’t send you spam.




Add your first comment to this post