Webhooks allow you to receive data from third parties without writing code or running a server. FluentBoards provides an incoming webhook feature that enables you to create new tasks on your boards.
With this feature, you can assign tasks, add labels, set dates, and utilize other functionalities to complete your tasks. Additionally, you can associate CRM contacts with tasks, streamlining your workflow and ensuring all relevant information is integrated.
This guideline will show you how to add tasks using the webhook feature in just a few simple steps.
Adding Webhook #
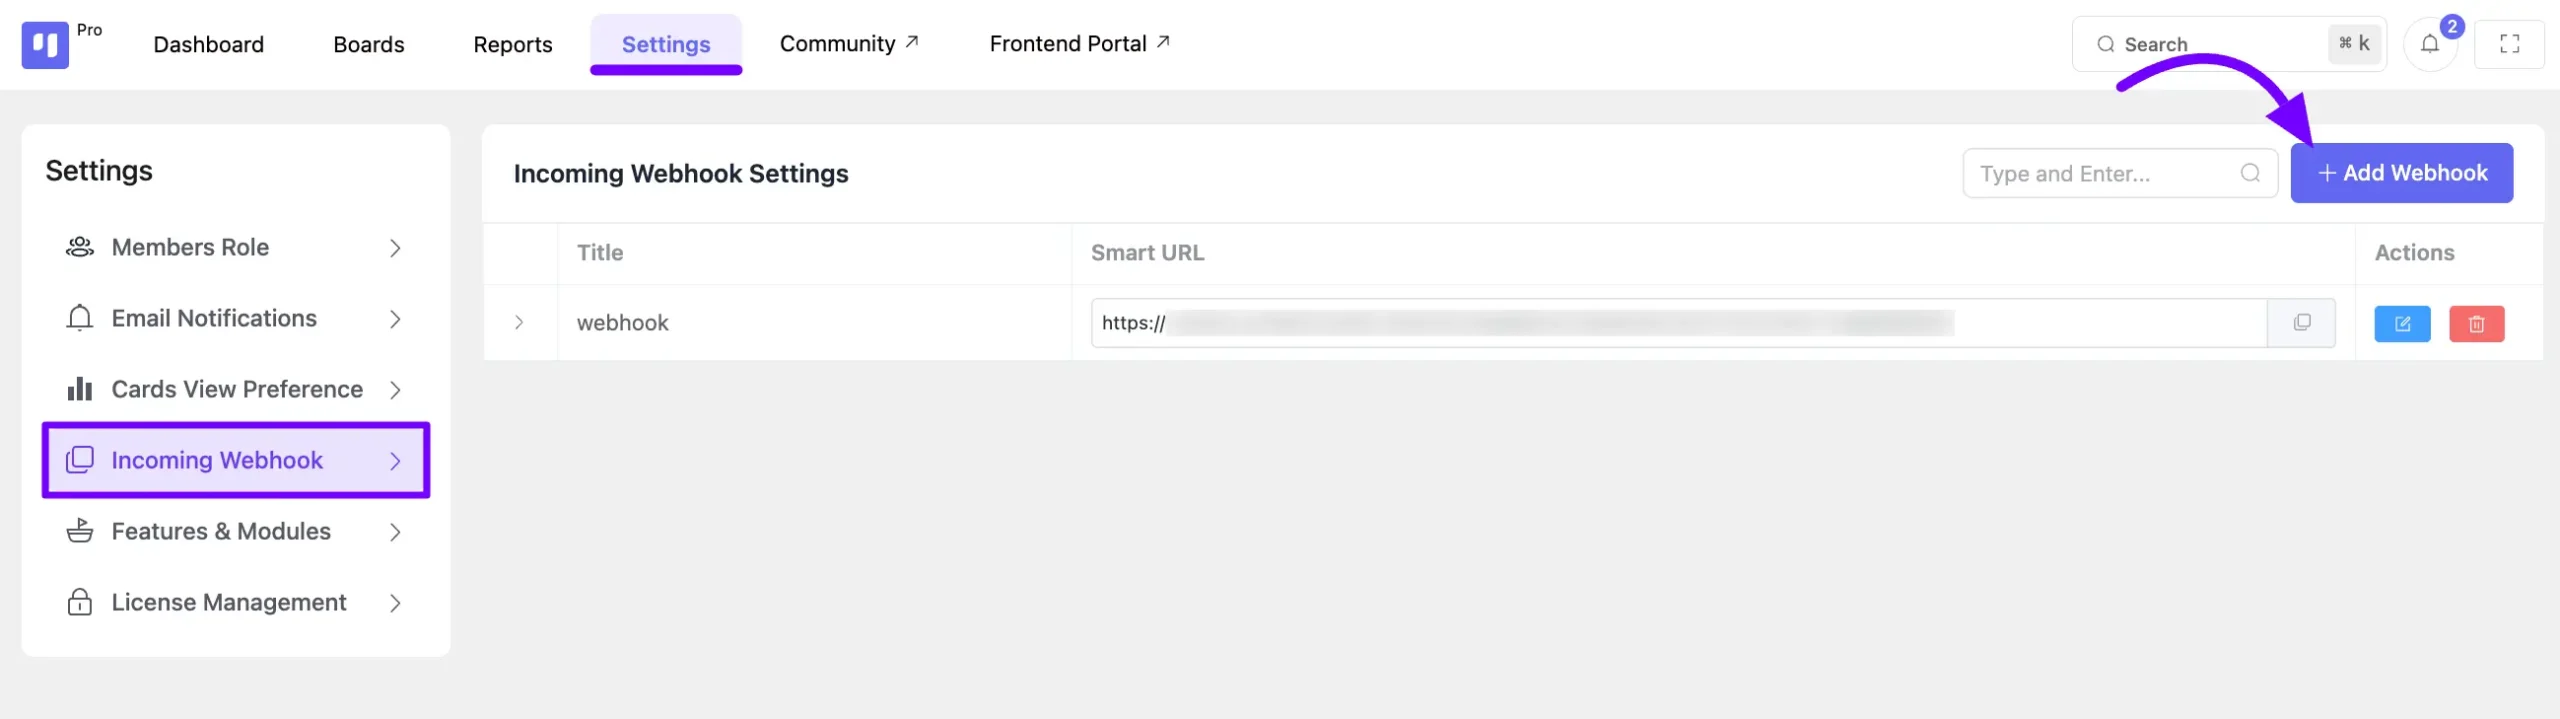
First, go to the Settings of your FluentBoards. On the left sidebar, select the Incoming Webhook option.
Next, click the Add Webhook button to create your webhook.
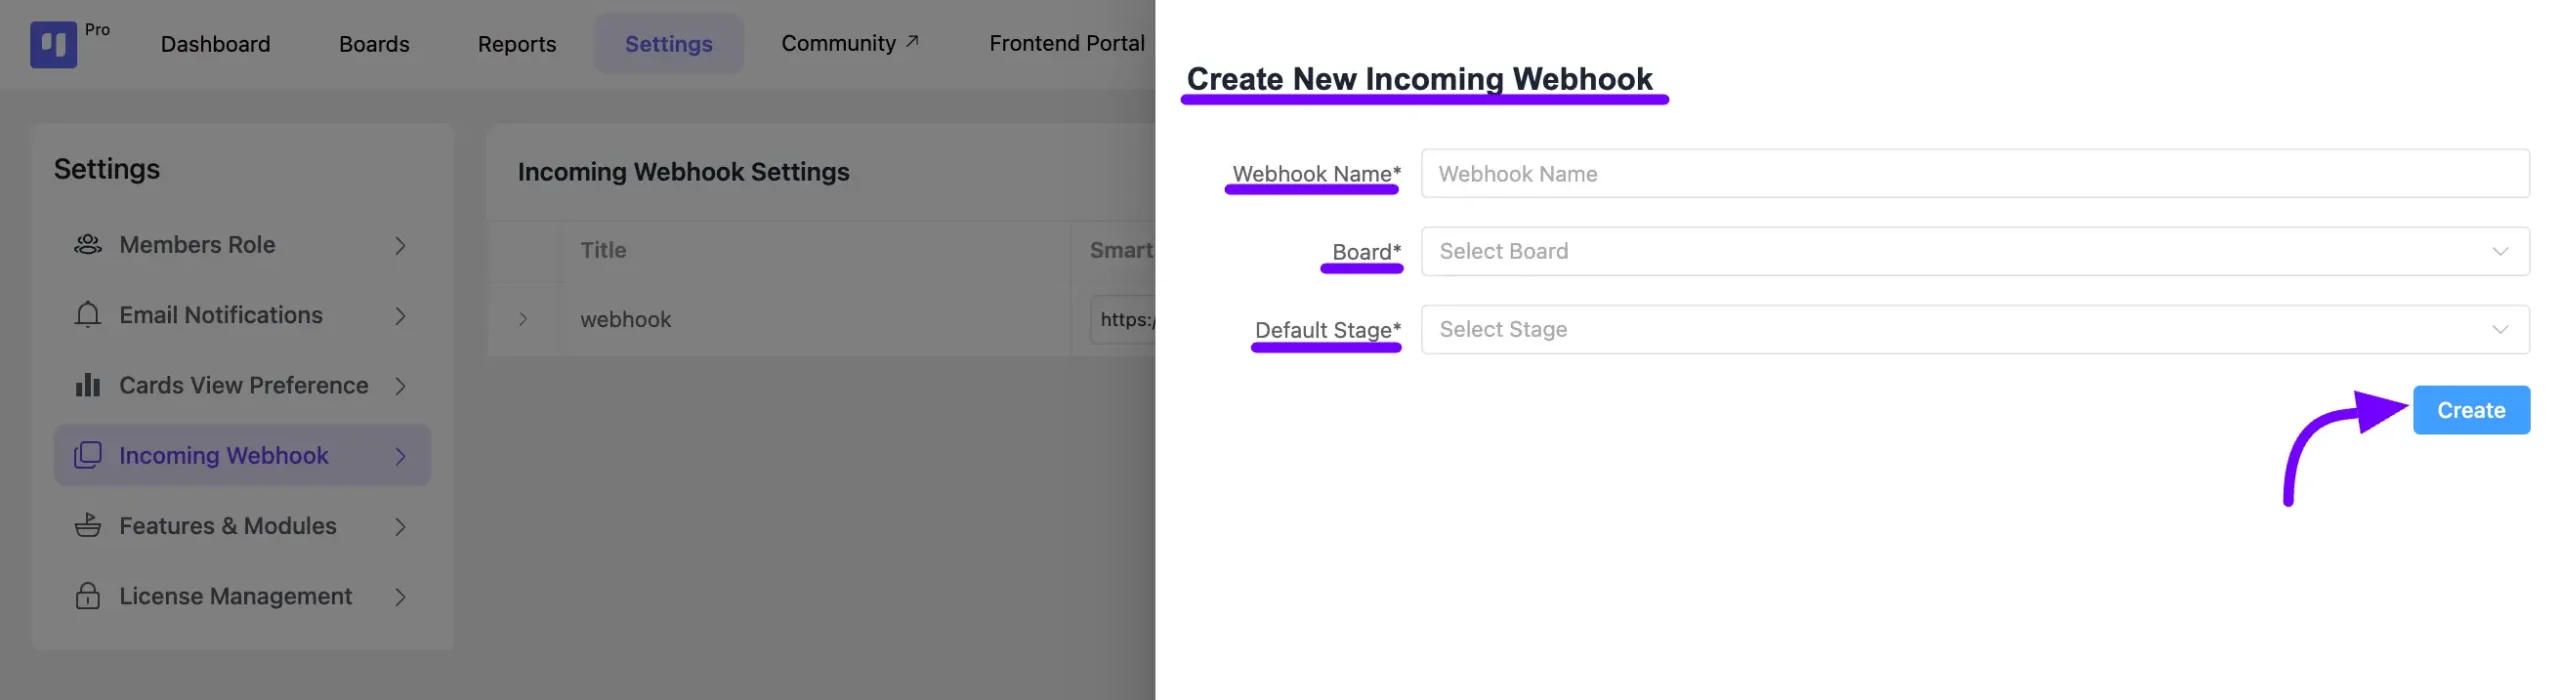
A pop-up will appear from the right side where you need to enter a Webhook Name. Then, select the Board where the task will be saved and choose the Default Stage. Now, click the Create button.
Your webhook is now created, and you can copy the webhook URL. Copy the keys from the Key column to map your data and send it to the desired contact fields.
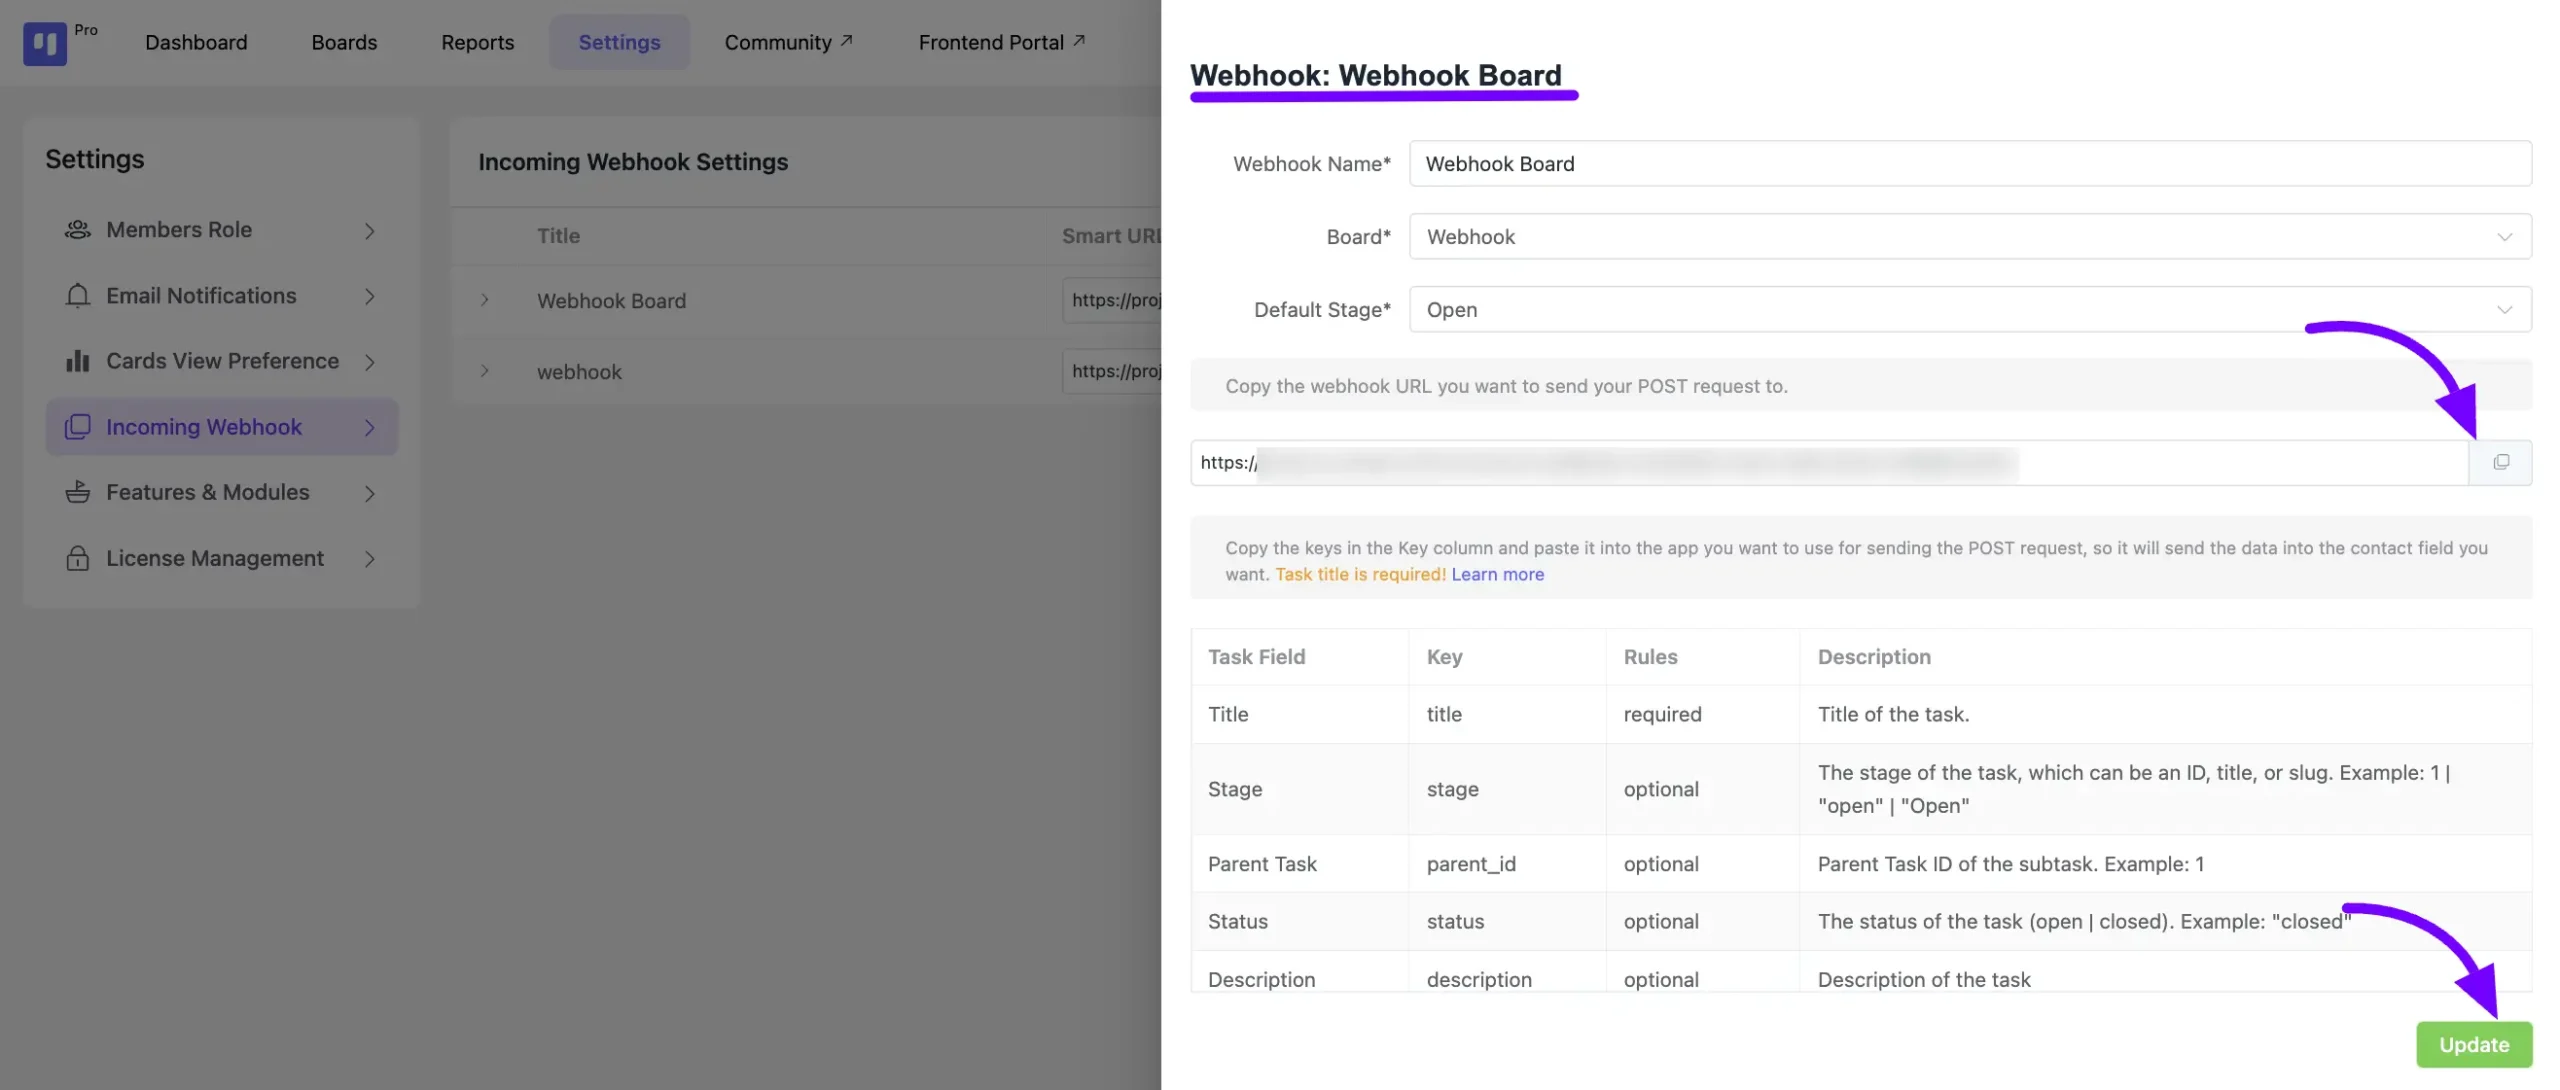
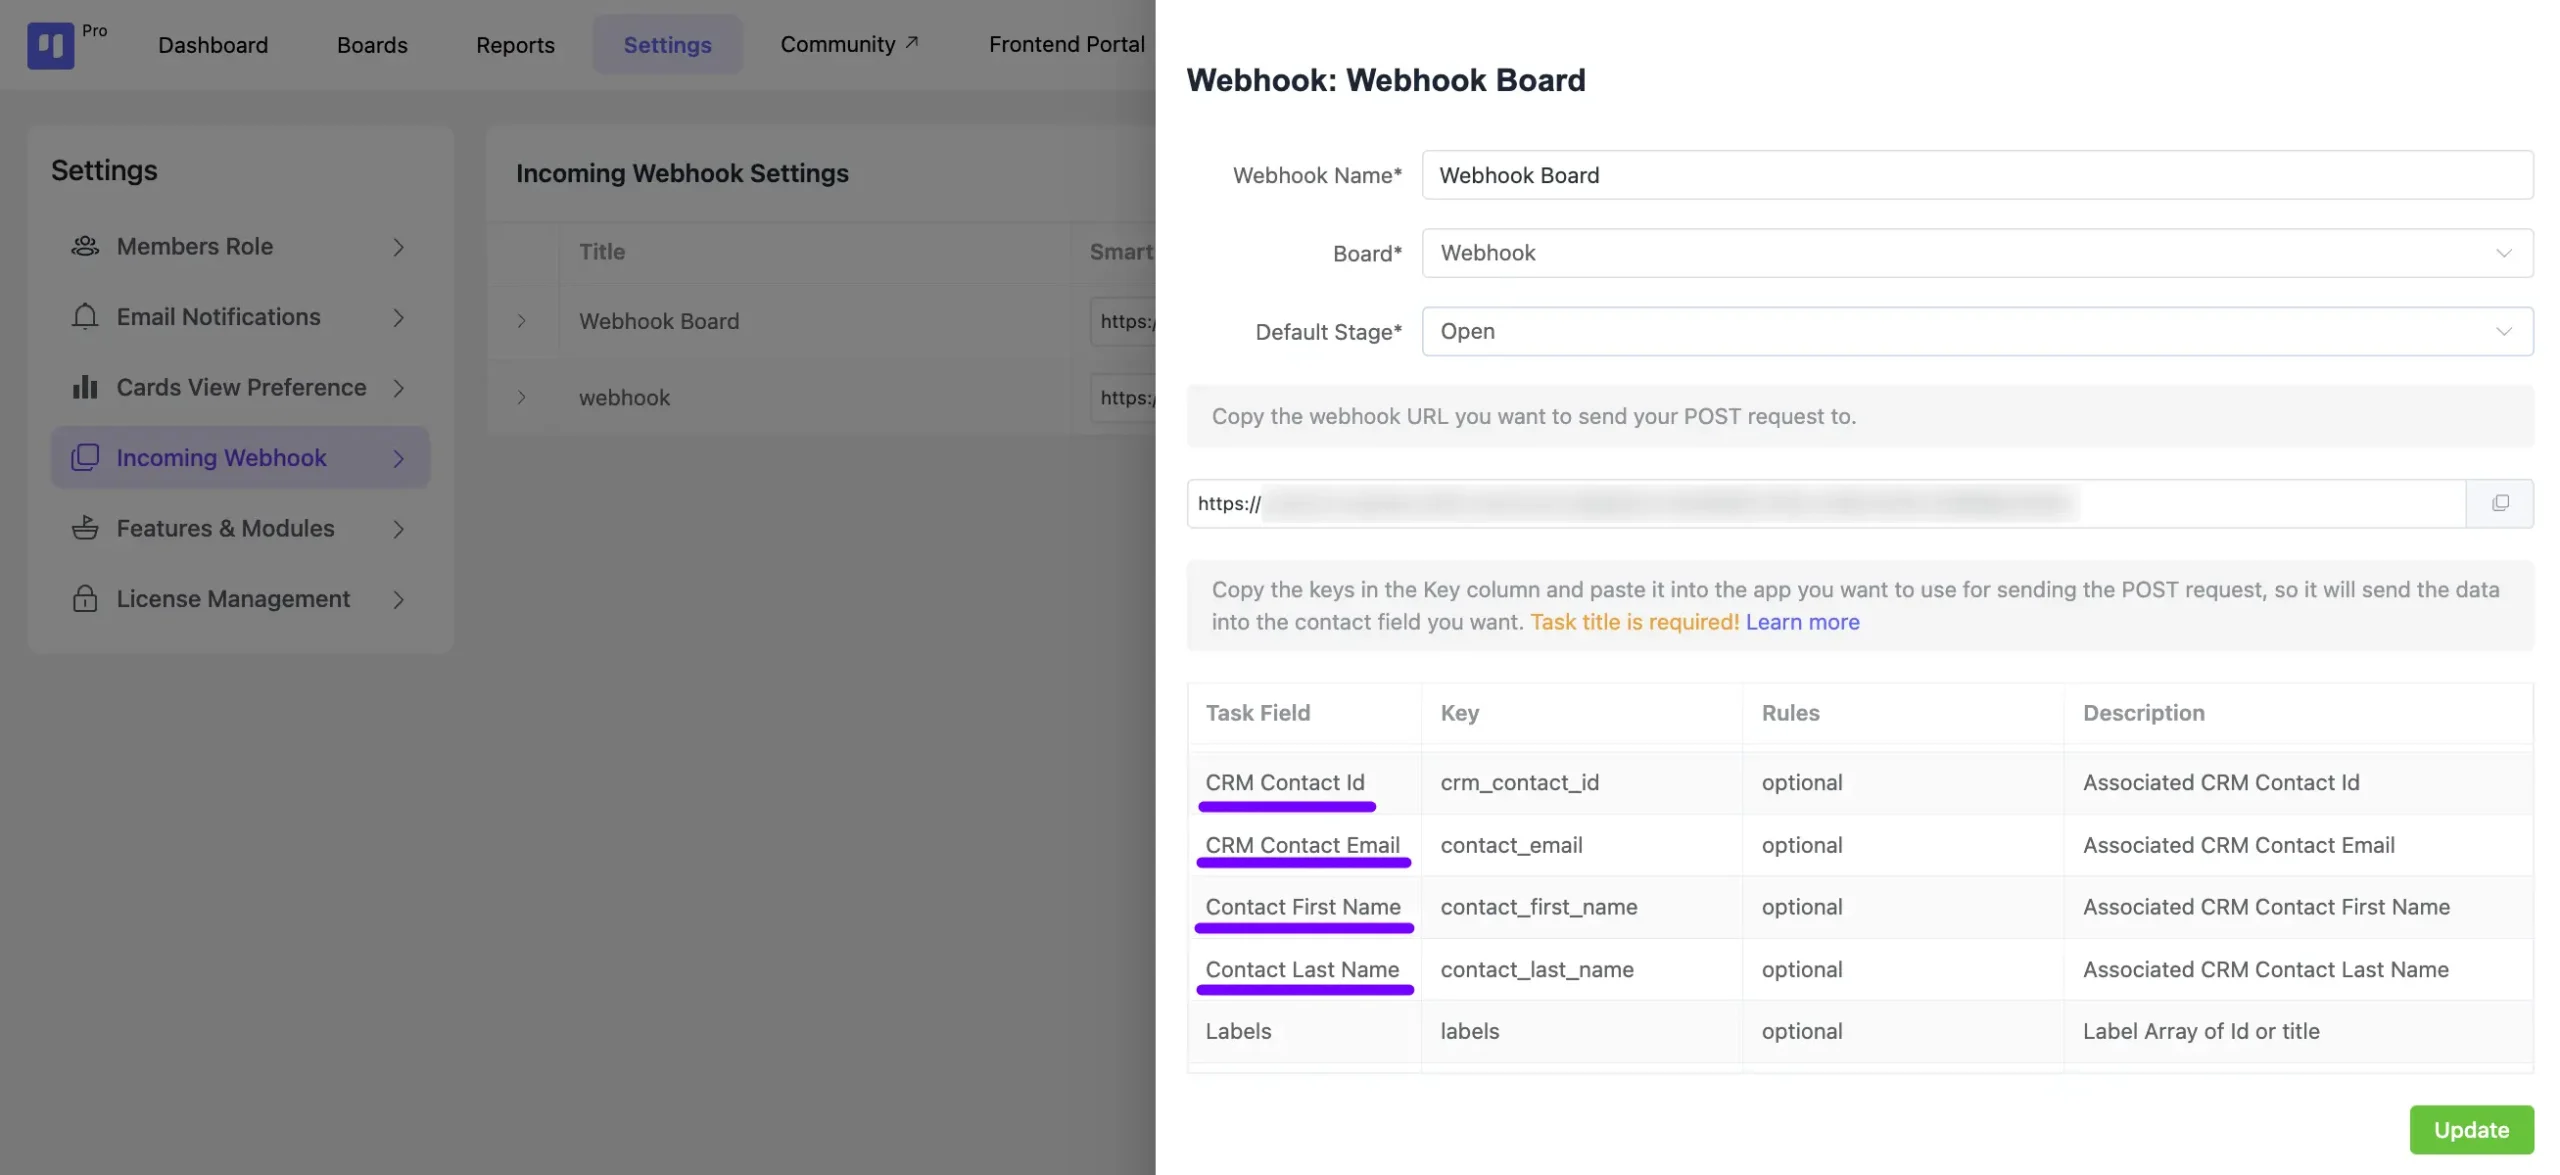
Below in the field section, you’ll find the essential Key for associating FluentCRM contacts with your task. You can link your CRM contacts by their ID, email, first name, and last name. Click the Update button to preserve all your modifications.
Within the Incoming Webhook feature of your FluentBoards, you’ll find a list of all generated incoming webhooks. To view the details of a specific webhook, simply click on the arrow icon with it.
Additionally, next to each webhook, you’ll find a Copy button for copying the webhook and an Edit icon button to modify the webhook settings. If you wish to remove a webhook, just click on the Delete icon button.

Creating a Task using a third-party platform #
In this process, we’ll use Postman to generate a task with the webhook. Access your Postman account. Paste your webhook URL in the POST field here.
Remember, it’s mandatory to include the Title Key. Then, add the necessary keys based on your mapping needs. Once all adjustments are made, click on the Send button to initiate the task creation.
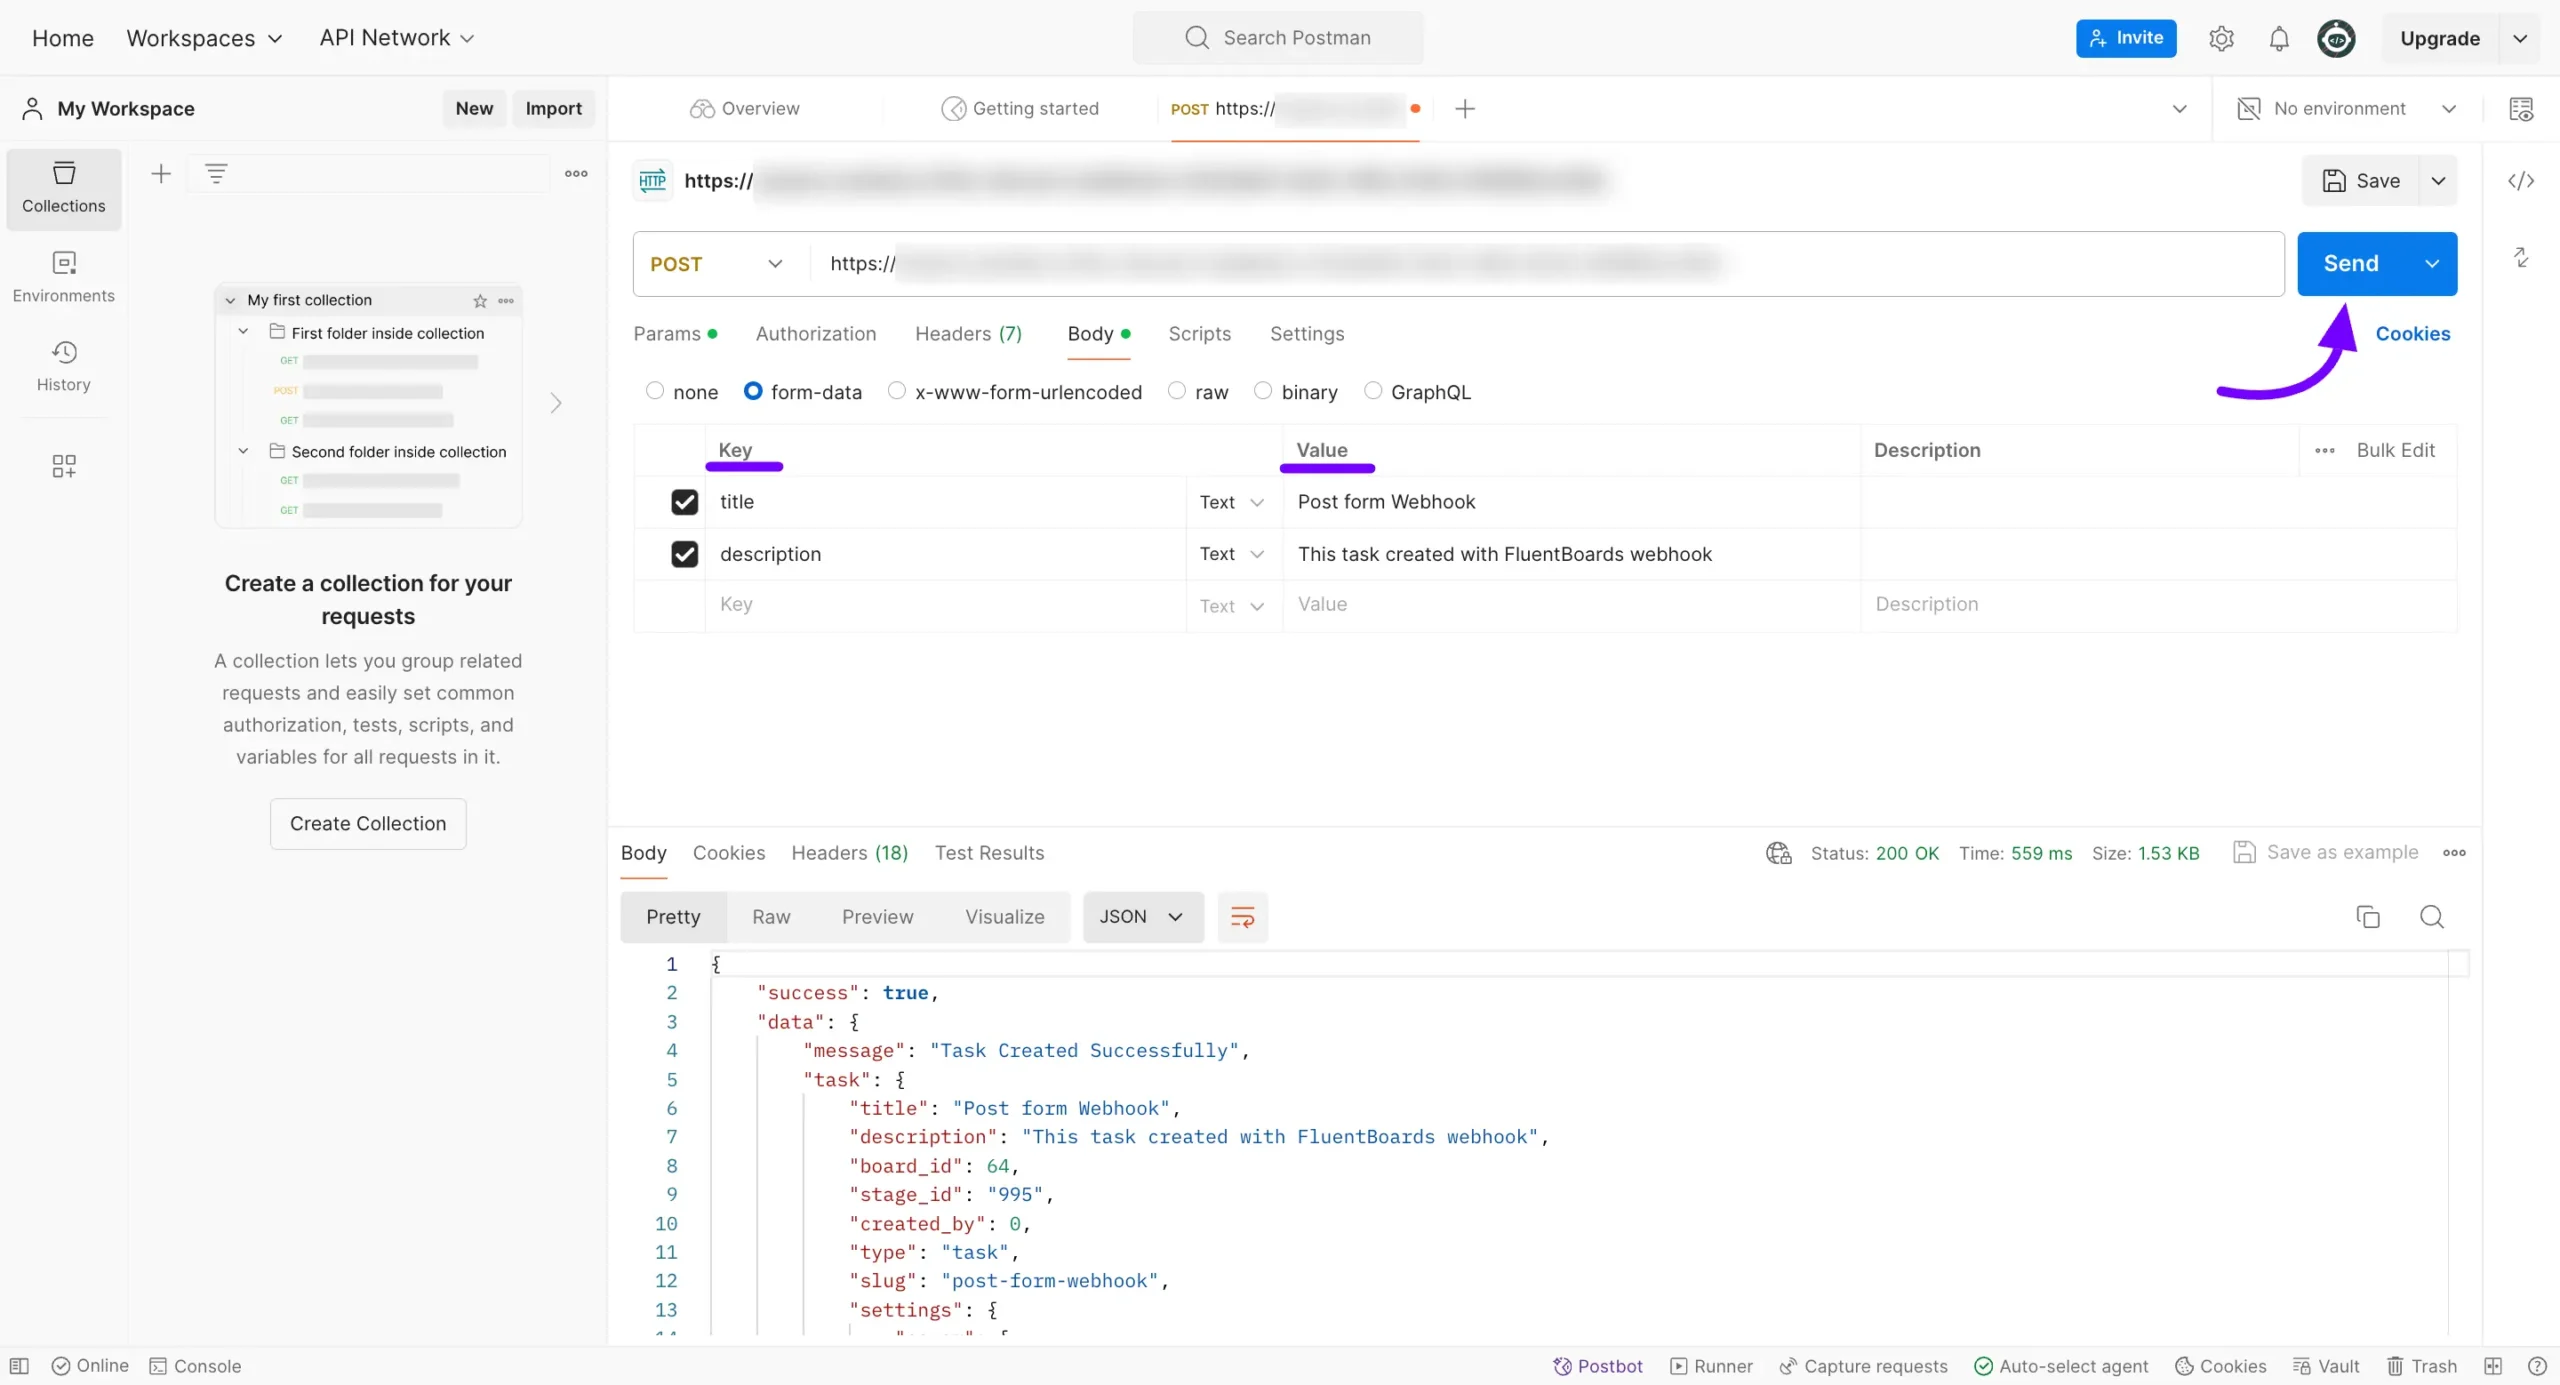
Navigate to the board where you’ve designated task creation from the webhook, and you’ll observe the task successfully appended to your boards.
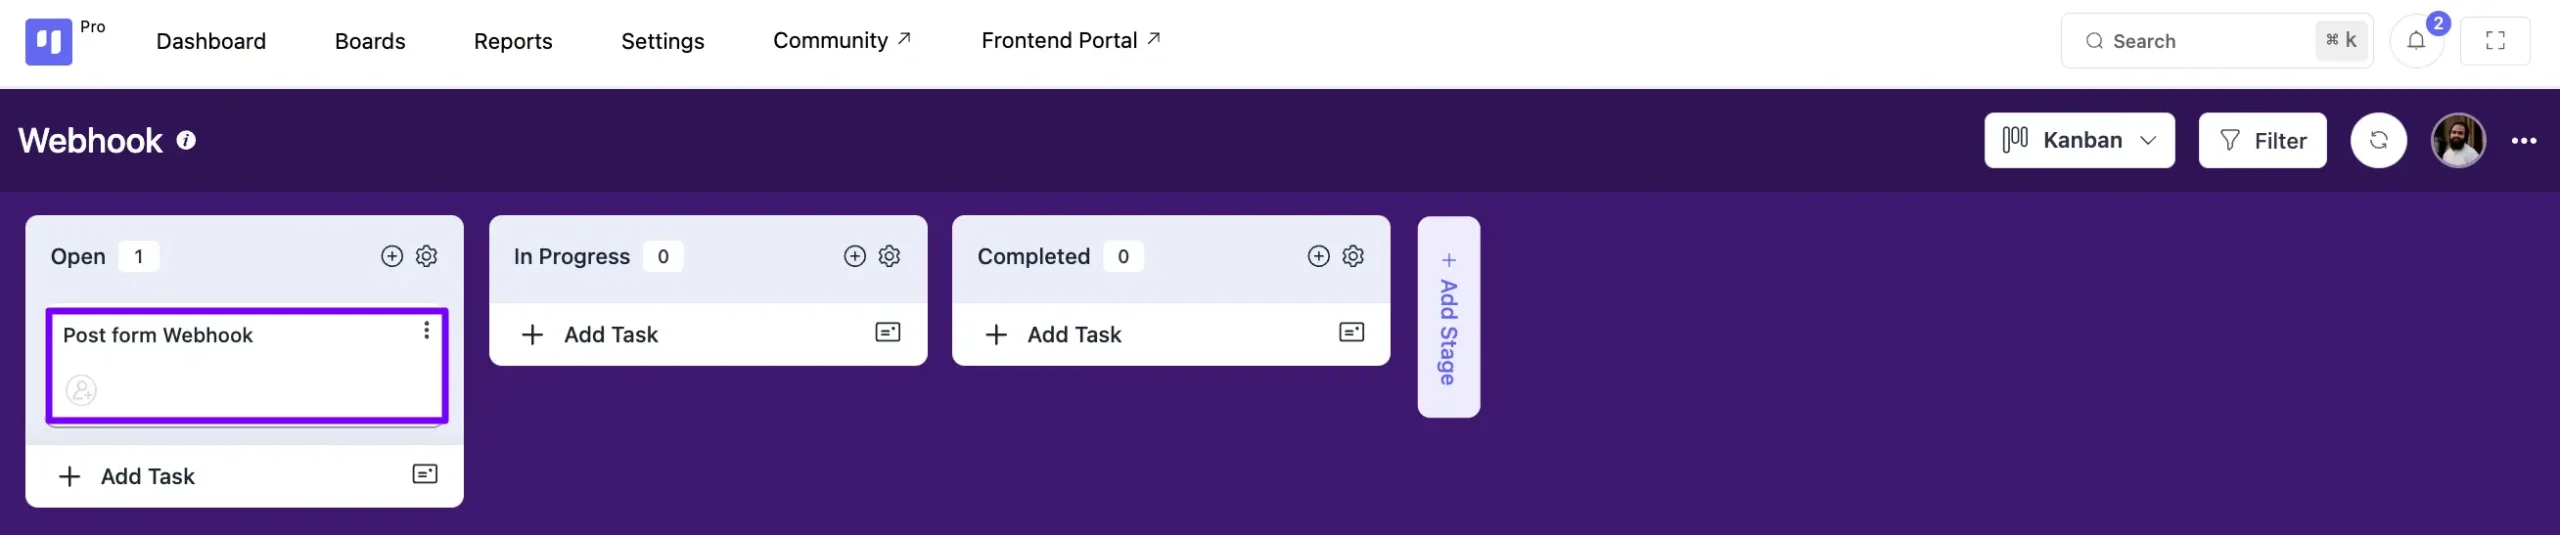
This method shows how to generate tasks using a webhook.


but if we use a platform can send webhook but we cant customize the data send, why you dont permit to us map the webhook data?