Within your boards, you have the flexibility to create as many stages as needed to streamline your projects. Adding a stage to your board is straightforward and comes with a range of features. In this guide, we’ll walk you through the process of creating a stage on the board and explore the features available for the stage.
Add New Stage #
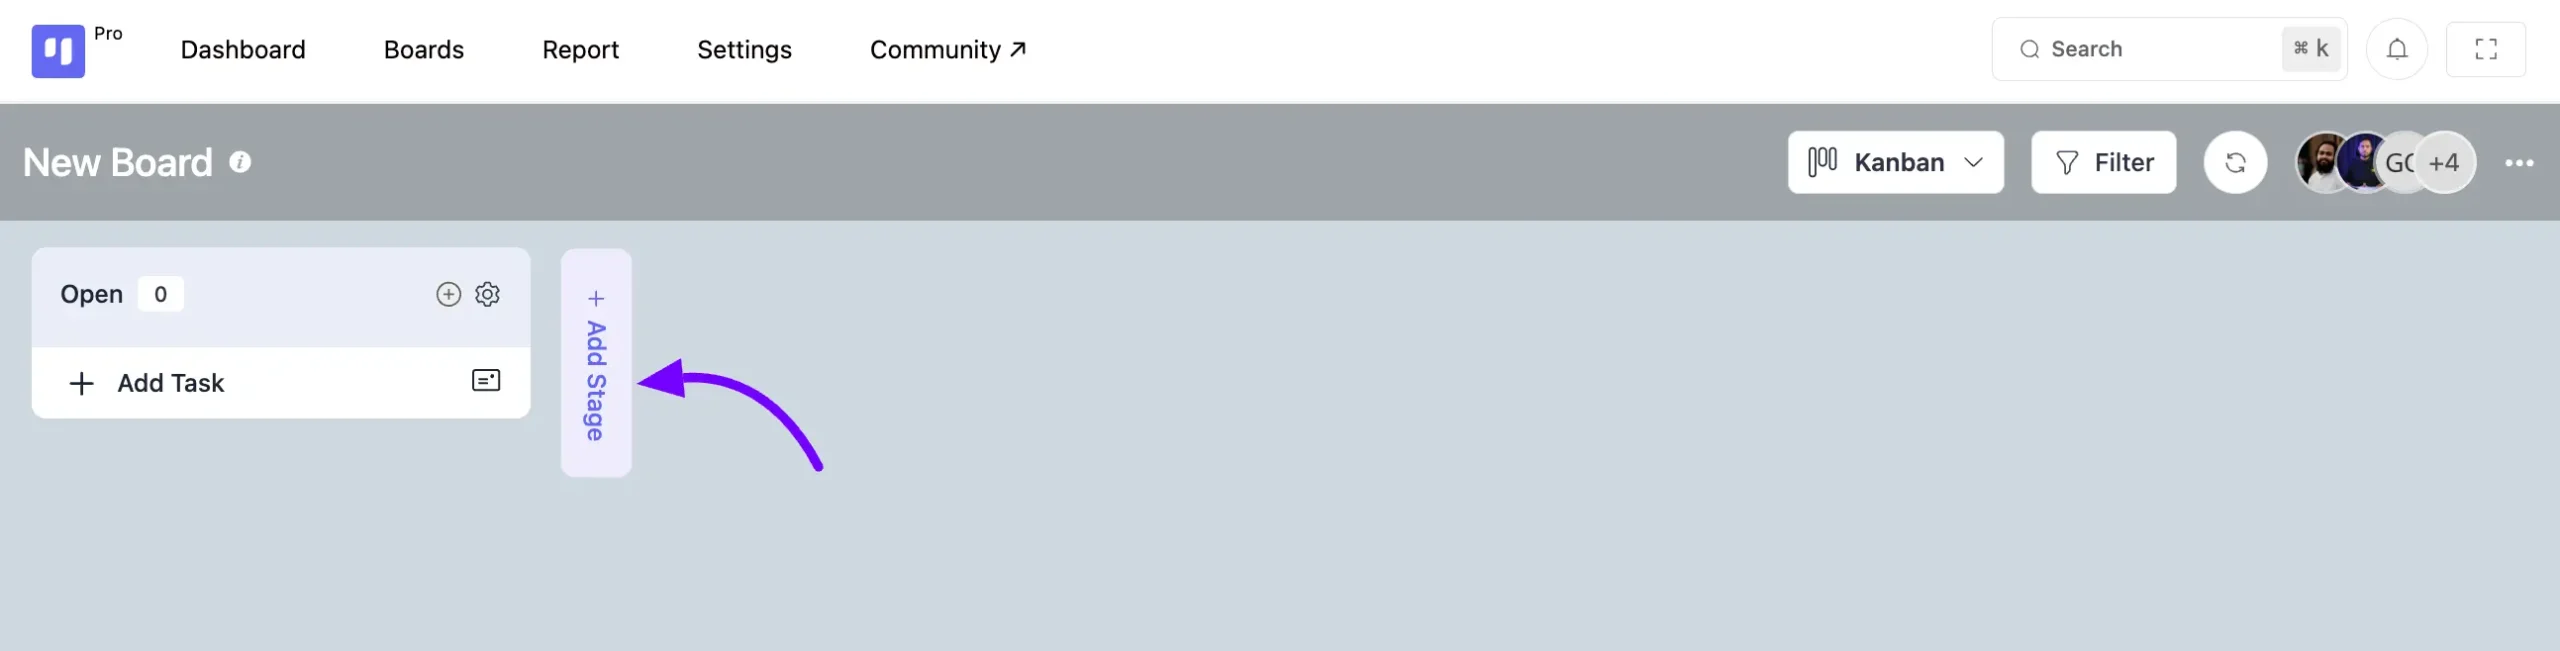
Go to the specific board where you want to add a stage. Look for the Add Stage button on your board, and simply click on it.
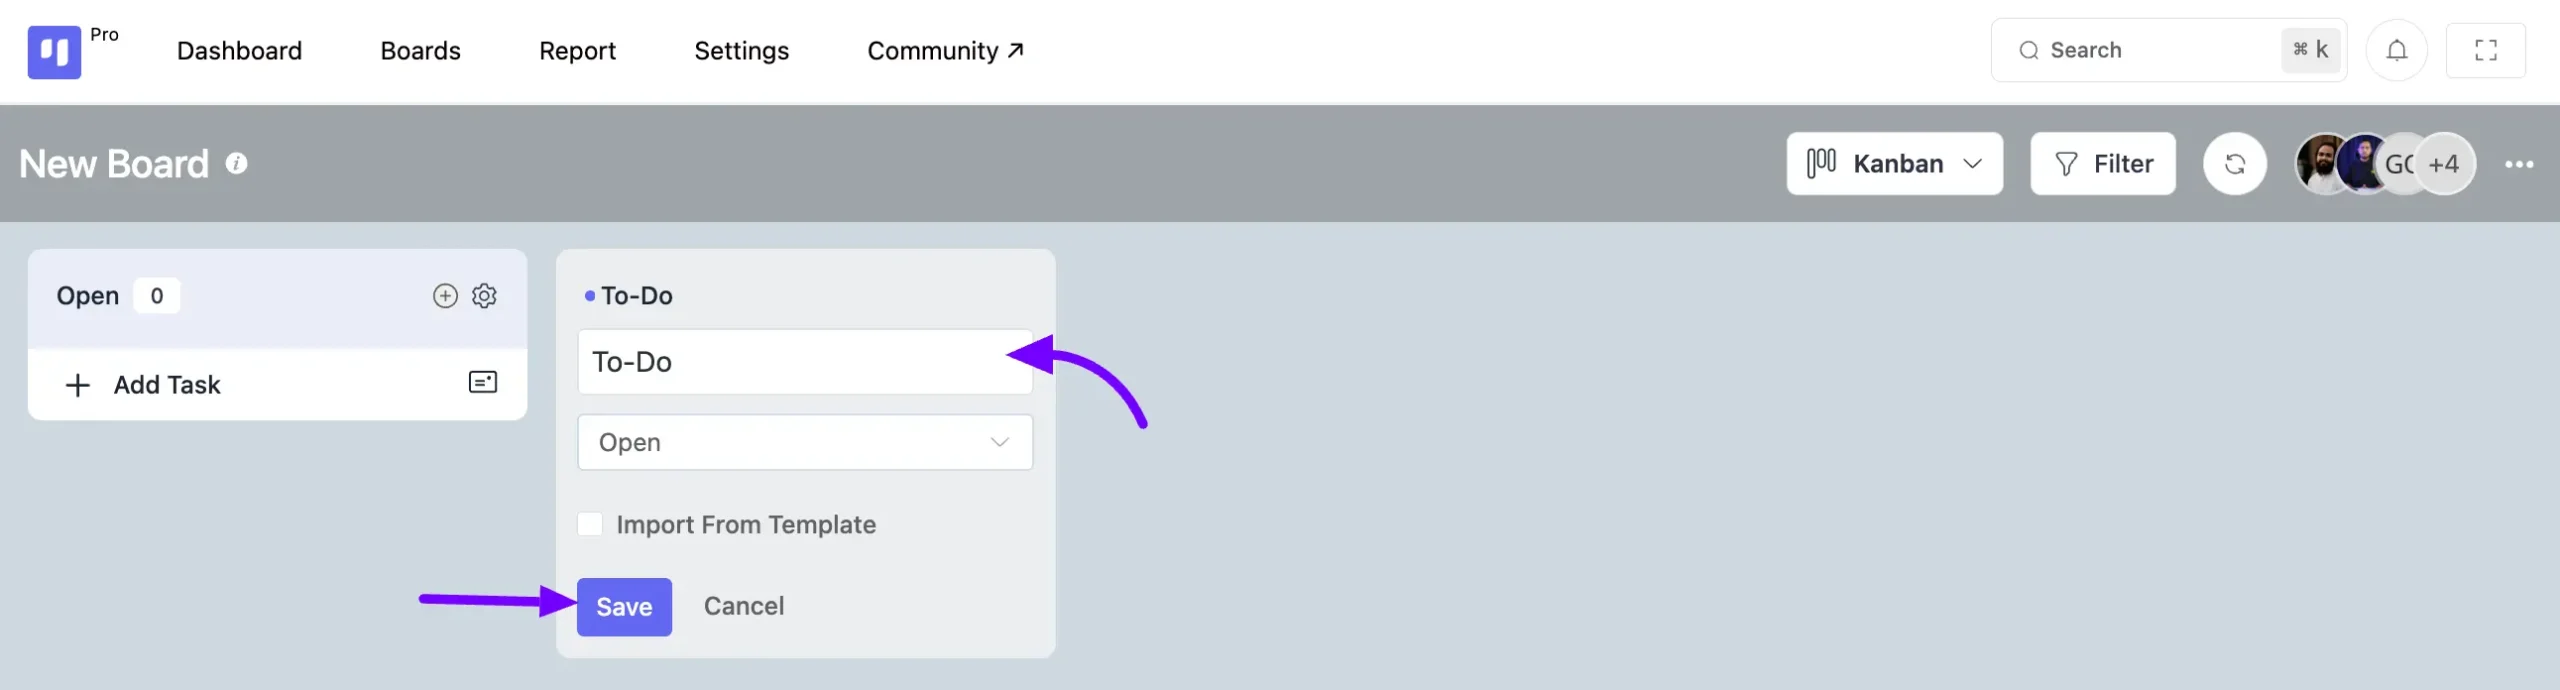
Here, you’ll need to provide a Title for your stage and specify whether it’s Open or Closed from the dropdown list.
Additionally, you have the option to import a stage from templates. Click on the Import From Template button, select the template from the dropdown list, and then click Save to add your stage to the board.
Stage Actions #
At the top right corner of your stage, you’ll find a Settings icon button. Clicking on it will reveal several actions specific to this stage. Below, we’ll detail all the available actions for your Stage.
Copy Stage: This action duplicates the stage, creating another identical stage.
Set Status Closed: This action toggles the stage status between open and closed.
Reorder Stage: Opens a pop-up allowing you to rearrange the stage order using drag and drop. Also, you have the option to rearrange your stages in boards using the drag and drop feature.
Sort by: Filters stage tasks by Date Created (Newest First), Date Created (Oldest First), or Task Name (Alphabetically).
Move All Tasks: Moves all tasks to any stage within the board.
Make Template: Converts the stage into a template for future use in other boards.
Change Background: Customize the background for this stage.
Default Assignees: Set a person to automatically be assigned to tasks added to this stage.
Archive All Tasks: Archives all tasks within the stage.
Archive This Stage: Archives the current stage.

Create Intermediate Stage #
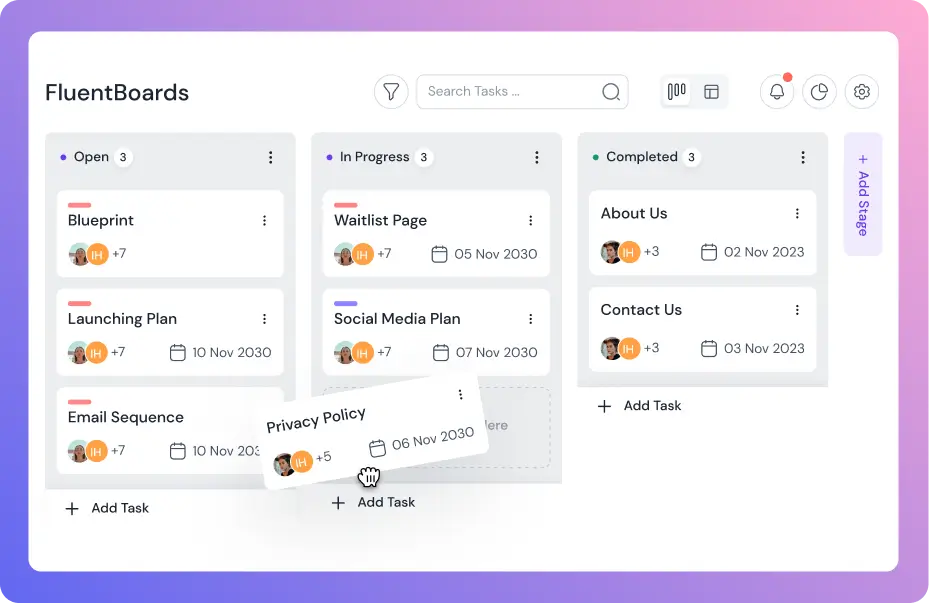
You can instantly create a stage in FluentBoards. Simply navigate between two existing stages, and you’ll see an Add Stage button. Click on it to create a new stage between those two stages.
That’s the process for creating and managing stages in boards. If you have any further questions, don’t hesitate to reach out to us.


how can we delete the stage instead of just archive?