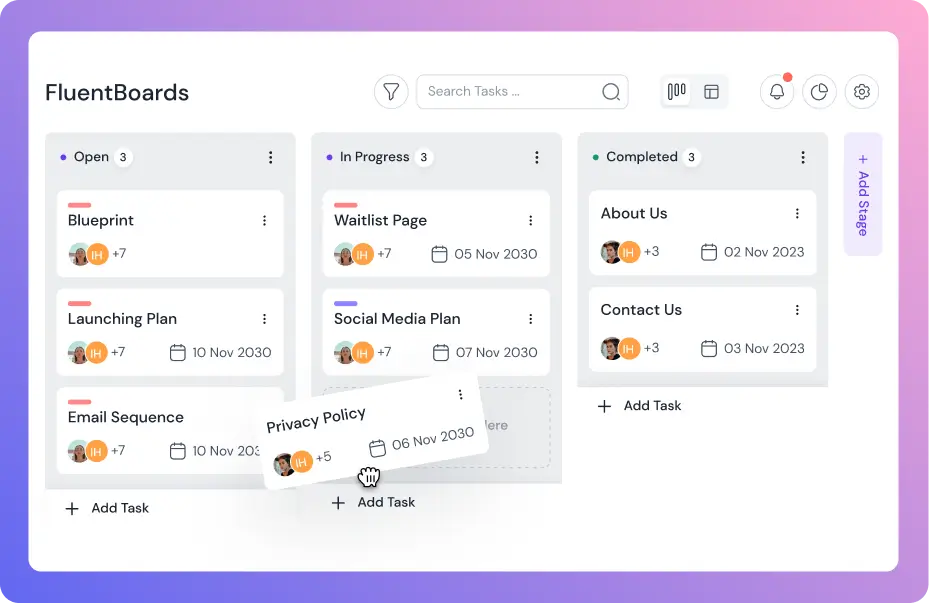
When you first install FluentBoards, you’ll be guided through the onboarding process to set up your first board.
Creating Your First Board #
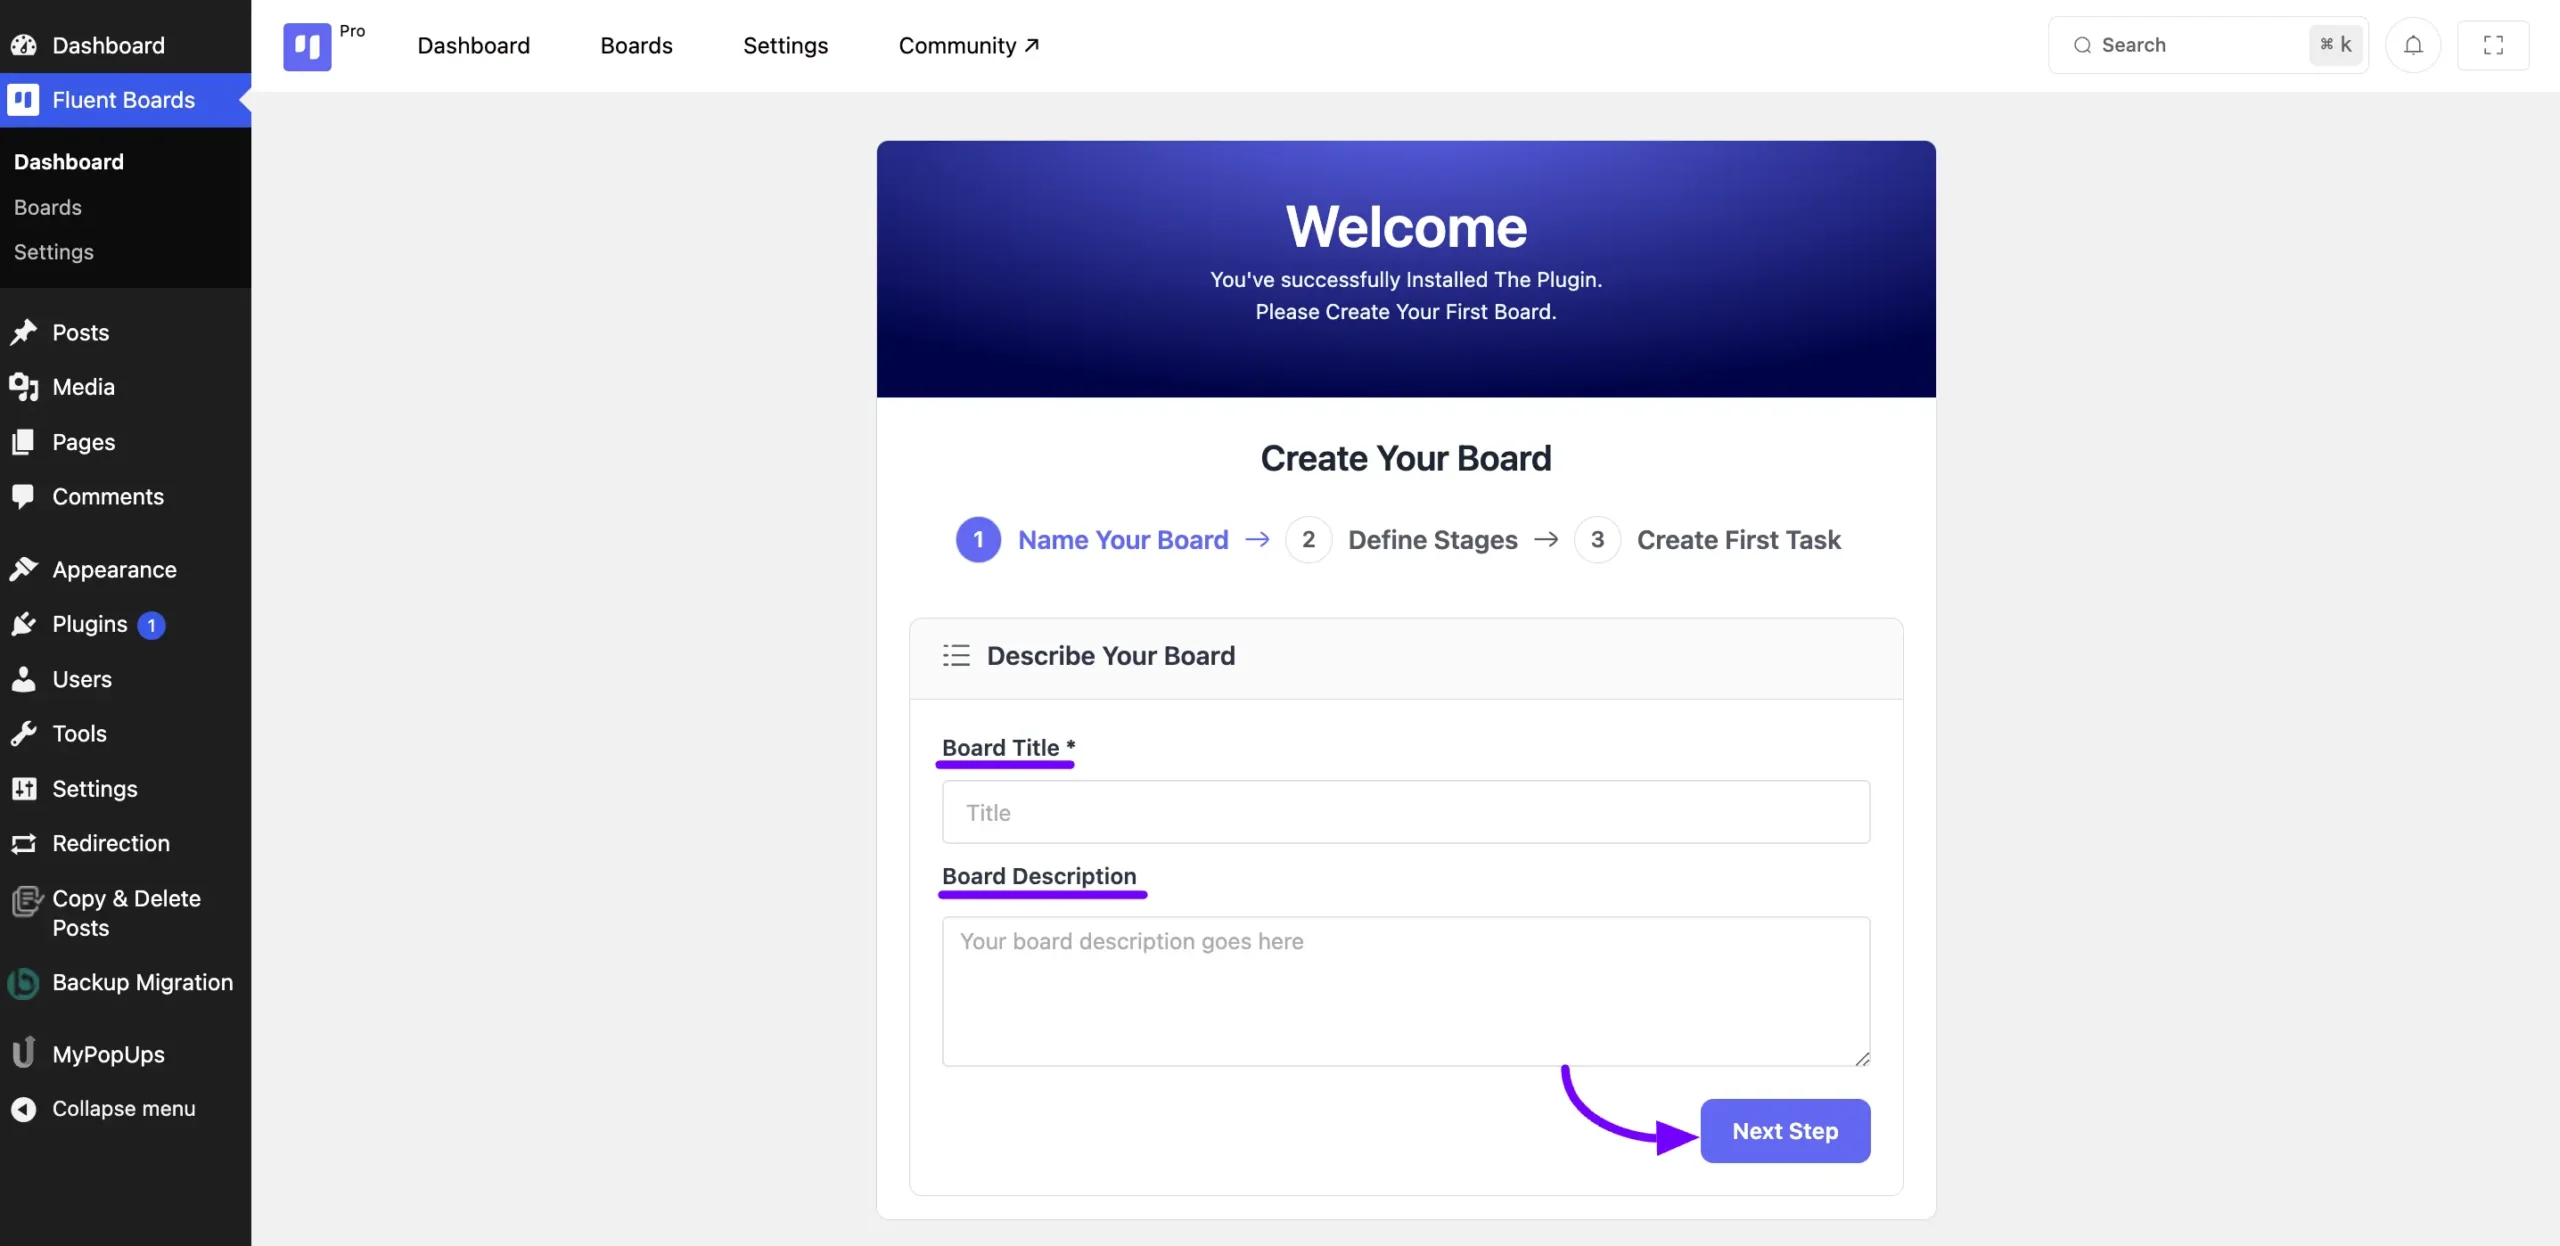
To begin, you’ll need to create your initial board by providing a Name and Description. Once done, click on the Next Step button to proceed.
Customizing Stages #
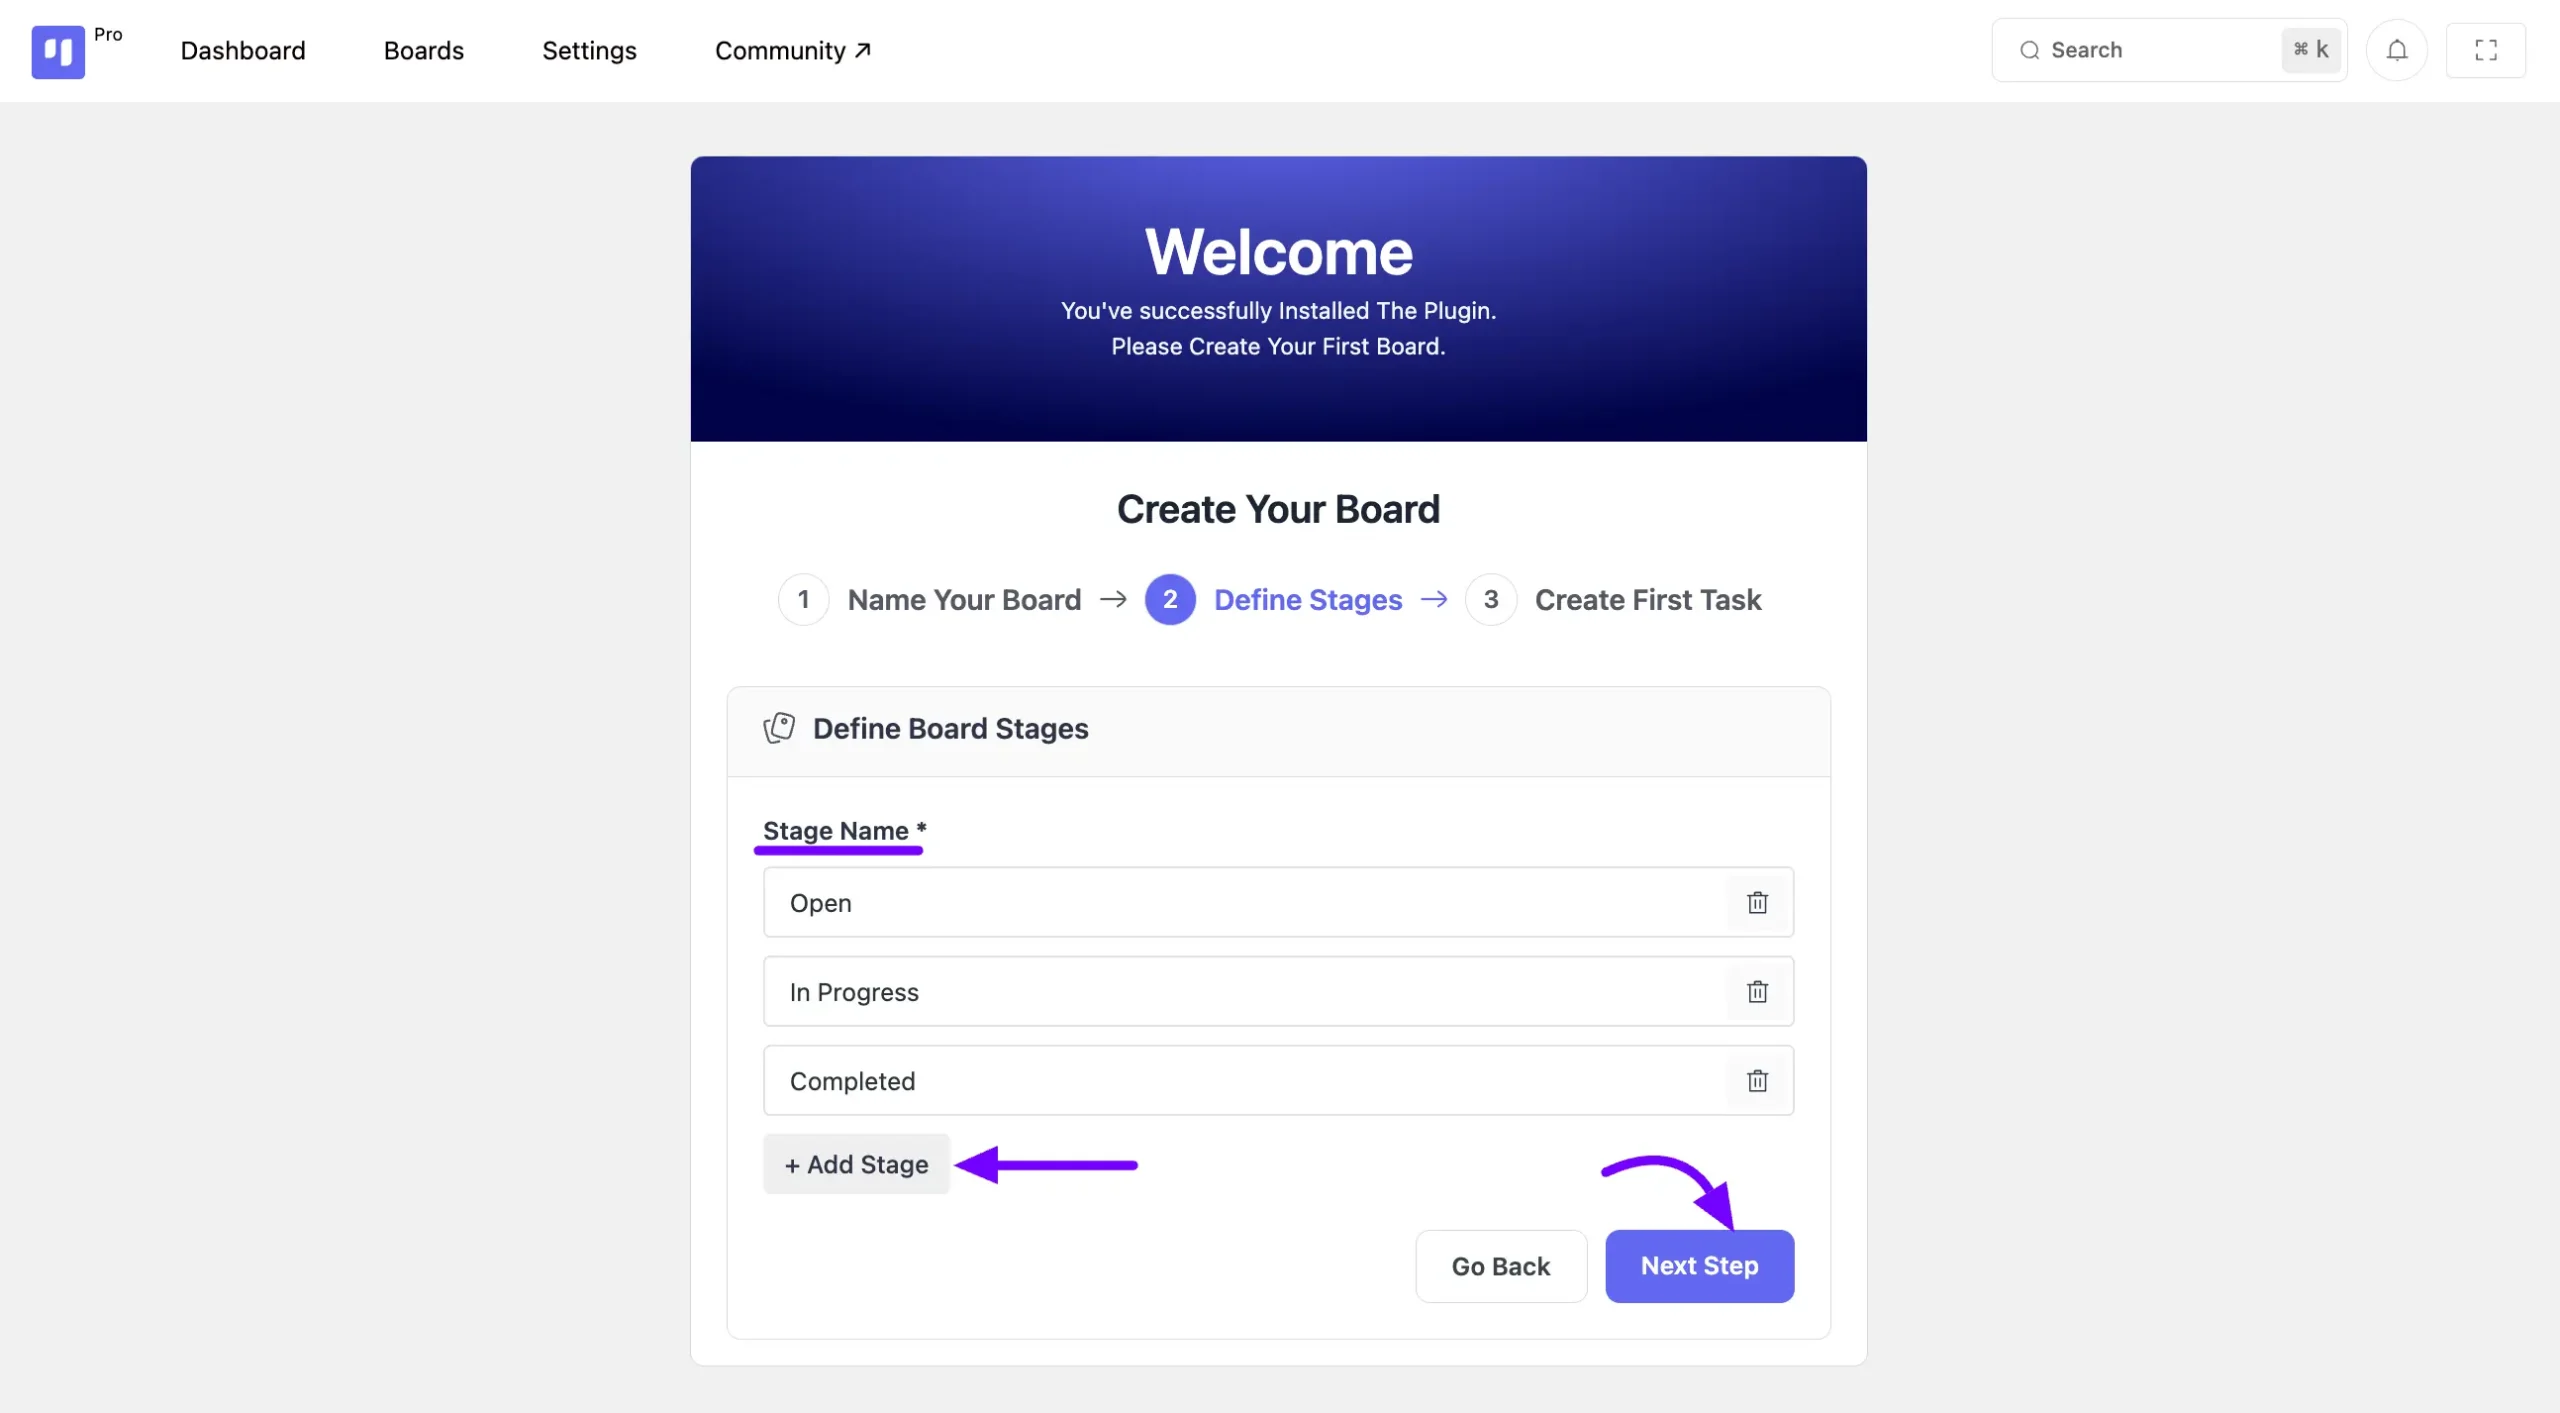
By default, FluentBoards provides three stages: Open, In Progress, and Completed. If you require additional stages, simply click on the Add Stage button.
Conversely, you can delete any default stages by clicking on the Delete icon button next to them. Click on Next Step once you’ve customized your stages.
Adding Task #
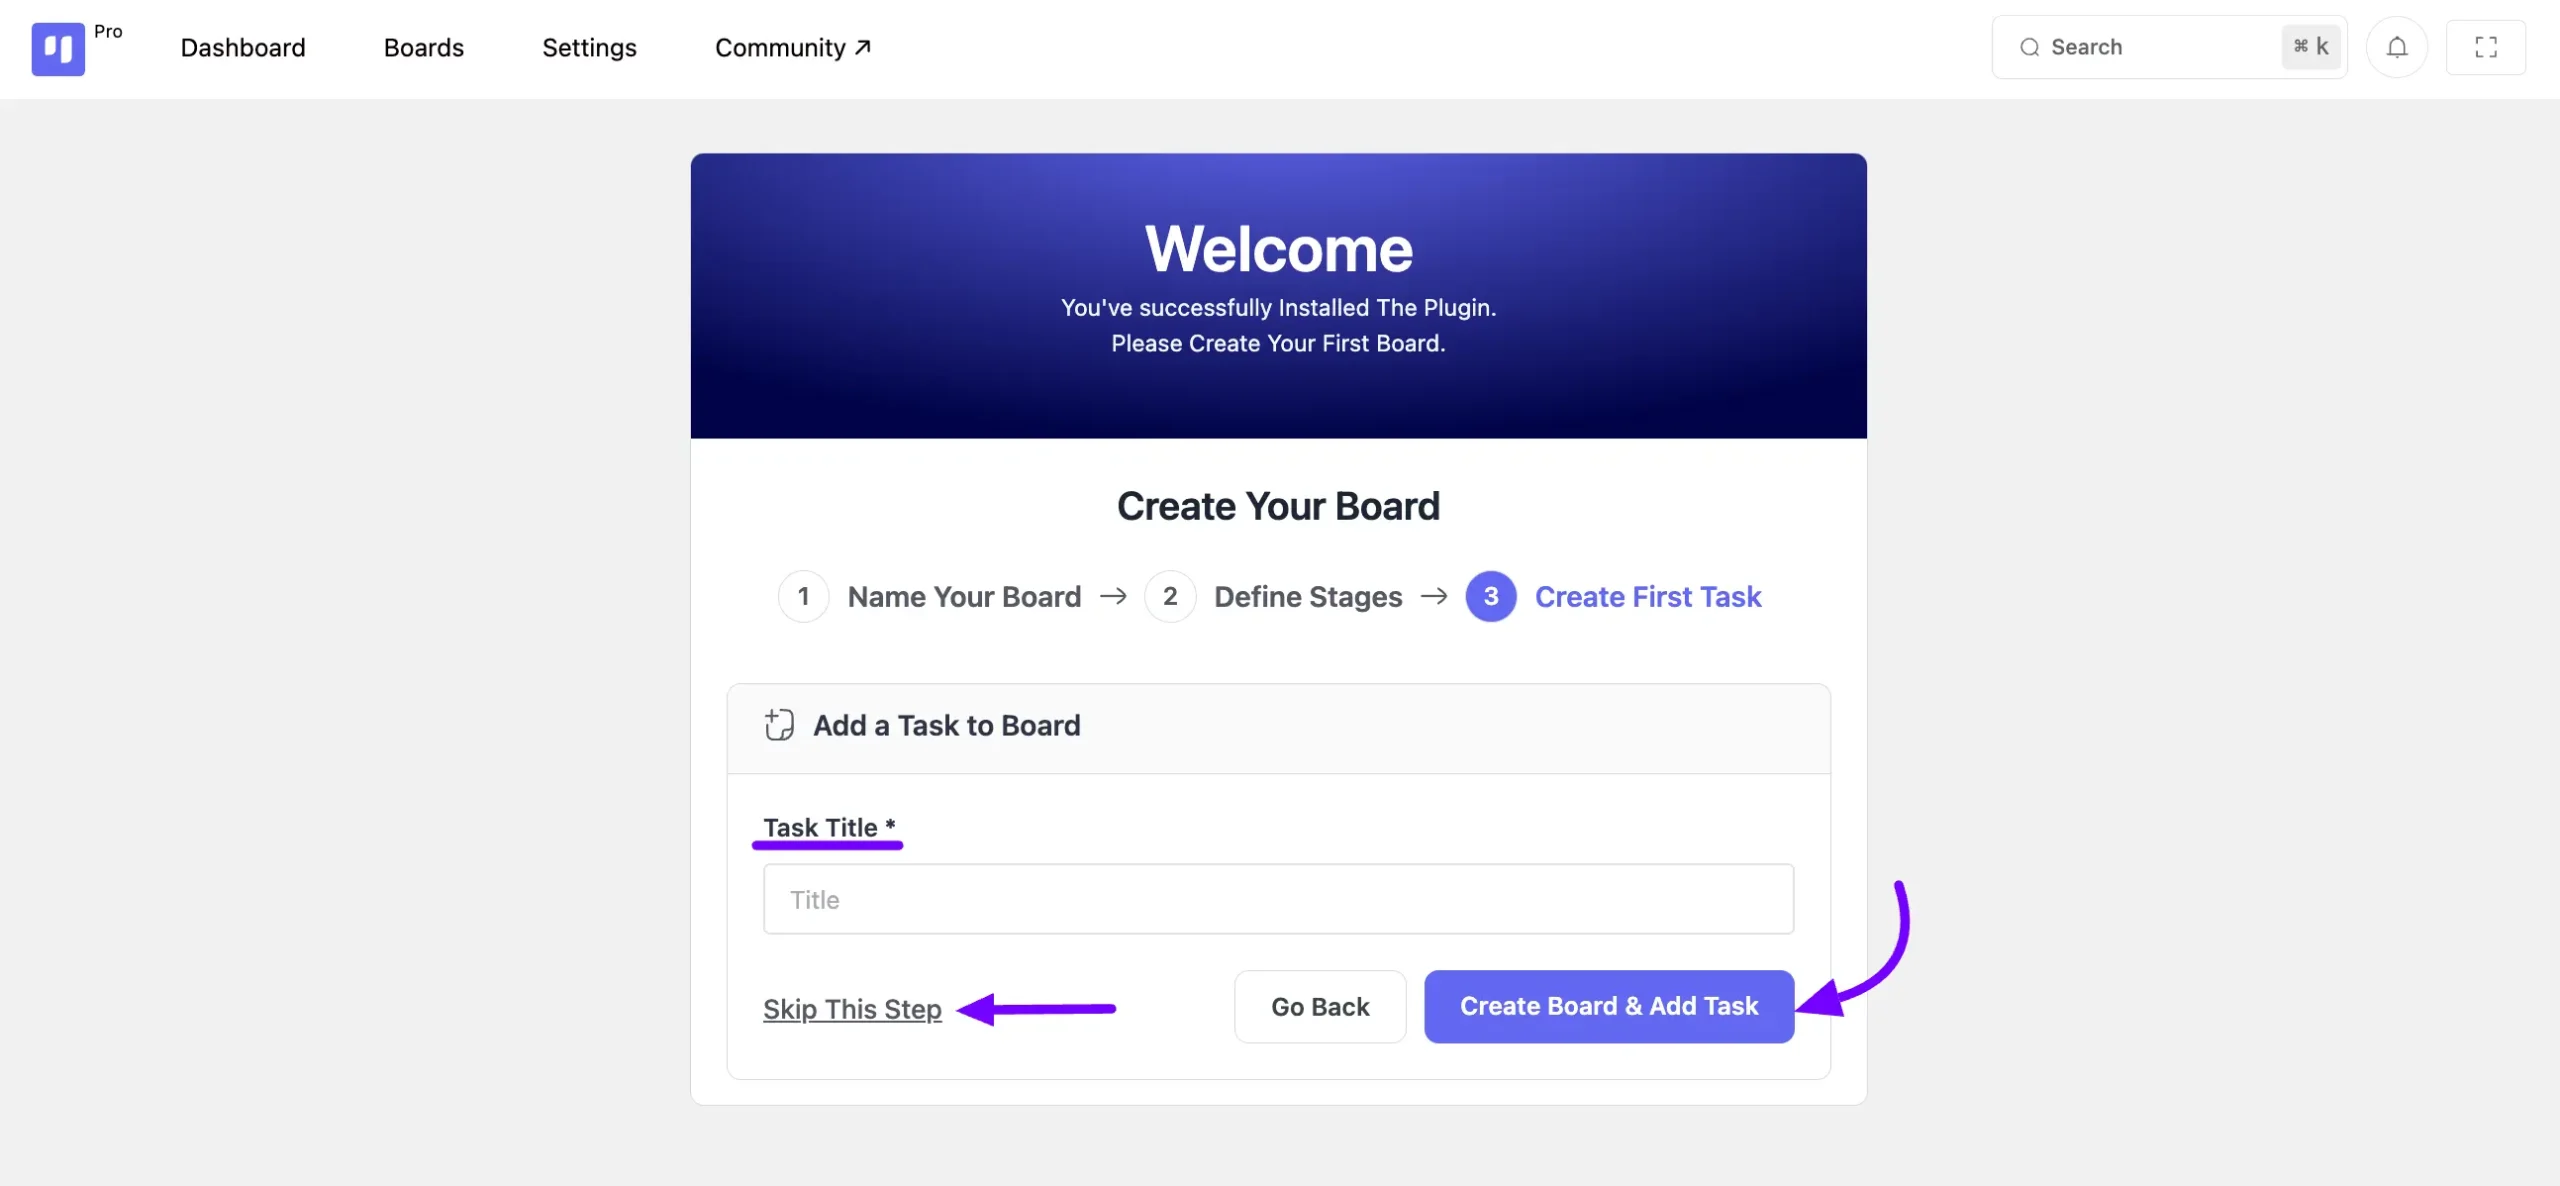
Finally, if you wish to add tasks to your board, you can do so here. Simply give your task a title and click on the Create Board & Add Task button.
Alternatively, if you prefer not to add tasks at this time, you can Skip this Step.
Following that, you’ll gain access to your boards, where you can organize various elements, including the association of FluentCRM contacts.
This simple onboarding process ensures that you can quickly set up your Boards and begin organizing your Tasks efficiently.


