The Outgoing Webhooks feature in Fluent Boards provides a powerful way to connect your project management workflow with thousands of other applications and services. By using webhooks, you can send real-time data from your boards to external platforms, enabling automation and integration.
This guide will provide a detailed overview of how to configure and manage Outgoing Webhooks within Fluent Boards.
Common Use Cases:
- Real-time Notifications: Send a message to a Slack or Discord channel when a new task is assigned.
- Workflow Automation: Use services like Zapier or Make to trigger multi-step workflows, such as creating a Google Calendar event when a task’s stage is changed.
- Data Logging: Add a new row to a Google Sheet or Airtable base every time a task is completed, creating a log of your team’s accomplishments.
- Custom Integrations: Send task data to a custom-built application or a third-party API for advanced processing.
Configuration Steps #
Configuring your webhook is a straightforward process.
Step 1: Navigate to the Webhook Settings #
- From your WordPress Admin Dashboard, navigate to Fluent Boards → Settings.
- Select the Outgoing Webhooks tab from the left-hand menu.
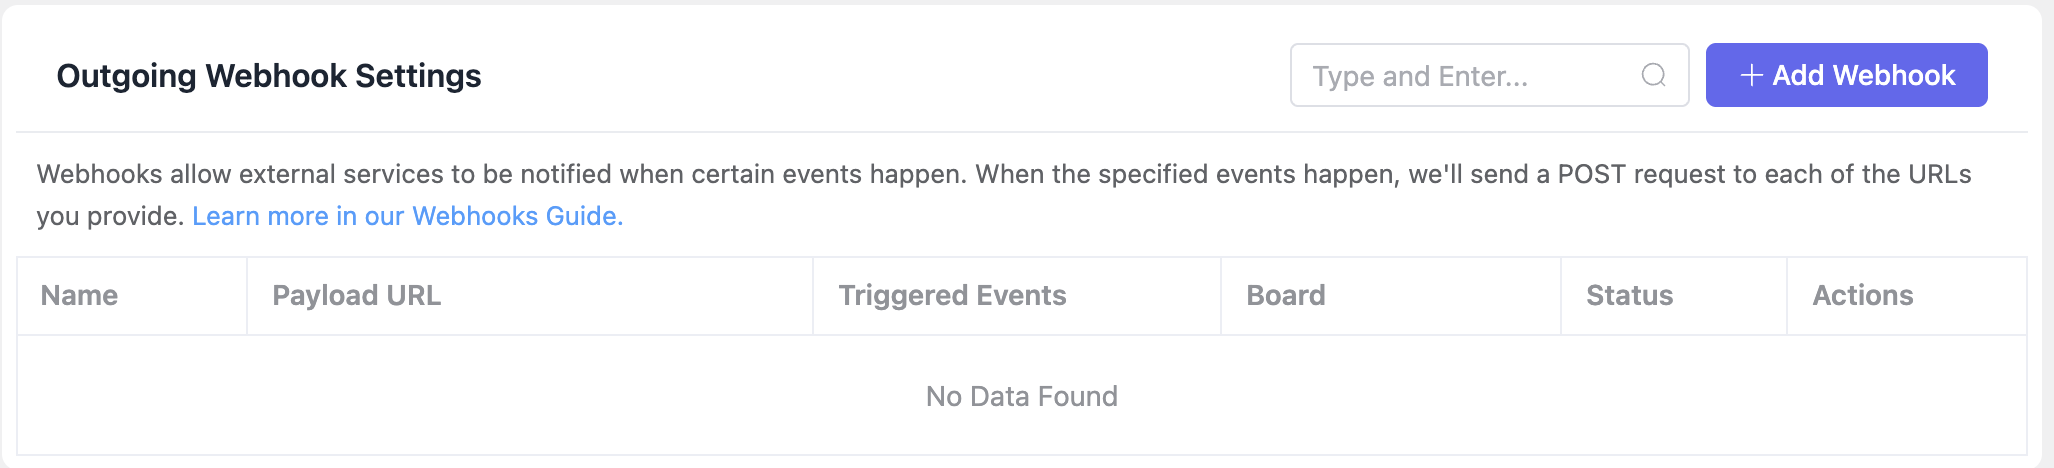
This screen is your main dashboard for managing all created webhooks. You can view their status, see which events trigger them, and perform actions like editing or deleting them.
Step 2: Create a New Webhook #
Click the “+ Add Webhook” button to open the configuration form. Below is a detailed explanation of each field.
Status: This is the main on/off switch for your webhook. Turn it on when you want it to work.
Name: Give your webhook a simple name so you remember what it does. For example: Send new tasks to my team.
Webhook URL: This is the special link you get from the other app (like Slack or Zapier). Just copy that link and paste it here.
Board: Choose which project board this webhook should watch. It will only pay attention to the board you select.
Request Method & Request Format: You can safely ignore these. The default settings (POST and JSON) are what you need.
Request Header: This is an advanced option for security. Think of the “With Headers” section as adding a secret password or an ID badge to your message so the receiving application knows it’s really you.
- Header Name: This is the type of ID the other app is looking for. The app will tell you exactly what to enter here, for example, Authorization or X-API-Key.
- Header Value: This is your actual secret key or password. You will copy this from the other service and paste it here.
You can usually leave this alone.
Events To Trigger: This is where you choose which actions on your board will send the data. You have two main options:
- Send everything.: Select this option if you want the webhook to fire for every single event that happens on the board.
- Select individual events.: Select this to choose specific events. Only the events you check will send data.
If you choose Select individual events, you can check the box next to the specific actions you want to monitor:
- Task Created: Triggers when a new task is made.
- Task Stage Changed: Triggers when a task is moved to a different stage.
- Task Closed: Triggers when a task is marked as complete.
- Task Archived: Triggers when a task is archived.
- Task Date Changed: Triggers when a task’s due date is added or updated.
- Task Priority Changed: Triggers when a task’s priority is changed.
- Task Label Added: Triggers when a label is added to a task.
- Stage Added: Triggers when a new stage (column) is created on the board.
- Comment Added: Triggers when a new comment is added to a task.
- Assignee Added: Triggers when a user is assigned to a task.
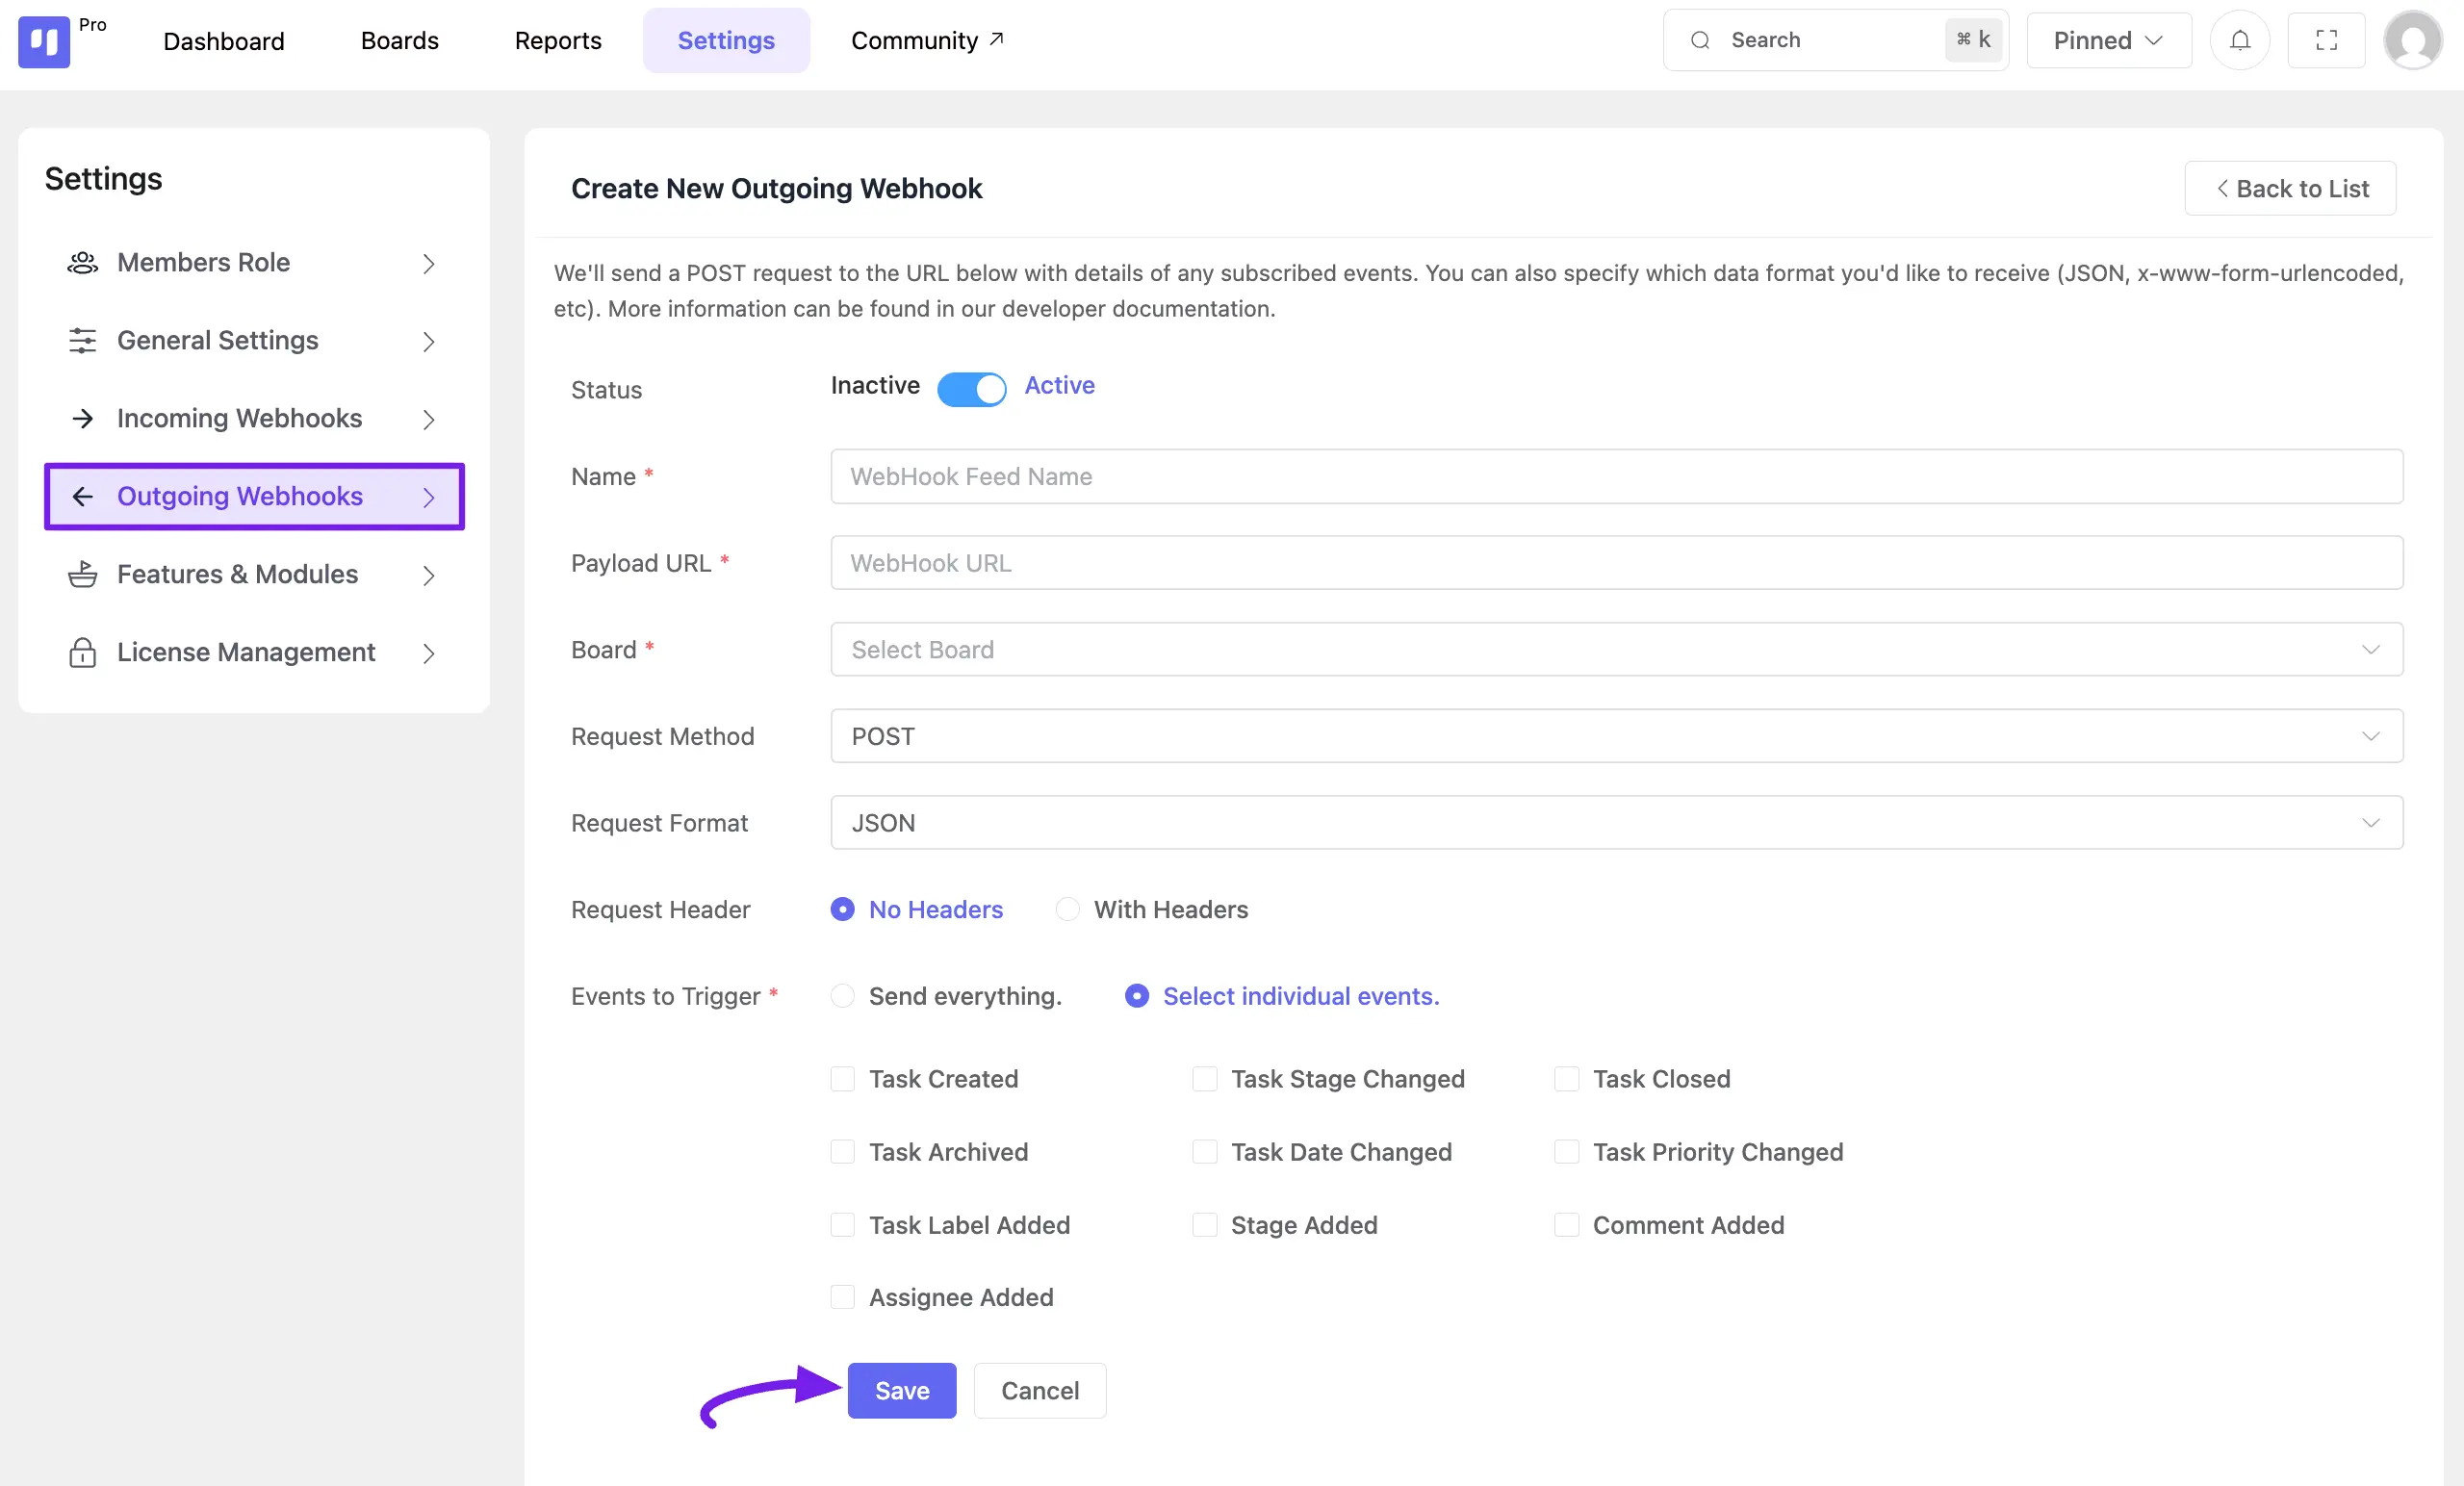
After filling out the form, click Save. Your webhook is now configured and, if set to “Active”, will begin monitoring your board for the specified trigger events.
Managing Existing Webhooks #
Once you have created one or more webhooks, they will be listed on the Outgoing Webhook Settings dashboard. This central view allows you to see and manage all of your configured integrations at a glance.
Each row in the list provides a summary of the webhook’s configuration:
- Name: The custom name you assigned to the webhook.
- Request URL: The destination URL where the data is sent.
- Triggered Events: The specific events that will trigger this webhook.
- Board: The project board the webhook is associated with.
- Status: A label indicating whether the webhook is currently Active or Inactive.
Action Buttons
- Edit Button: If you need to make a change, like updating the URL or adding a new trigger, click this button.
- Delete Button: If you no longer need a webhook, click this to permanently remove it.